Mother's Day Art Project
For this lesson all you need is paper, pencil, marker or crayon or colored pencil, glue, and old newspapers/magazines etc. The end product of this project is a profile silhouette of your mom and in place of her hair will be images and words you have cut and collaged together that remind you of her.
|
To get started:
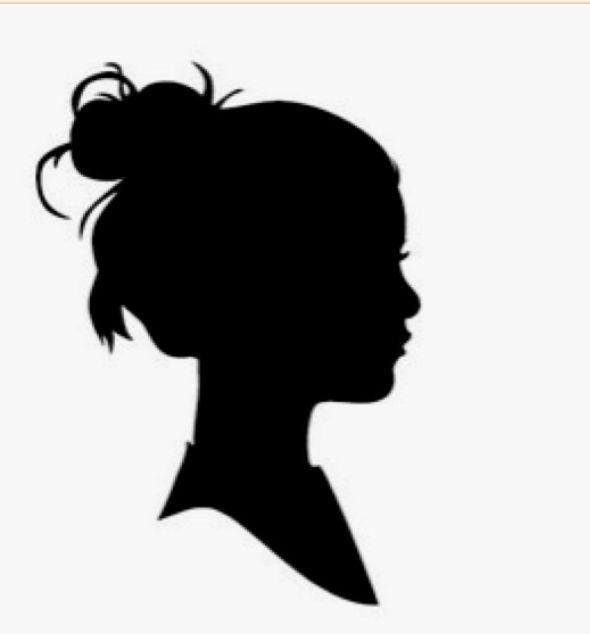
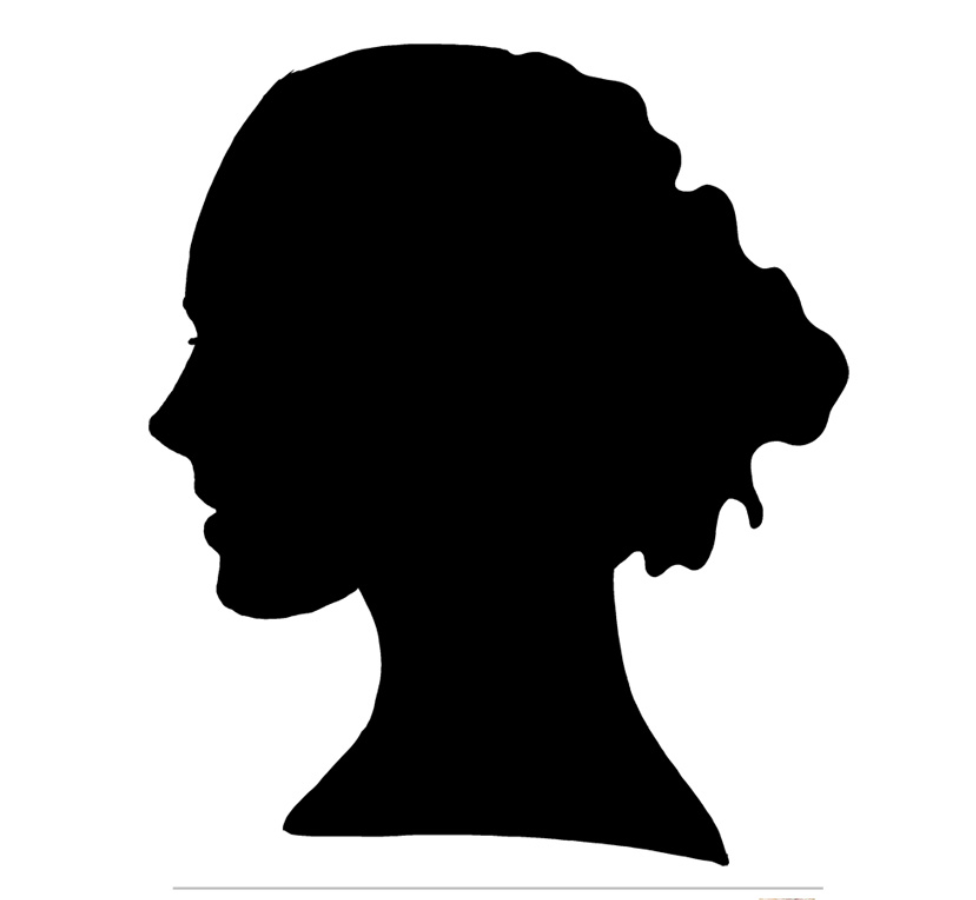
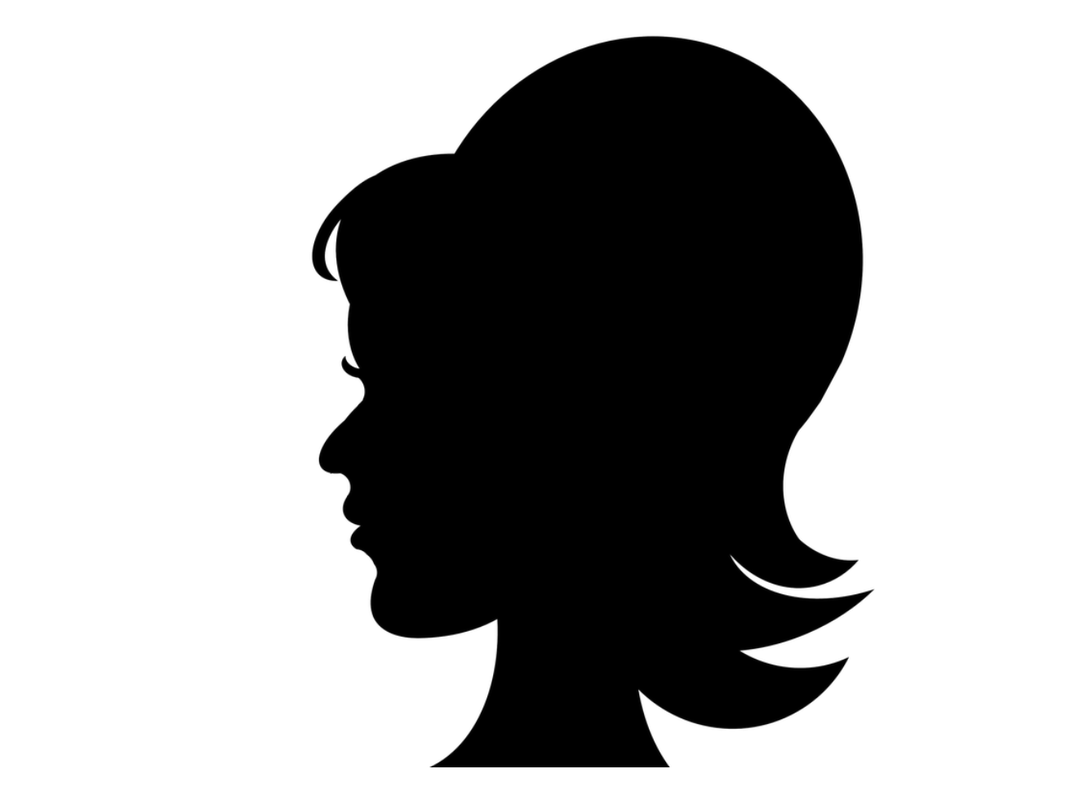
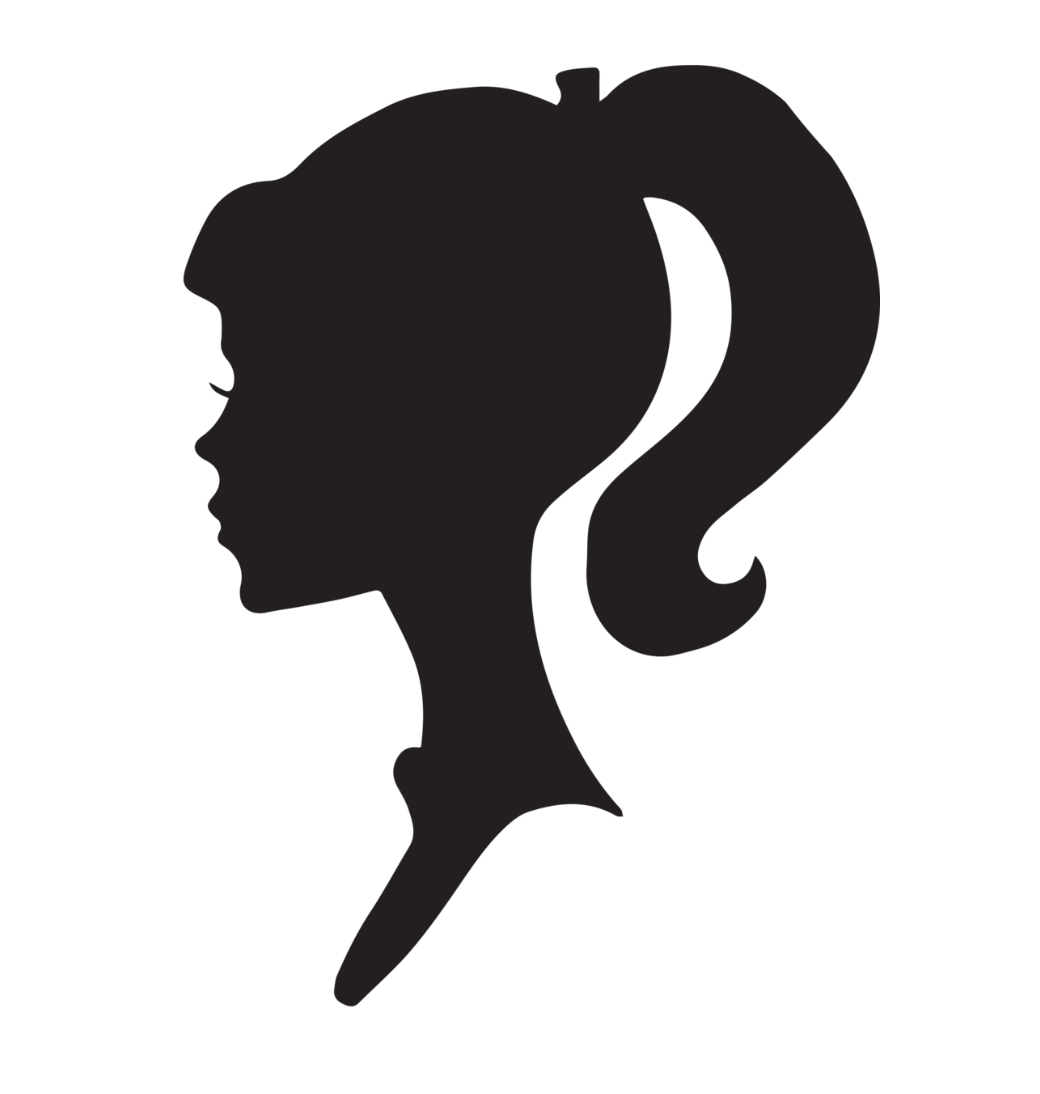
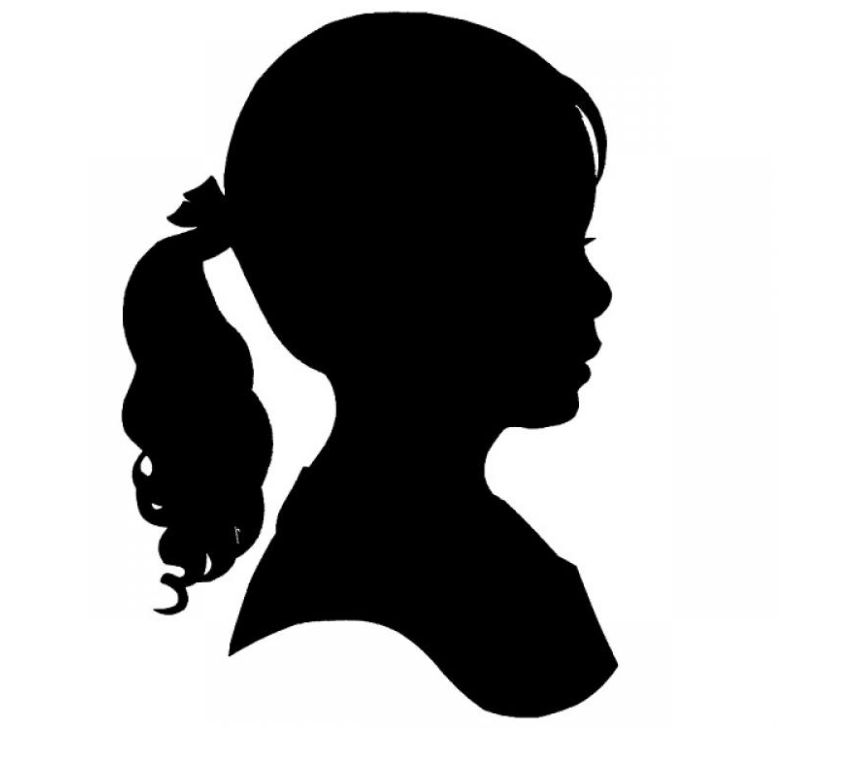
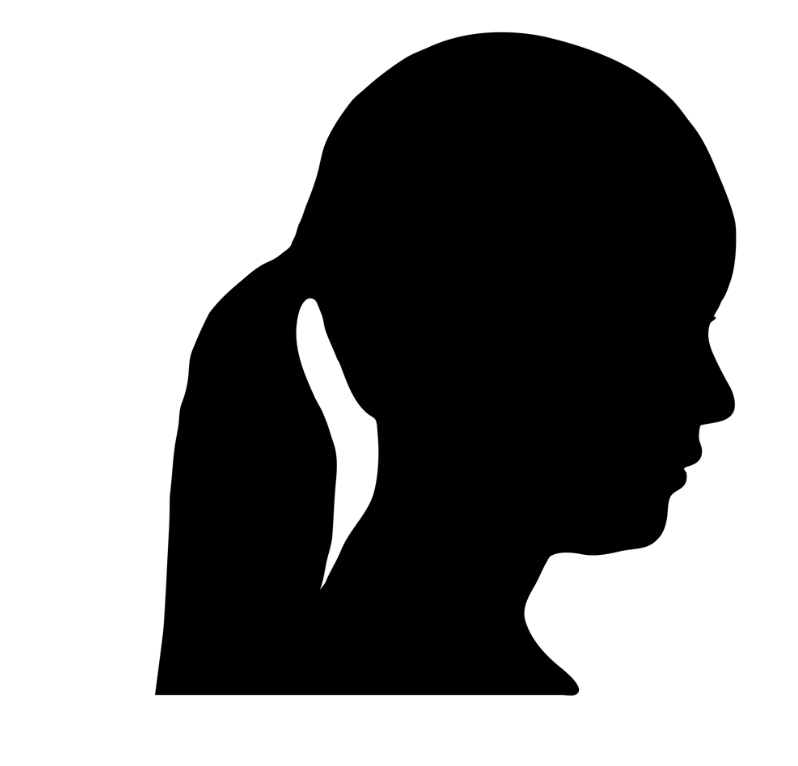
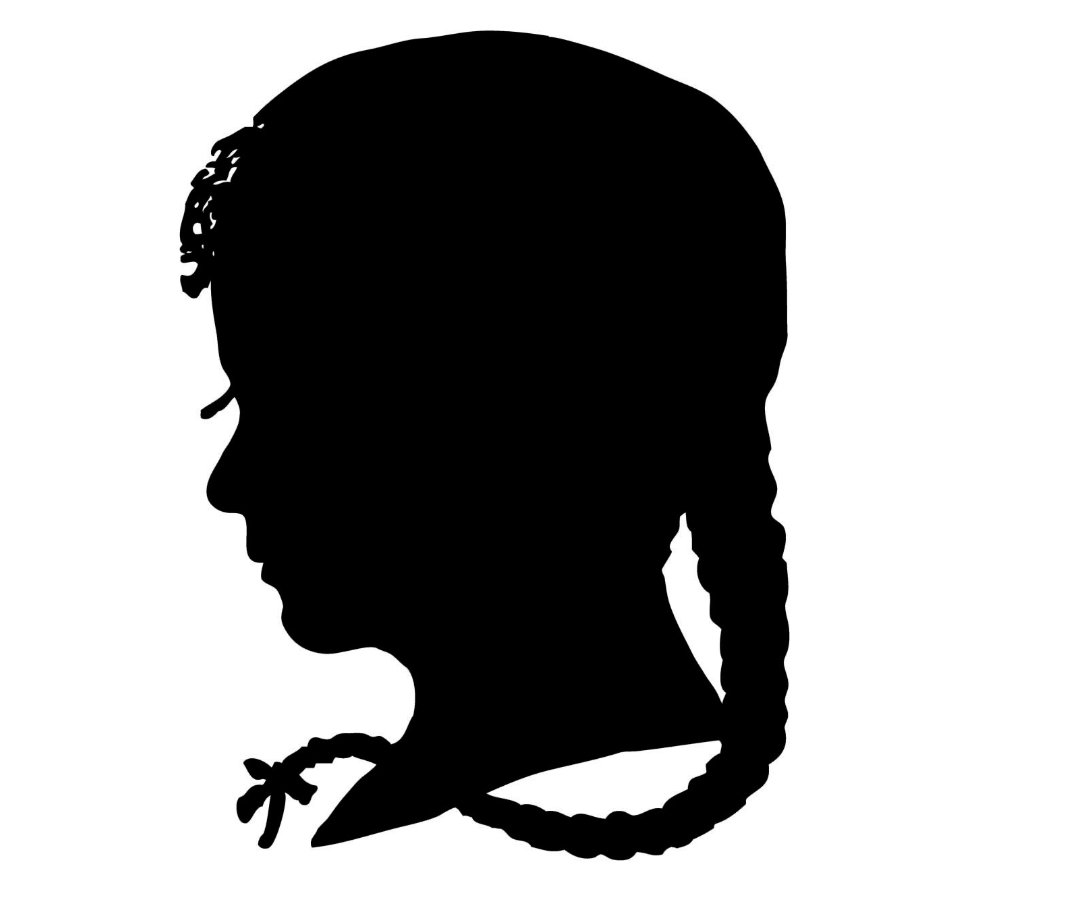
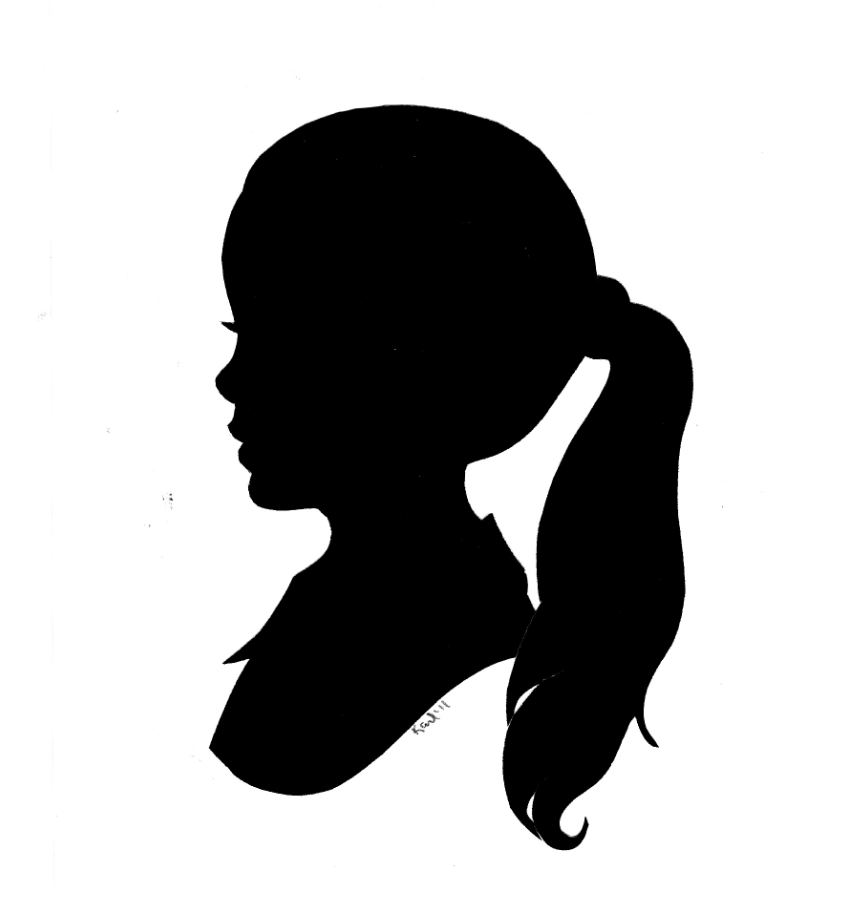
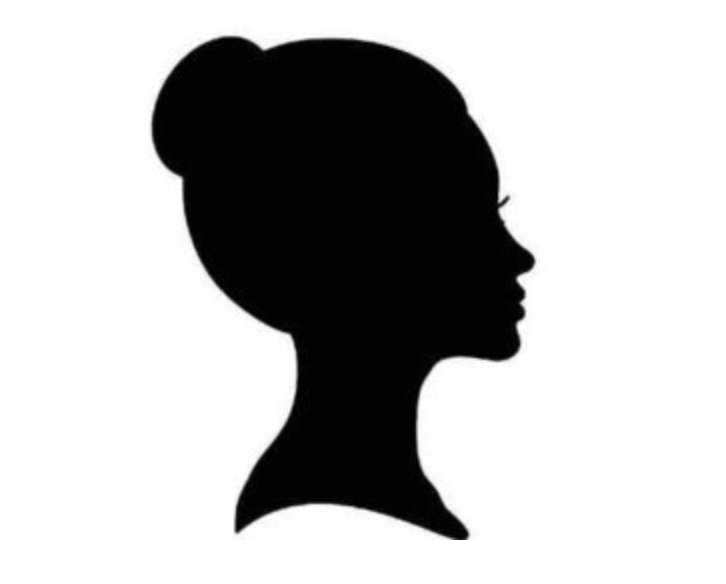
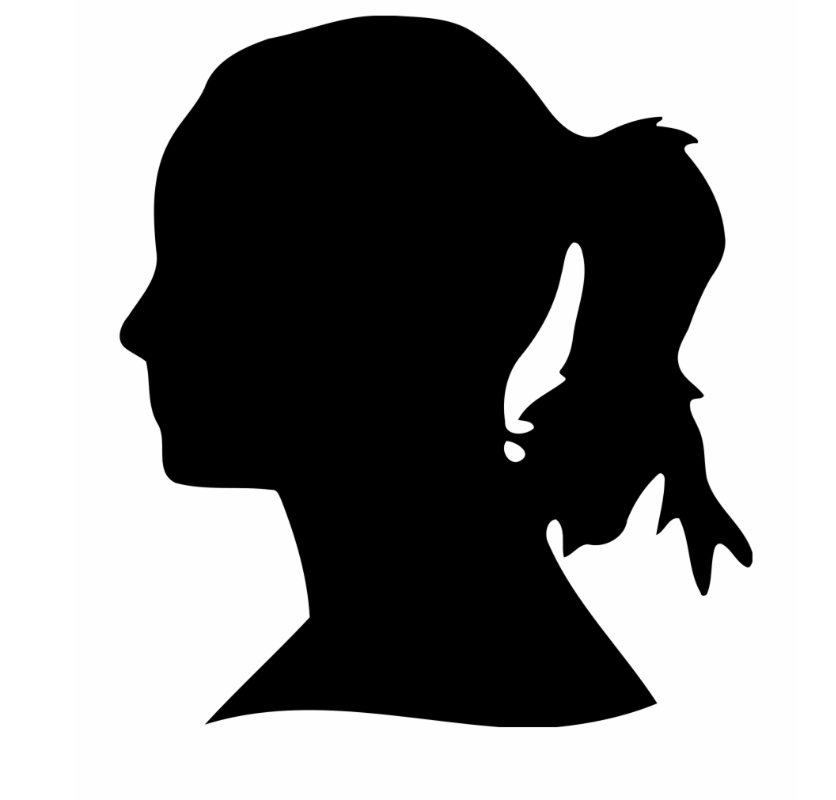
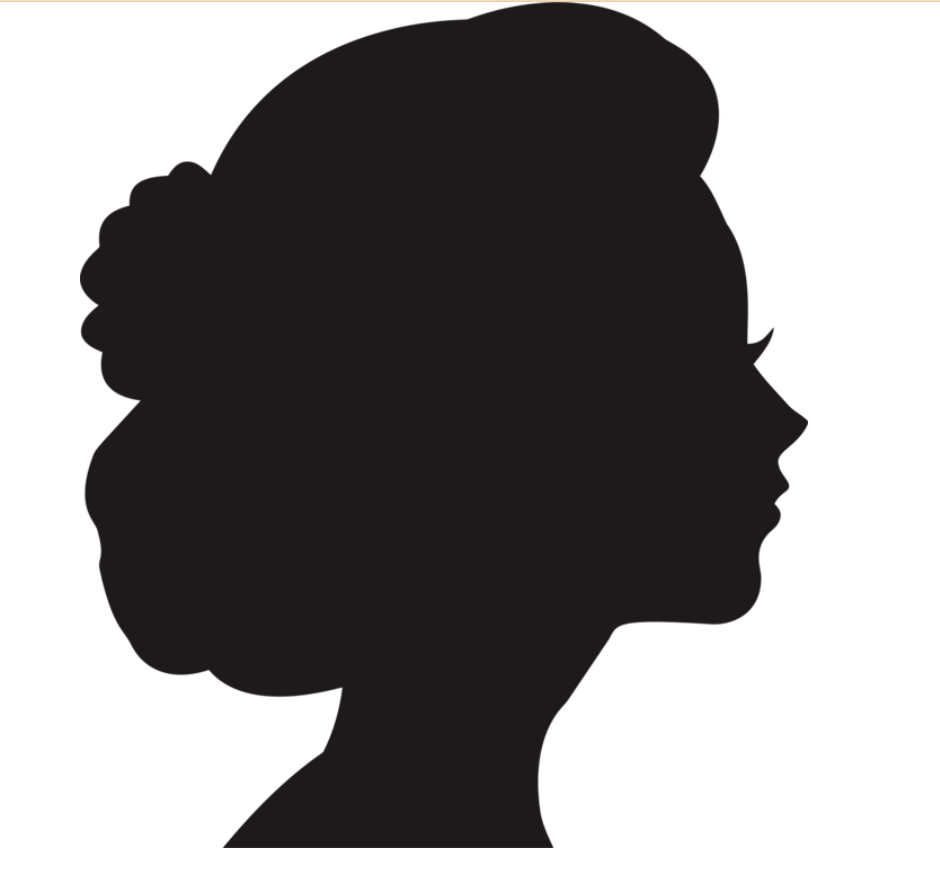
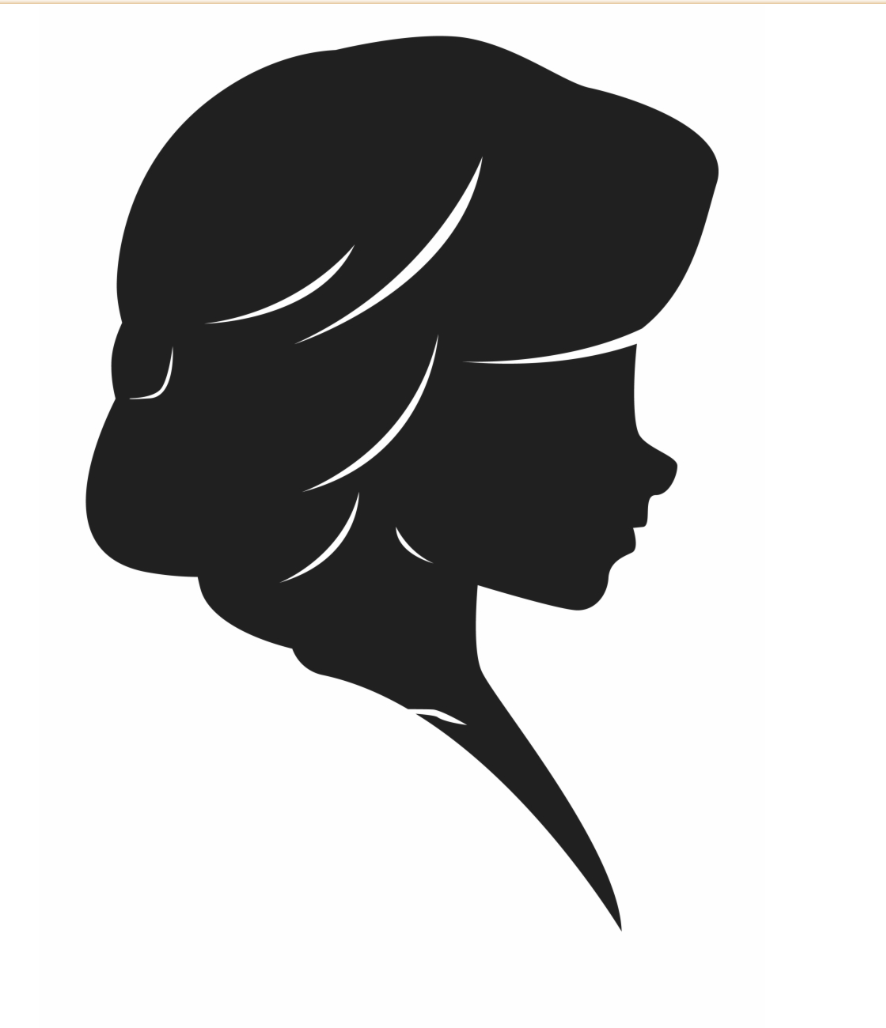
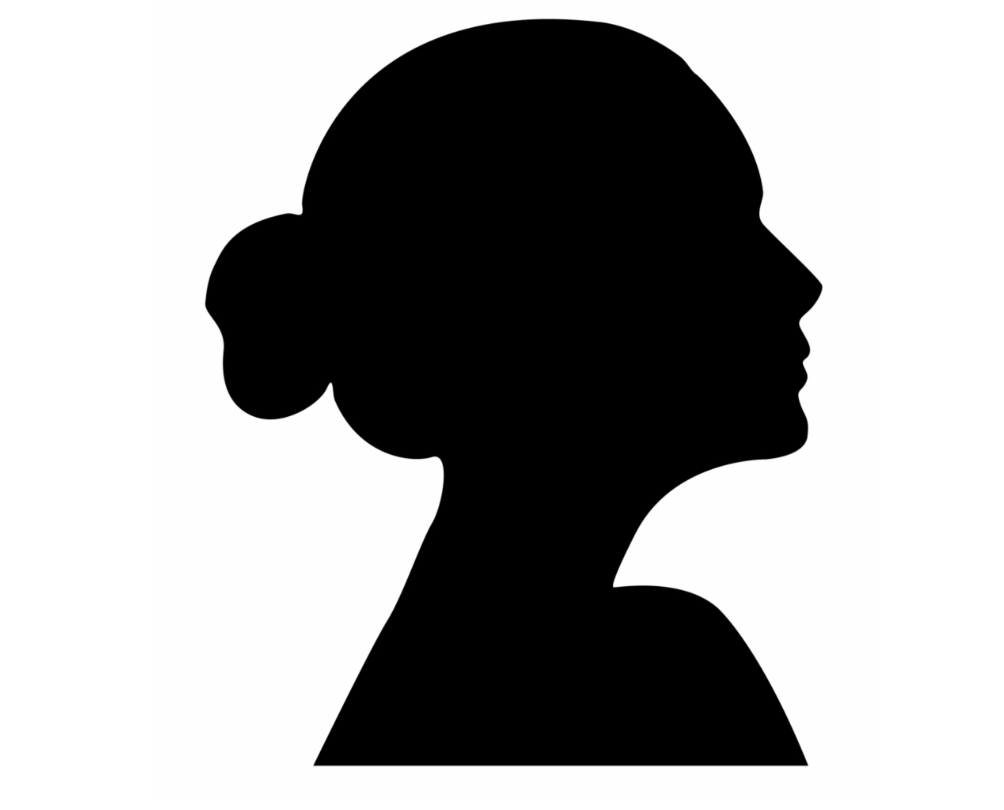
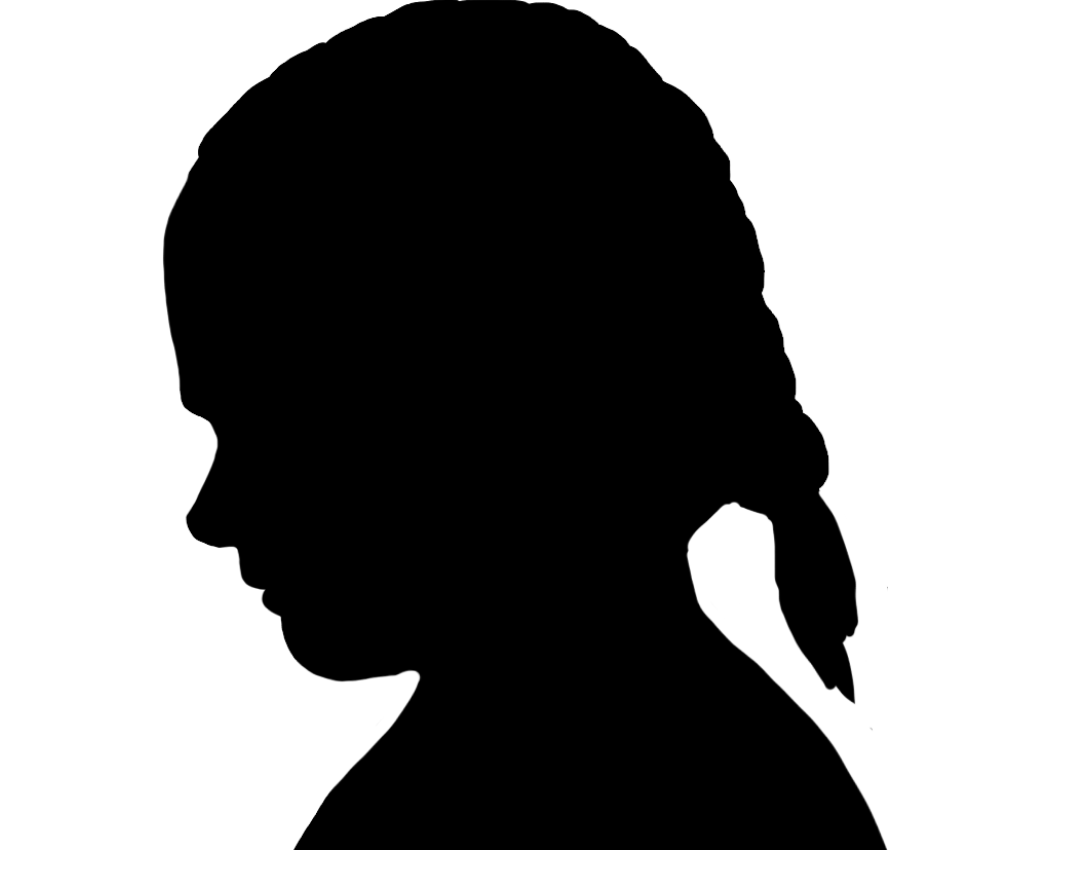
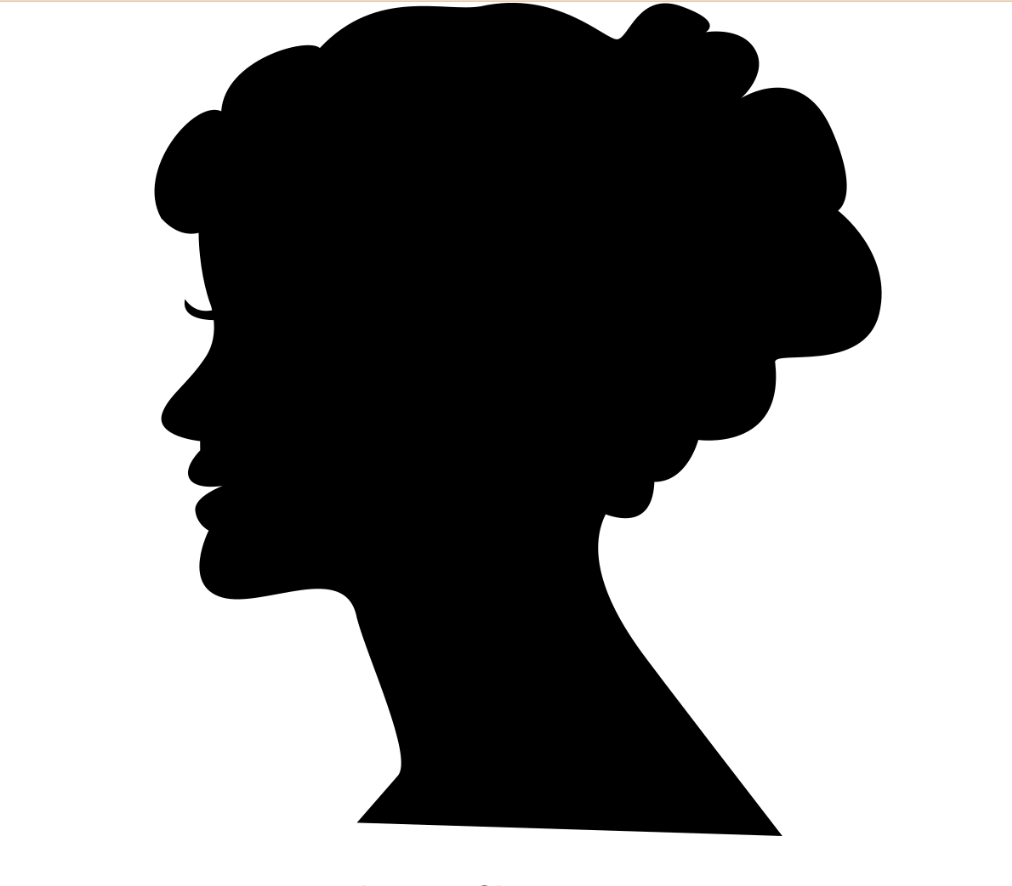
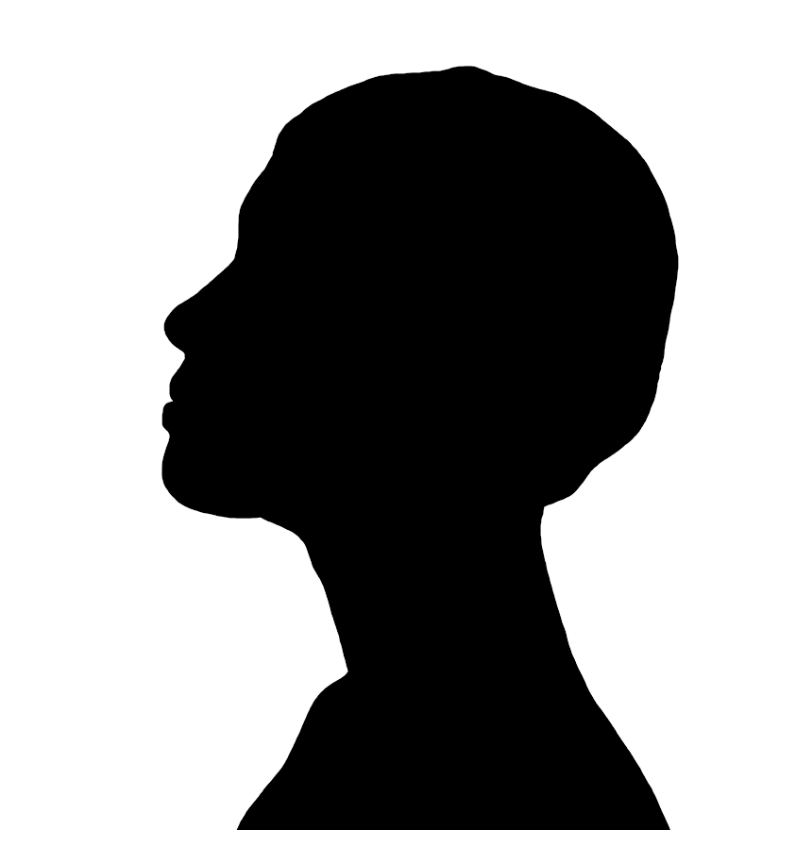
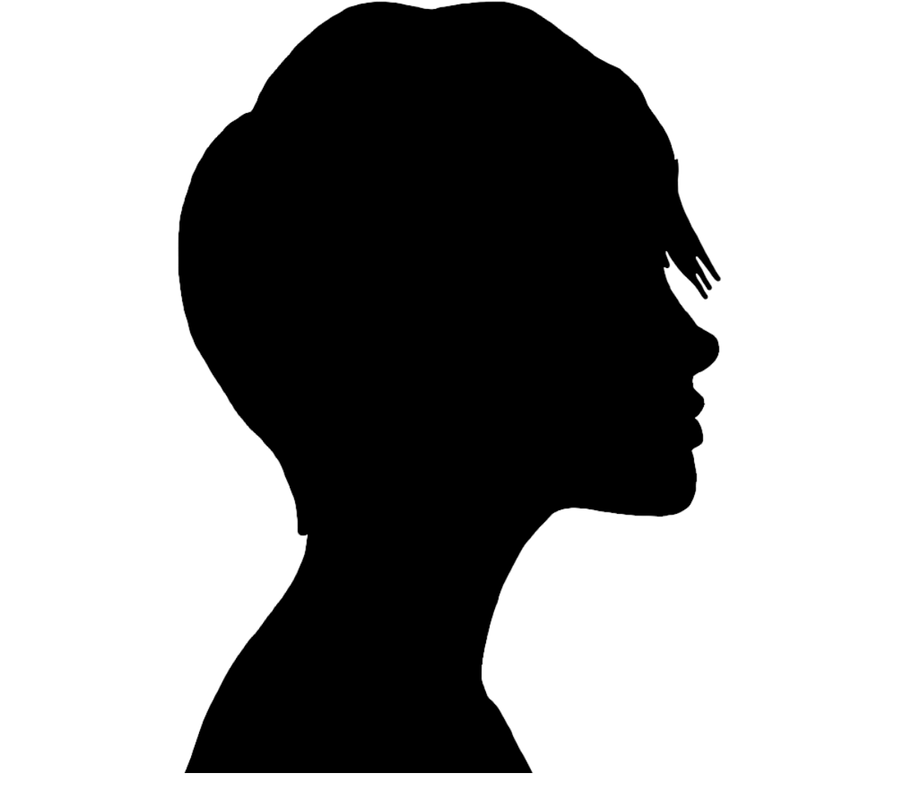
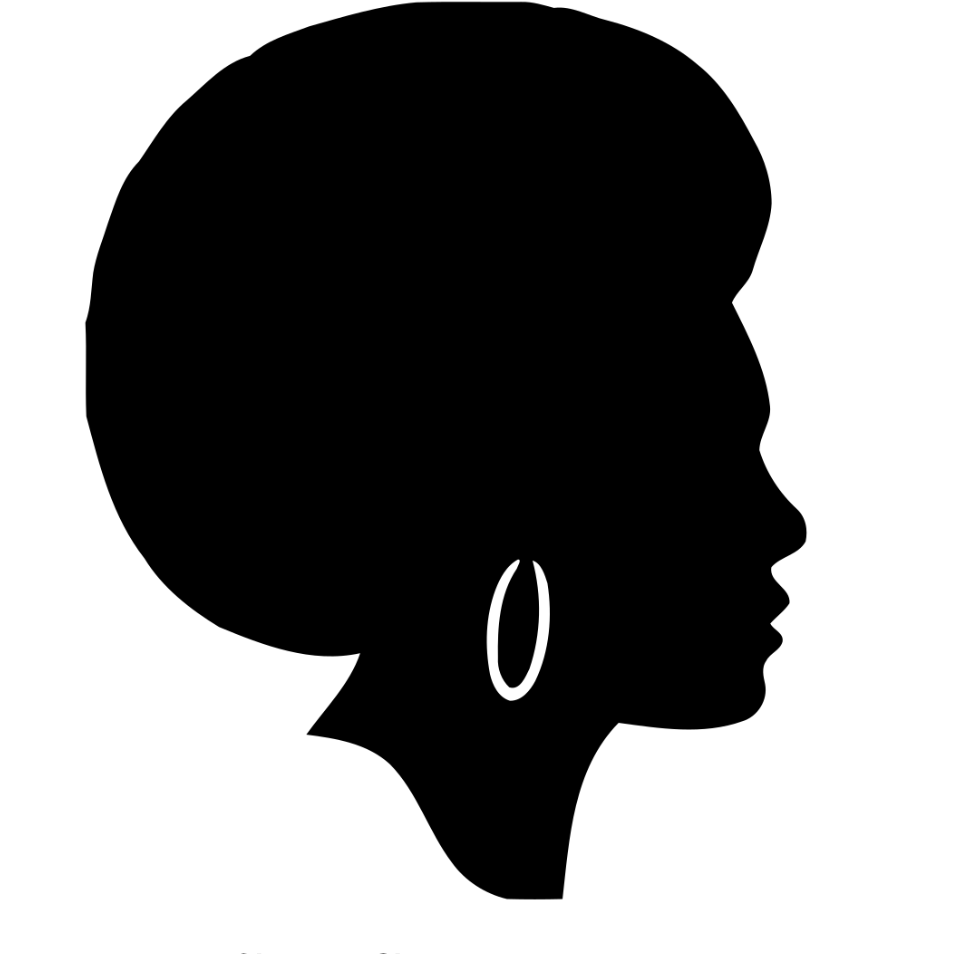
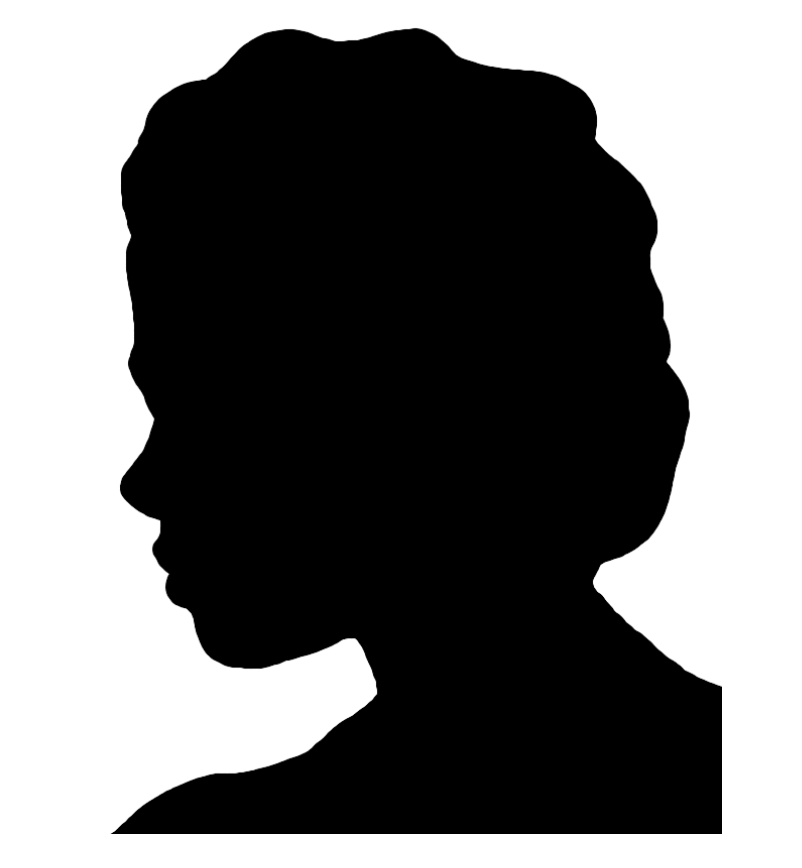
Look at the silhouettes to the right and pick the one you think MOST resembles your mother's. Look at the nose, chin, and lips. Don't look at the hair because you can easily change that. Once you pick the one that most resembles you mom, click on it so it fills your computer screen. Turn your brightness ALL the way up on your screen. (ask your parents if you don't know how to). Now hold your paper up to your screen and very carefully and delicately trace the outline of the silhouette. |
|


After you have finished drawing the silhouette, place your paper back on the table and draw the hair the way your mom wears her hair the most. Then you need to color the silhouette in black all the way up to the hairline.
|
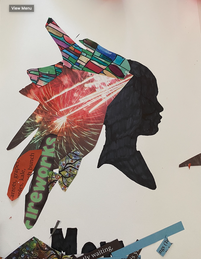
Next, when you draw the hair, make sure you know where the hairline is. Then you will want to cut some color and patterns you like to glue down as a base first.
|
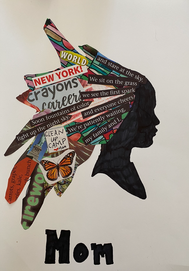
When that is finished, cut our images and words you think about when you think of your mom. Then on top of the base, glue down the images and words that remind you of your mother. Make sure you trim the images to fit inside the hair lines, you want it to look clean and nice.
|
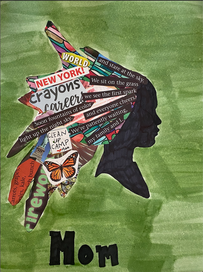
Finally write whatever you would like at the bottom like 'MOM'. If you want to add color to the background make sure you do it carefully.
|
Geometry Cakes
For this project, you will use your knowledge of geometry to accurately draw a cake with a slice cut out.
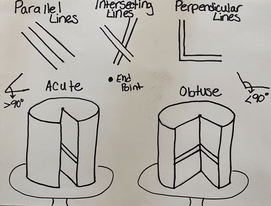
Recall that lines that are parallel are lines that run side by side and will never cross over each other. Intersecting lines cross other each other and perpendicular lines meet at a right angle. For this project you will need to use only parallel lines. If your lines intersect you will need to erase and try again.
|
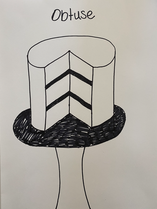
This cake was created by using an Obtuse angle and parallel lines.
|
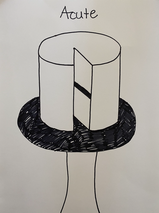
This cake was created by using an Acute angle and parallel lines.
|
Here is the You Tube video that shows you how to draw the cake. Enjoy!
|
Storyboard and Greek Allusions
For this project you will create a storyboard for a Greek Allusion you learned about in your reading
Allusions are an expression designed to call something to mind without mentioning it explicitly; an indirect or passing reference.
For example: You are acting like a Scrooge!
This is an allusion because it is referring to Dickens's A Christmas Carol, this line means that the person is being miserable and selfish, just like the character Scrooge from the story.
For example: You are acting like a Scrooge!
This is an allusion because it is referring to Dickens's A Christmas Carol, this line means that the person is being miserable and selfish, just like the character Scrooge from the story.
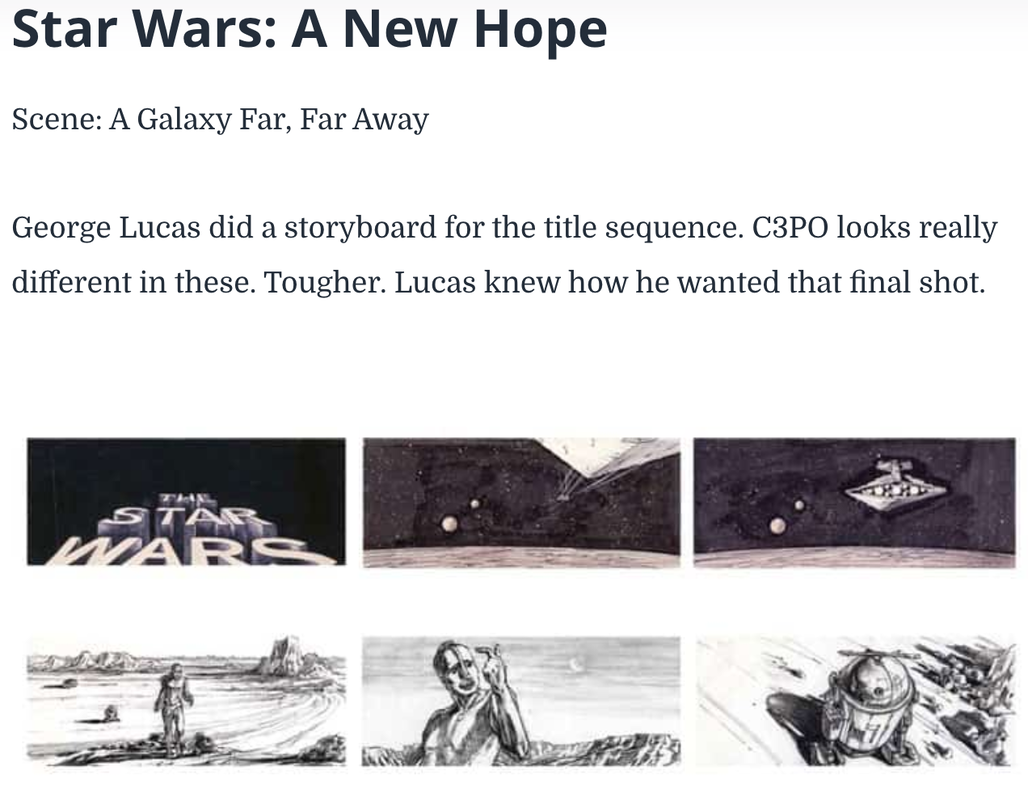
This is an example of a storyboard using in one of the Star Wars movies. Storyboards are a type of graphic organizer that plans a narrative. They are used in pre production as tools for Directors to help visualize the setting and better understand the scene. Storyboards are linear and can help show passage of time.
|
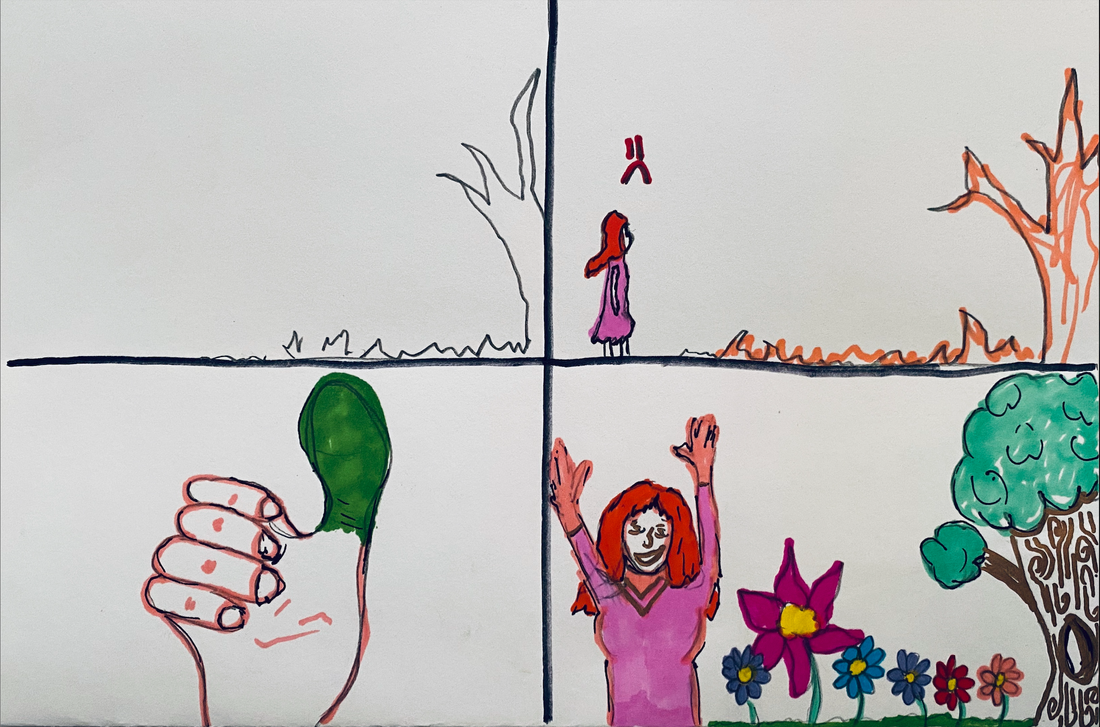
This is my storyboard of an allusion from Greek mythology. In the first scene you see desolated nature, second scene you see a girl saddened by that desolation, third scene you see a hand with a green thumb, and in the final scene you see the girl rejoicing because nature is alive, thriving and blooming. The Greek allusion is of the 'Green Thumb'. I am alluding to the Greek Goddess Demeter. She is considered a type of mother earth. When she lost her daughter she was saddened and all plants withered and died. When she got her daughter back plants lived and bloomed again.
|
Measurements and Abstract digital art
For this project I want you to represent changes in measurements through abstract digital art.
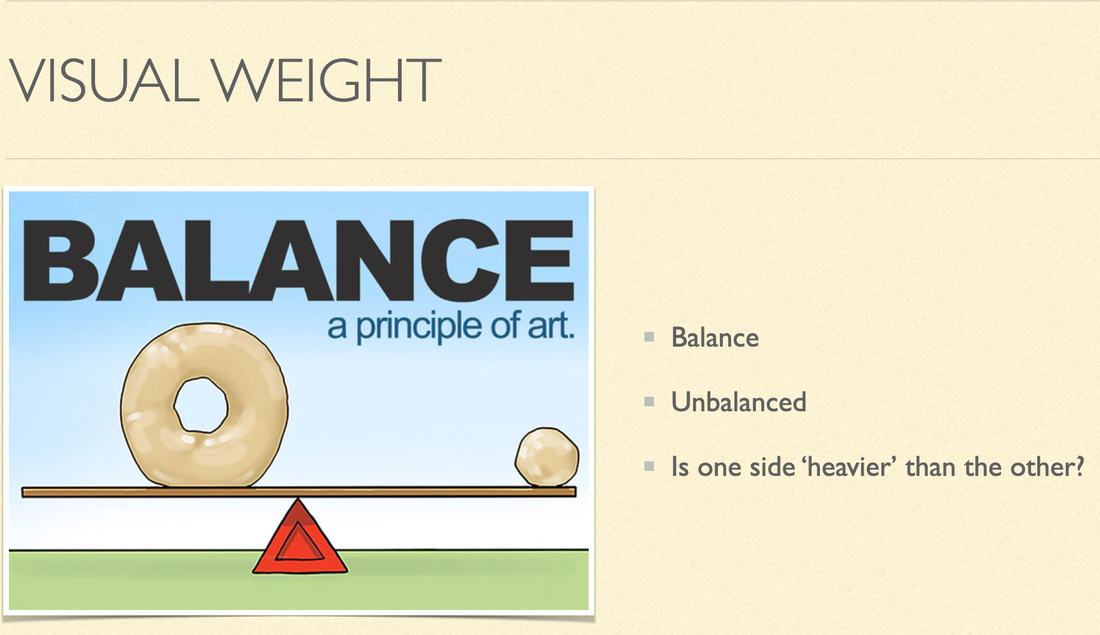
Take what you have learned and show one group of measurements within your art. Below you will see more information on what you need to do as well as learn about an Element of art called Balance/Visual Weight.
|
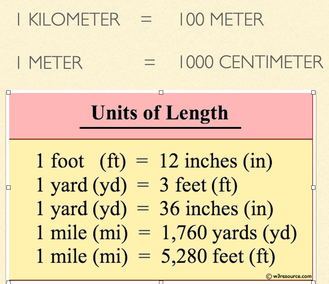
Here are the measurements of Length broken down. What other measurements do you know?
|
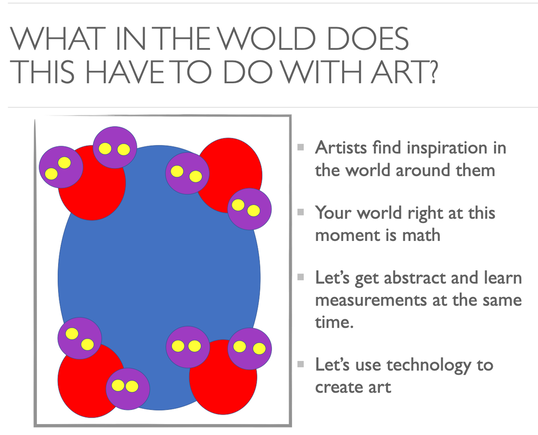
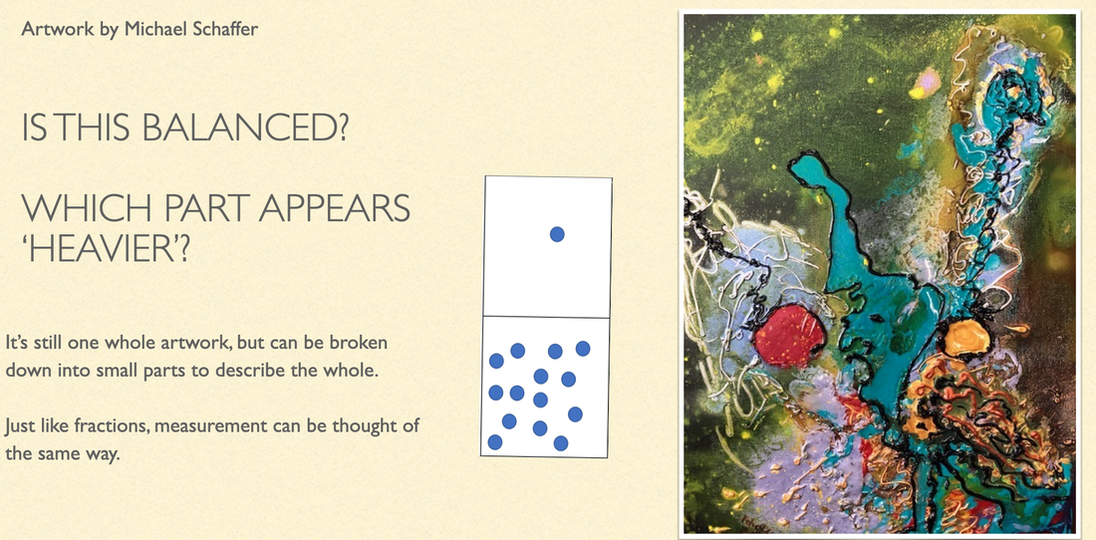
For this project open up Microsoft Word. Pick which measurement you want to visually represent in your artwork. For my example on the right, I chose volume. The blue circle represents 1 gallon, 4 red circles are quarts, 8 purple circles are pints, and the 16 small yellow circles are cups. There are 4 quarts in a gallon, two pints in a quart, 4 pints in a gallon etc.
Notice also how this artwork has balance and the visual weight is even.
Play with the balance. What would happen if I moved all but three red circles to one side? What would happen with the balance then?
In Microsoft word select 'insert' then 'illustrations' then 'shape'. Pick what shape you want to use. After that to change the color double click on the shape to make a box open to your right. You want to 'formate shape' and 'Fill' the shape. Change the color. When you are done changing the color, adjust the size of the shape. When you have the shape just the right size and color not it's time to make as many of that same sized shape/color that you need. Click on the shape once and hold down Ctrl + C to copy and Ctrl + V to duplicate.
Those are the basic steps! Good luck and have fun!
Simple Circuit Robot
Use your knowledge of simple circuits to draw a robot that utilizes one!
|
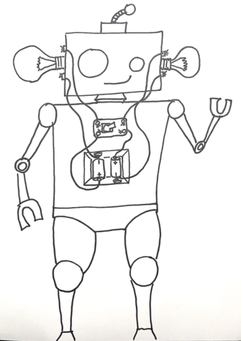
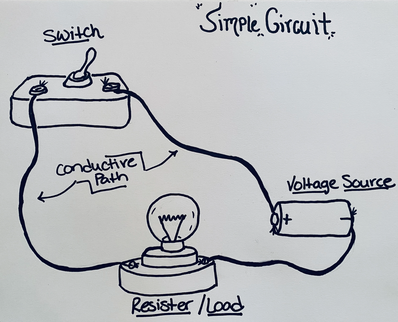
When you draw the robot, remember you will need a resistor/load (light bulb), a voltage source, a switch, and a conductive path. The conductive path needs to run from the voltage source to the resistor, a path from the resister to the switch, and the final path from the switch to the voltage source.
Have fun and happy drawing! |
