Welcome! There are over 30 projects here that you can do at home! I hope you enjoy yourself and remember to not only be creative but have fun!
Art-ing @ Home project #1
|
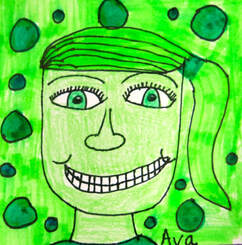
Self portraits are one the most basic and fun things to draw! Make sure you have a mirror! For this project I will direct you to a YouTube link for the step by step. If you do not have markers then use crayons, colored pencils, or paint! You will learn to draw a simple and fun self-portrait. You will then add color using a monochromatic color scheme. Do you remember that word? MONO means ONE and CHROMA means COLOR. Soo....you guessed it! You will use ONE COLOR but different VALUES of that ONE COLOR. Hope you enjoy! Click THIS LINK to go to the drawing video on YouTube and happy drawing!
If you like this project, check out more of Cassie Stephen's projects here.
|
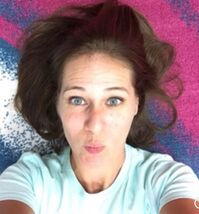
Art-ing @ Home project #2I know some of you do not have art materials at home, but I bet you can get your hands on a device and snap a quick selfie! Let's see what you got! Snap a selfie that captures the essence of your personality! When you are done, upload it to ARTSONIA! Remember to have your parents email me HERE if you have not set up your account yet. Go to this blog post I made about how to set up your account and upload your artwork. Happy Art-ing!
|
|
Art-ing @ Home project #3
Did you know the Georgia Aquarium has set up live webcams on most of their attractions. I'm serious! My kids and I watched some whale sharks and stingrays swim around this morning. So here is my project for the day. Check out one of the live streams of the Georgia Aquarium. Pick a fish, shark, mammal or other living thing you see and draw it. If you need some help, below you will find various YouTube videos on how to draw some fish. I know drawing living things can be challenging so all I want you to do is TRY!!! If at first you don't succeed, try try again.
Here is the link to the Georgia Aquarium web cams.
Don't forget to upload what you draw to ARTSONIA! If you don't know what that is, it's a website for creating digital art portfolios! I have set one up for you. Here is the link to the blog post about how to set it up and upload your artwork to it.
Happy Art-ing!
Here are some You Tube videos showing how to draw ocean life you may see
|
|
|
|
|
|
Art-ing @ Home project #4

Bored of making art? Probably not, also what a silly thing to say. But in case you would like a change of pace, let's take a virtual tour of a museum! Click around and learn something new!
https://www.metmuseum.org/art/online-features/metkids/
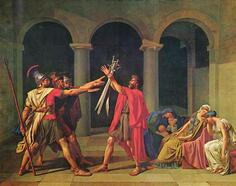
Now let's make some art! Watch the following short video about Super heroes in ancient times.
Now I want you to use your imagination...if you were an alien and lived on an alien planet, what would a super hero look like on your planet? Use any materials you can get your hands on, pencil, marker, crayon, digital drawing app, tearing grass and arranging it then photographing it....ANYTHING! Have fun and don't forget to upload it to Artsonia....click here if you do not know what I am talking about and want to share your work with me!
https://www.metmuseum.org/art/online-features/metkids/
Now let's make some art! Watch the following short video about Super heroes in ancient times.
Now I want you to use your imagination...if you were an alien and lived on an alien planet, what would a super hero look like on your planet? Use any materials you can get your hands on, pencil, marker, crayon, digital drawing app, tearing grass and arranging it then photographing it....ANYTHING! Have fun and don't forget to upload it to Artsonia....click here if you do not know what I am talking about and want to share your work with me!
Art-ing @ Home project #5
No art supplies needed for this project!
Let's get started.
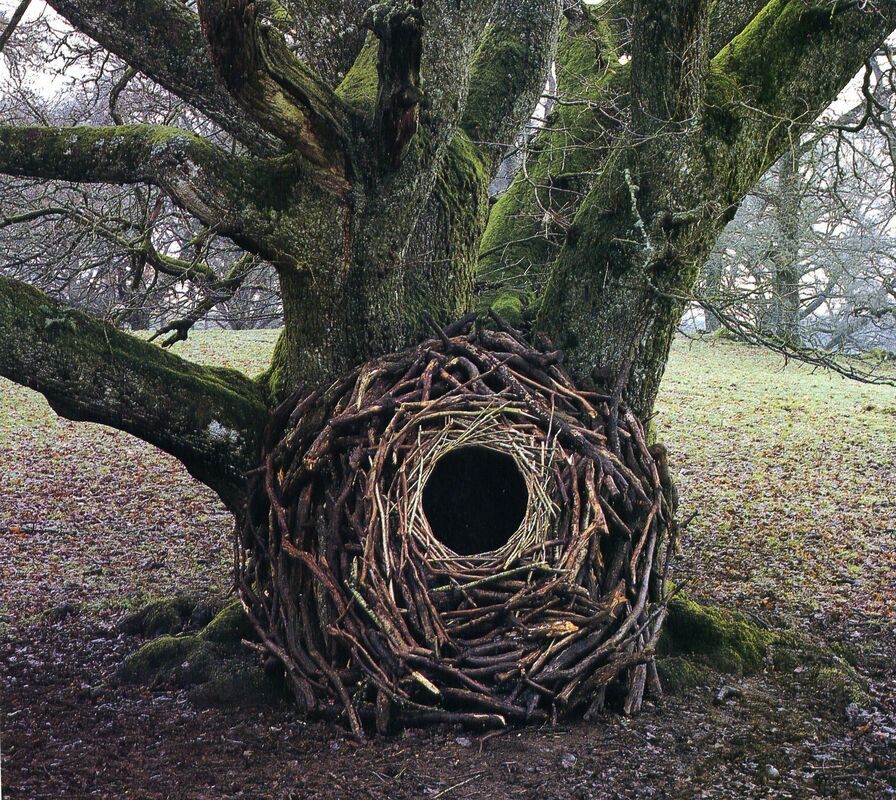
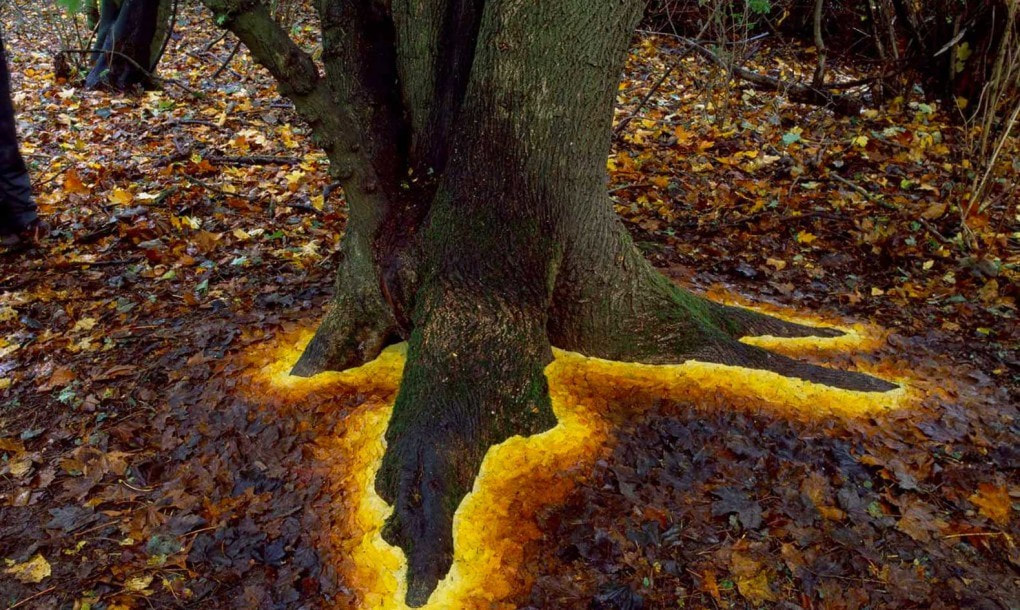
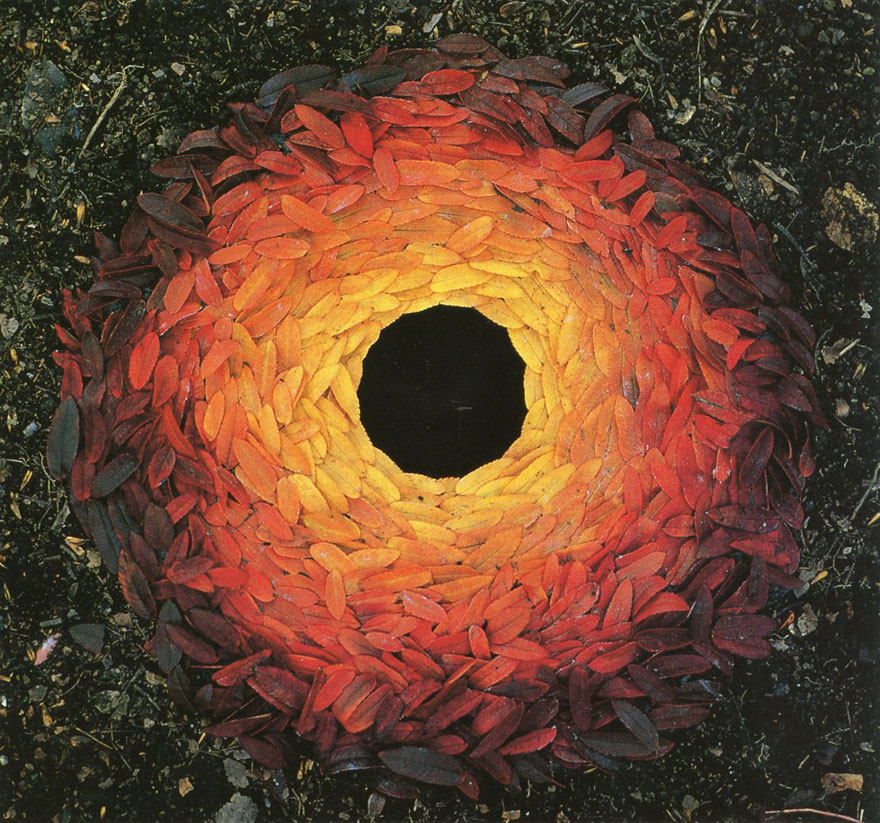
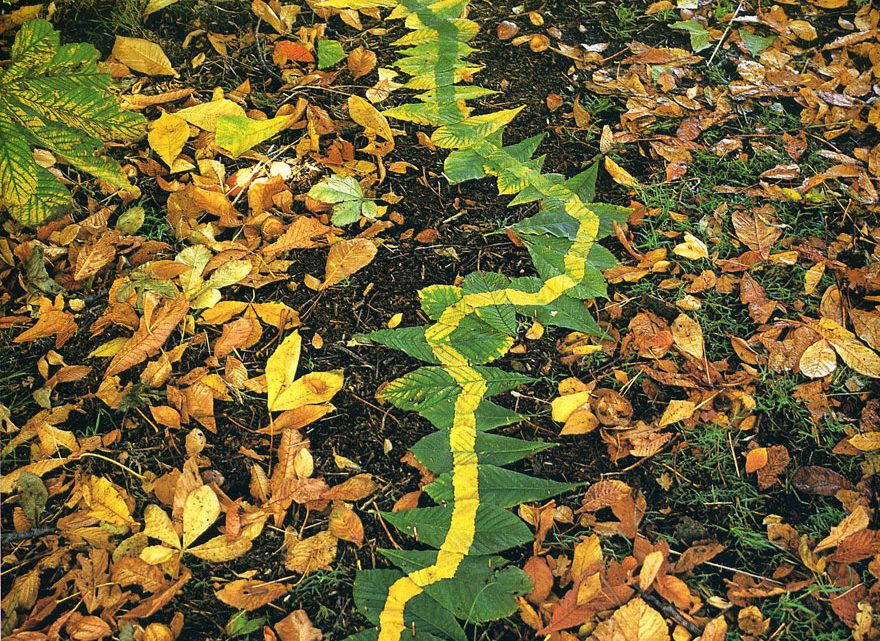
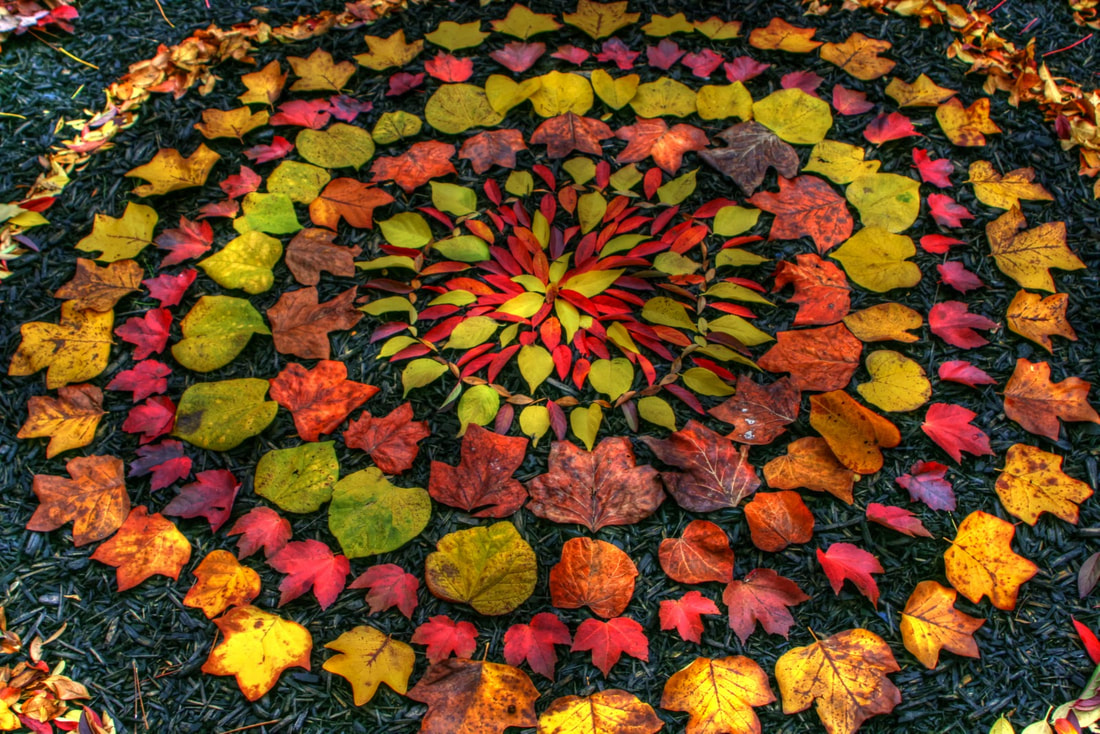
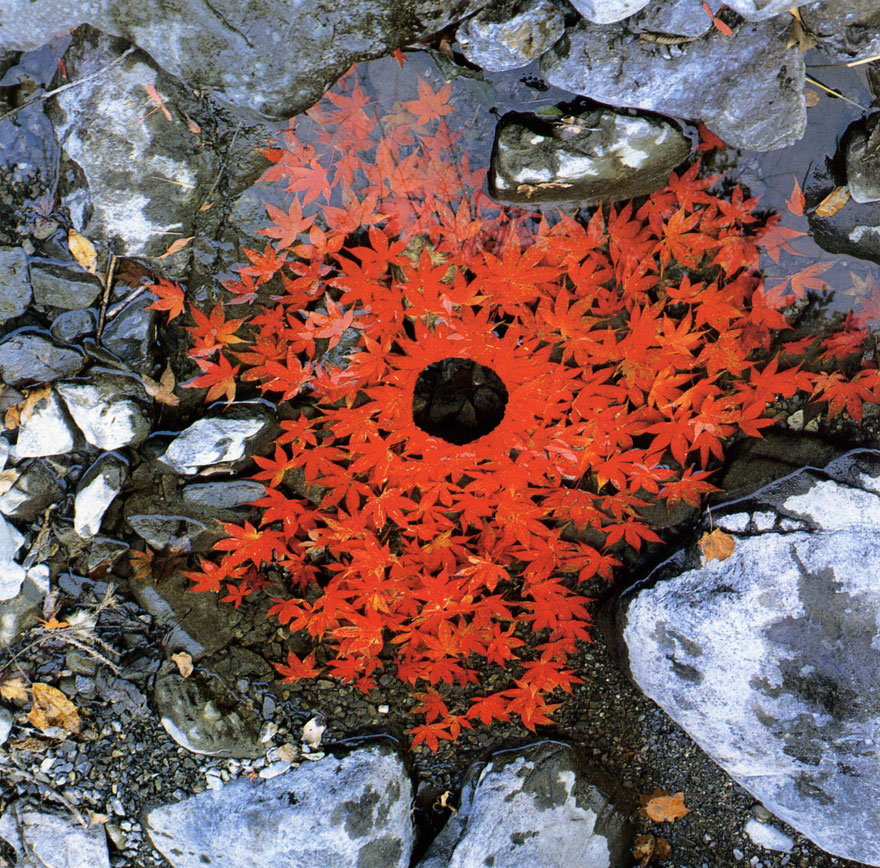
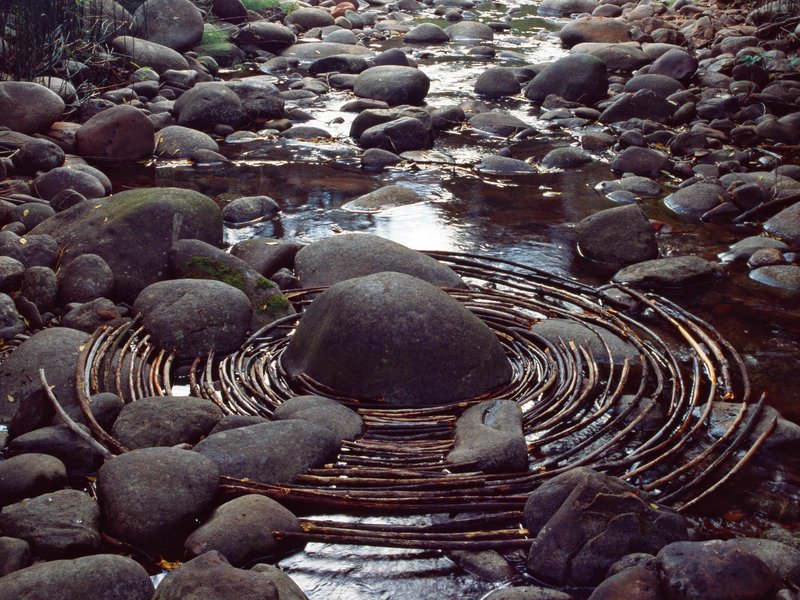
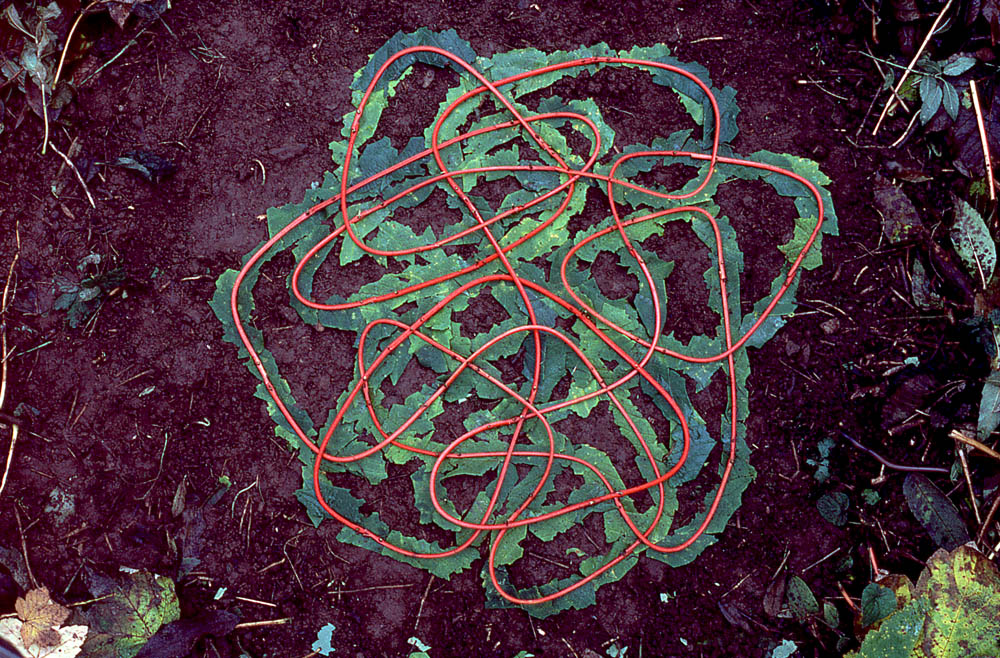
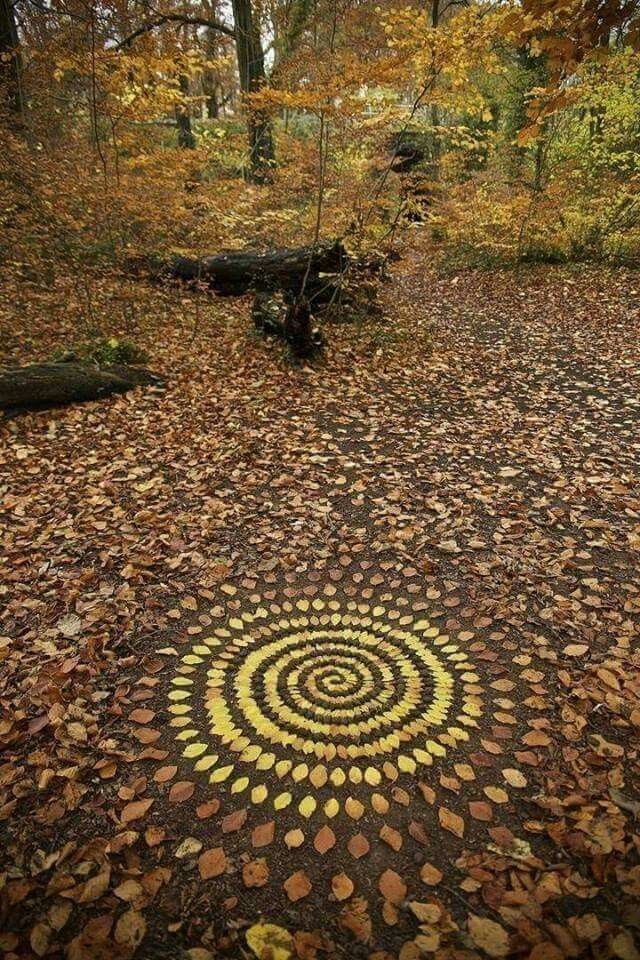
Andy Goldsworthy is a Scottish artist who makes sculptures and land art outside. What does that mean? To put it in a nutshell, he uses his hands to arrange outdoor found materials like leaves, flowers, sticks, stones, twigs, pine cones, rocks, pine straw, sweet gum balls and anything else you can image into these land art sculptures. Photography is important in his work because the sculptures he creates can be blown away or destroyed by weather moments after her completes them. So he takes a picture of his work so he can look back on it and document it. His sculptures are beautiful and fabulous! Below you will find some pictures.
If you have HULU and WITH YOUR PARENTS PERMISSION, check out "Leaning into the wind: Andy Goldsworthy".
OR watch some of the Youtube videos I have posted, make sure you have permission to watch YouTube videos! (not responsible for the adds)
Art Project
Here is your art challenge. Go outside in your yard and create land art or a sculpture from outside found materials. Photograph your work and upload it to Artsonia (or email me) so I can see! If you don't know what Artsonia is click HERE for the link to the blog post that explains it. If you need to email me click HERE.
Let's get started.
Andy Goldsworthy is a Scottish artist who makes sculptures and land art outside. What does that mean? To put it in a nutshell, he uses his hands to arrange outdoor found materials like leaves, flowers, sticks, stones, twigs, pine cones, rocks, pine straw, sweet gum balls and anything else you can image into these land art sculptures. Photography is important in his work because the sculptures he creates can be blown away or destroyed by weather moments after her completes them. So he takes a picture of his work so he can look back on it and document it. His sculptures are beautiful and fabulous! Below you will find some pictures.
If you have HULU and WITH YOUR PARENTS PERMISSION, check out "Leaning into the wind: Andy Goldsworthy".
OR watch some of the Youtube videos I have posted, make sure you have permission to watch YouTube videos! (not responsible for the adds)
Art Project
Here is your art challenge. Go outside in your yard and create land art or a sculpture from outside found materials. Photograph your work and upload it to Artsonia (or email me) so I can see! If you don't know what Artsonia is click HERE for the link to the blog post that explains it. If you need to email me click HERE.
|
|
|


Art-ing @ Home project #6
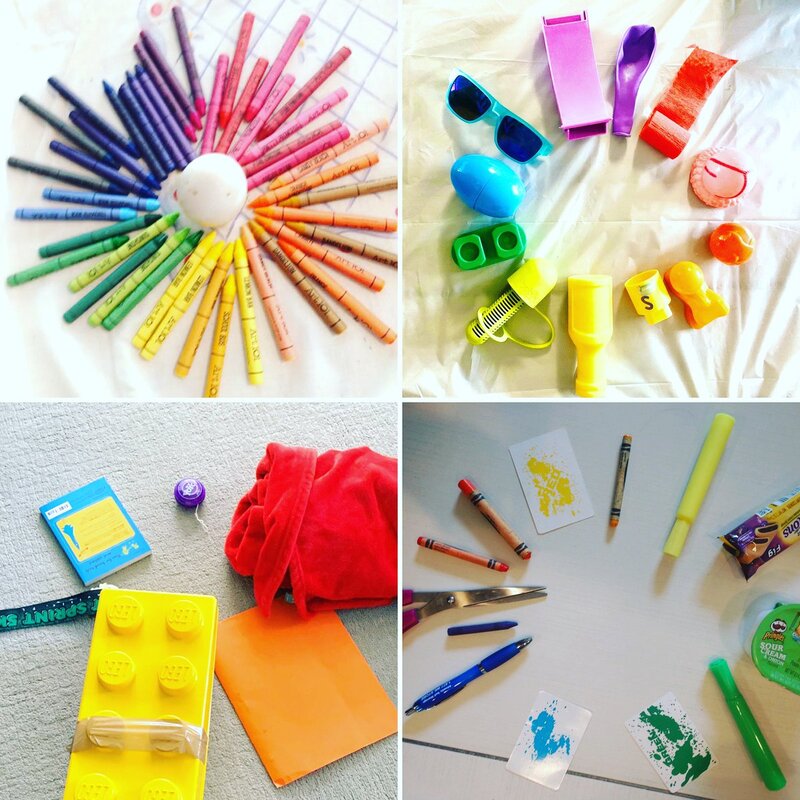
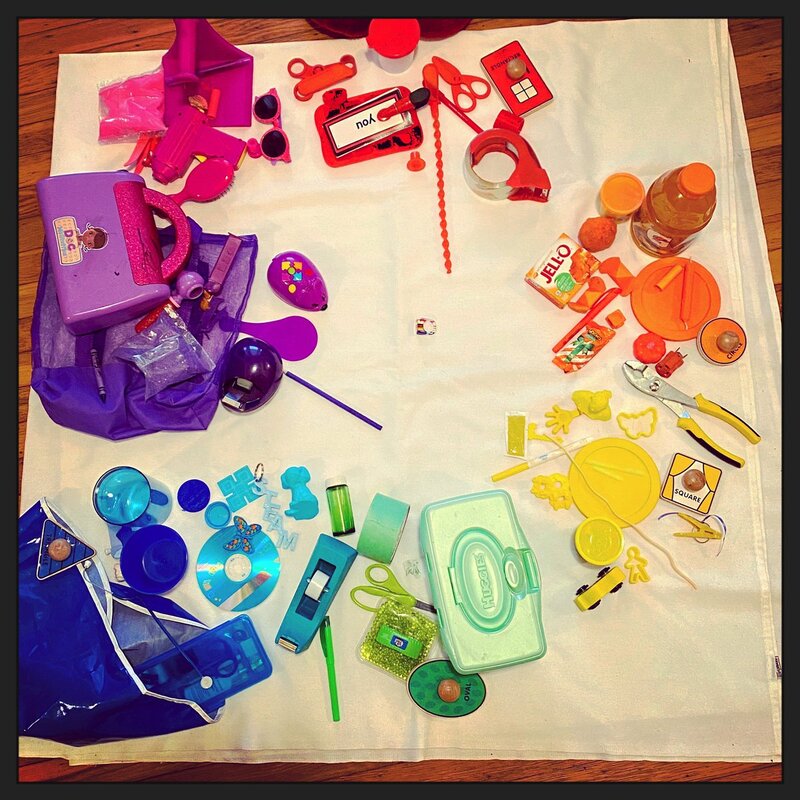
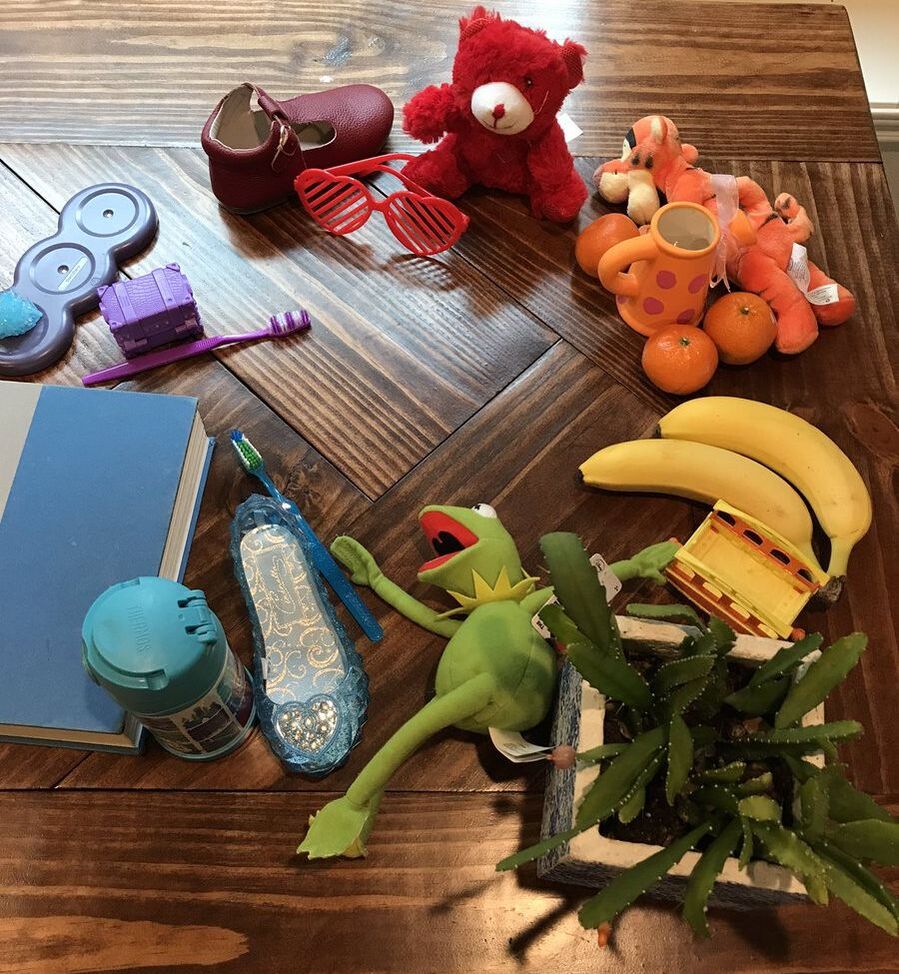
This project also requires no art supplies so anyone can do it! All you need is the device you are currently using to read this and a camera (or something to snap a picture). Go to the Elements of Art tab at the top of this page then on the drop down menu, click COLOR THEORY. Read the first paragraph about the color wheel. Here is what I want you to do. Walk around your house and fine things that have the colors on the color wheel. Arrange all these items to create your own color wheel. Below you will see some picture examples. Have fun! Snap a picture and upload it to Artsonia or email it to me. Happy Art-ing!
|
|
|
Art-ing @ Home project #7
Now, I know that we have not had a chance to really make some cool sculptures. Well here is your chance to make one at home. I know many of you do not have many art supplies. That's ok! I bet you have a newspaper or junk mail? Maybe some glue...because I know ALL of you love slime.
For this project you will create a sculpture of a bowl. A sculpture is the art of making 3D forms that represent something either real or abstract. Well all you need for this next project is paper (newspaper/junk mail/paper/construction paper), tape (maybe in your Christmas decorations/wrapping box?), and glue! You are going to use these supplies to make a bowl! Cool huh! Here is the YouTube video (ask your parents if you can use YouTube) that gives you the step by step. Make sure you take a picture of your work and post it to ARTSONIA. Don't know what that is? Go to this blog post for more information.
For this project you will create a sculpture of a bowl. A sculpture is the art of making 3D forms that represent something either real or abstract. Well all you need for this next project is paper (newspaper/junk mail/paper/construction paper), tape (maybe in your Christmas decorations/wrapping box?), and glue! You are going to use these supplies to make a bowl! Cool huh! Here is the YouTube video (ask your parents if you can use YouTube) that gives you the step by step. Make sure you take a picture of your work and post it to ARTSONIA. Don't know what that is? Go to this blog post for more information.
Coiled Paper Bowl
|
How to YouTube video |
Art-ing @ Home project #8
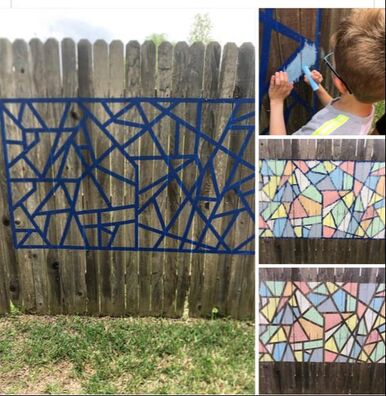
Here is another project that does not require traditional art supplies. For this project lets channel our ability to use shapes in a composition. A composition is the arrangement of the elements to create art. A shape is a geometric figure of either a triangle, circle, or square (or the shapes you can make from those). All you need for this project is some masking tape and sidewalk chalk. Oh yeah....and a fence or a wall. MAKE SURE YOU ASK IF IT'S OK!!!! Some people do not like chalk on their walls and fences. Make sure you are outside because the rain can wash it away (or a hose just in case). Using the tape, tape off a large square. Inside that square, use the tape to create a series of shapes, I recommend triangles. When you are finished setting up the tape, use the chalk to color inside all the shapes REALLY WELL. Finally, peel off the tape and VOILA! You have now created a composition using shapes and color. Hope you enjoy! Make sure you snap a picture and upload it to ARTSONIA so I can see!
Art-ing @ Home project #9
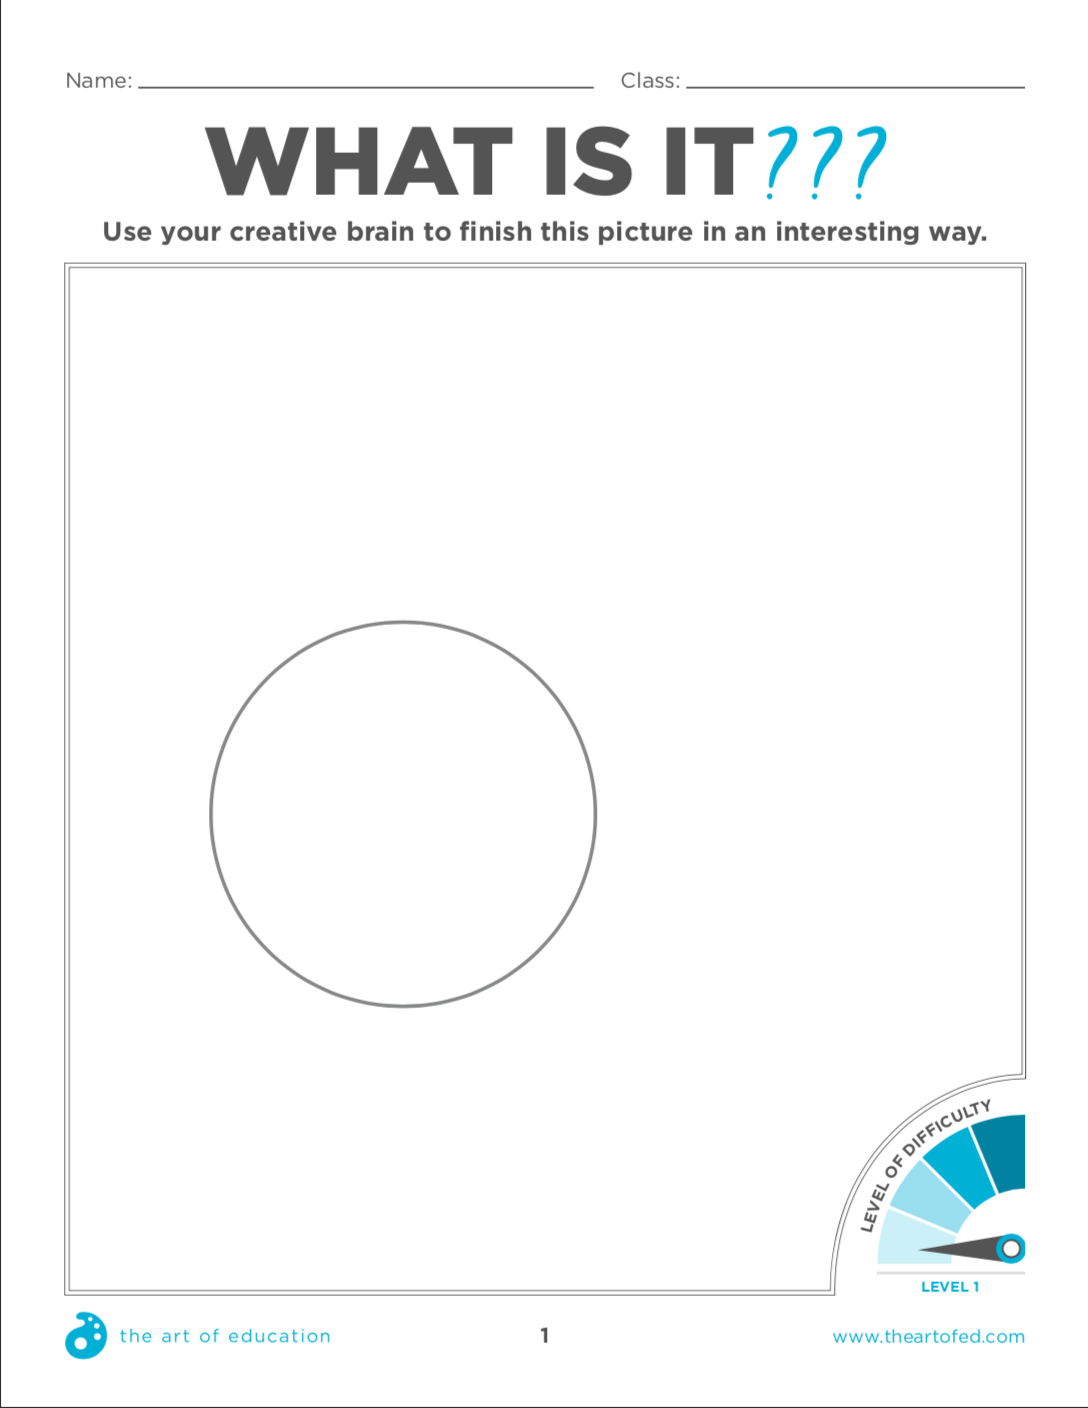
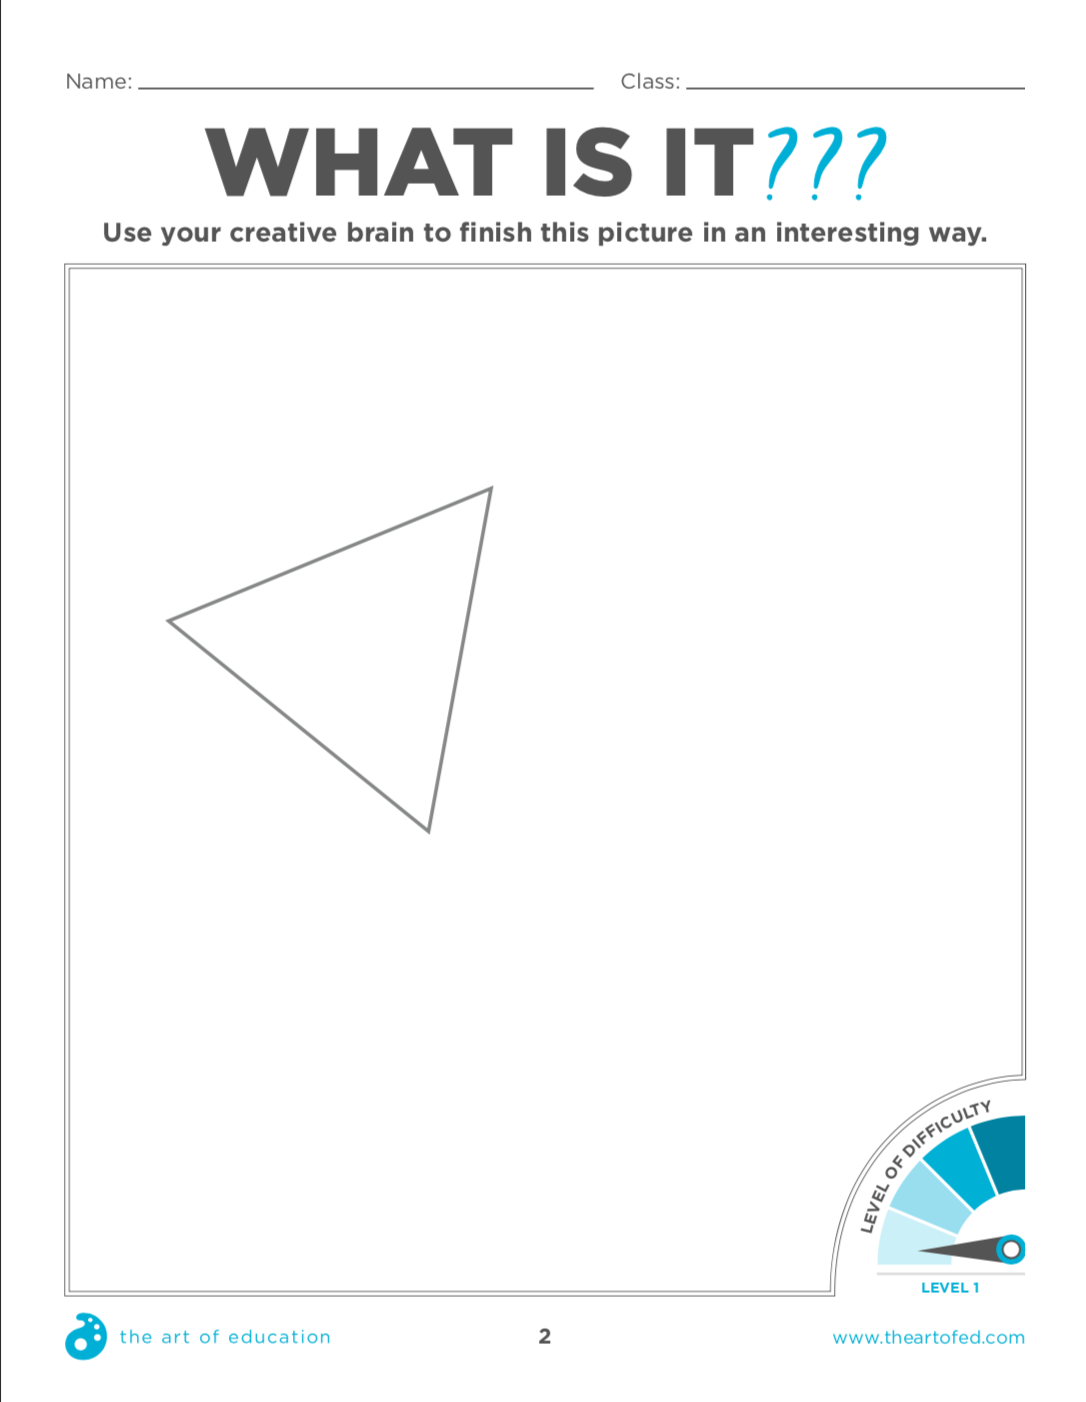
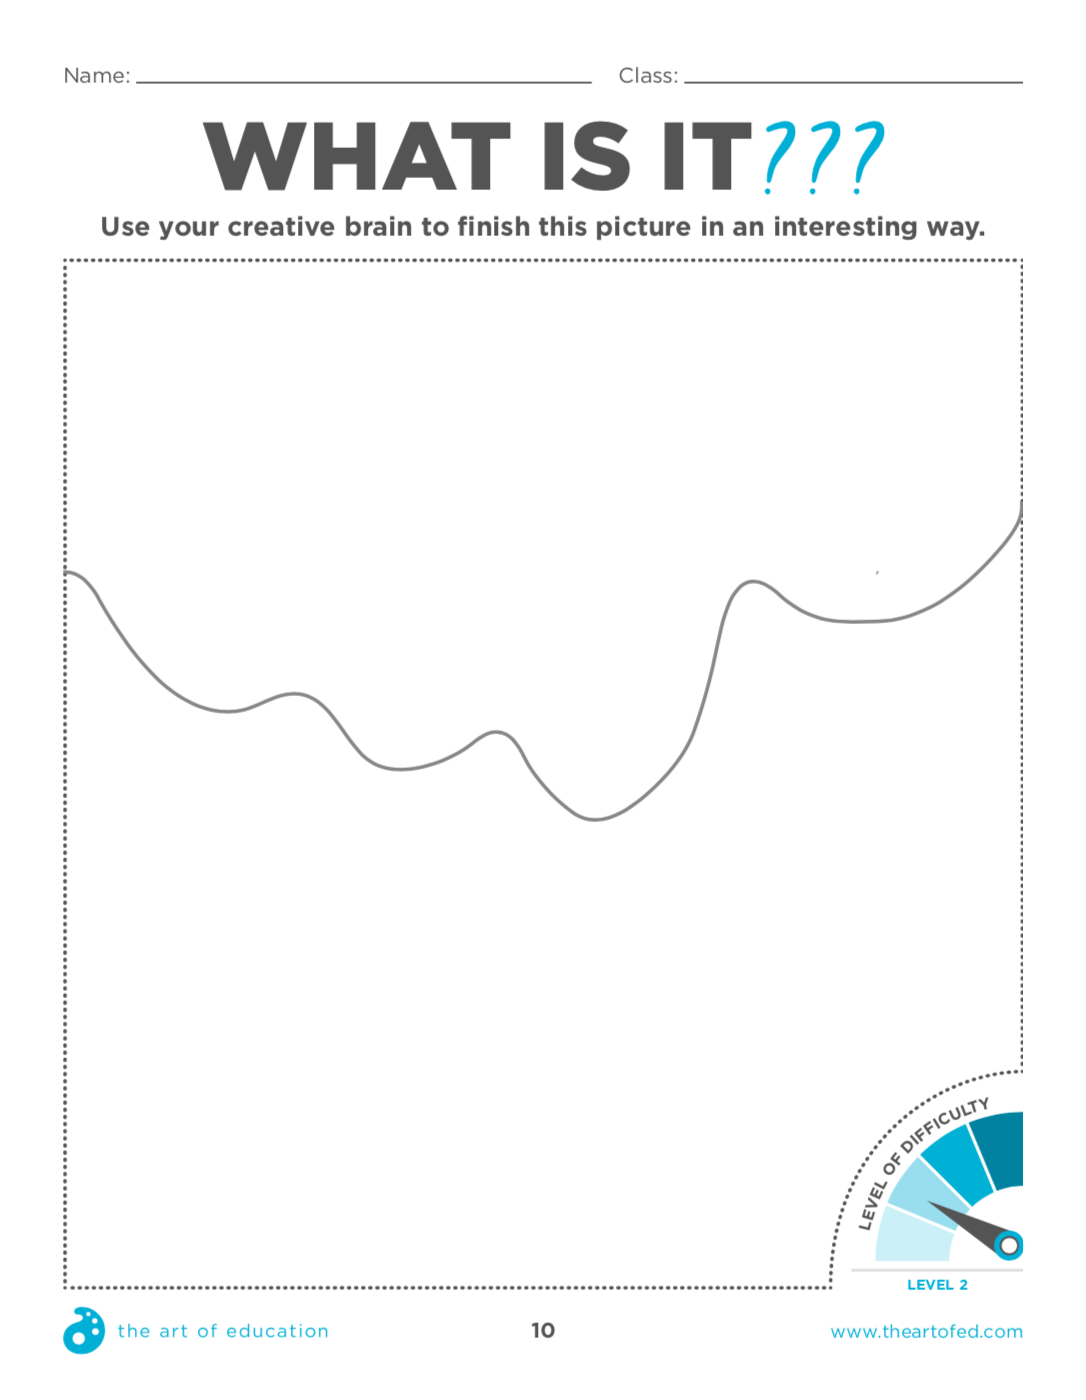
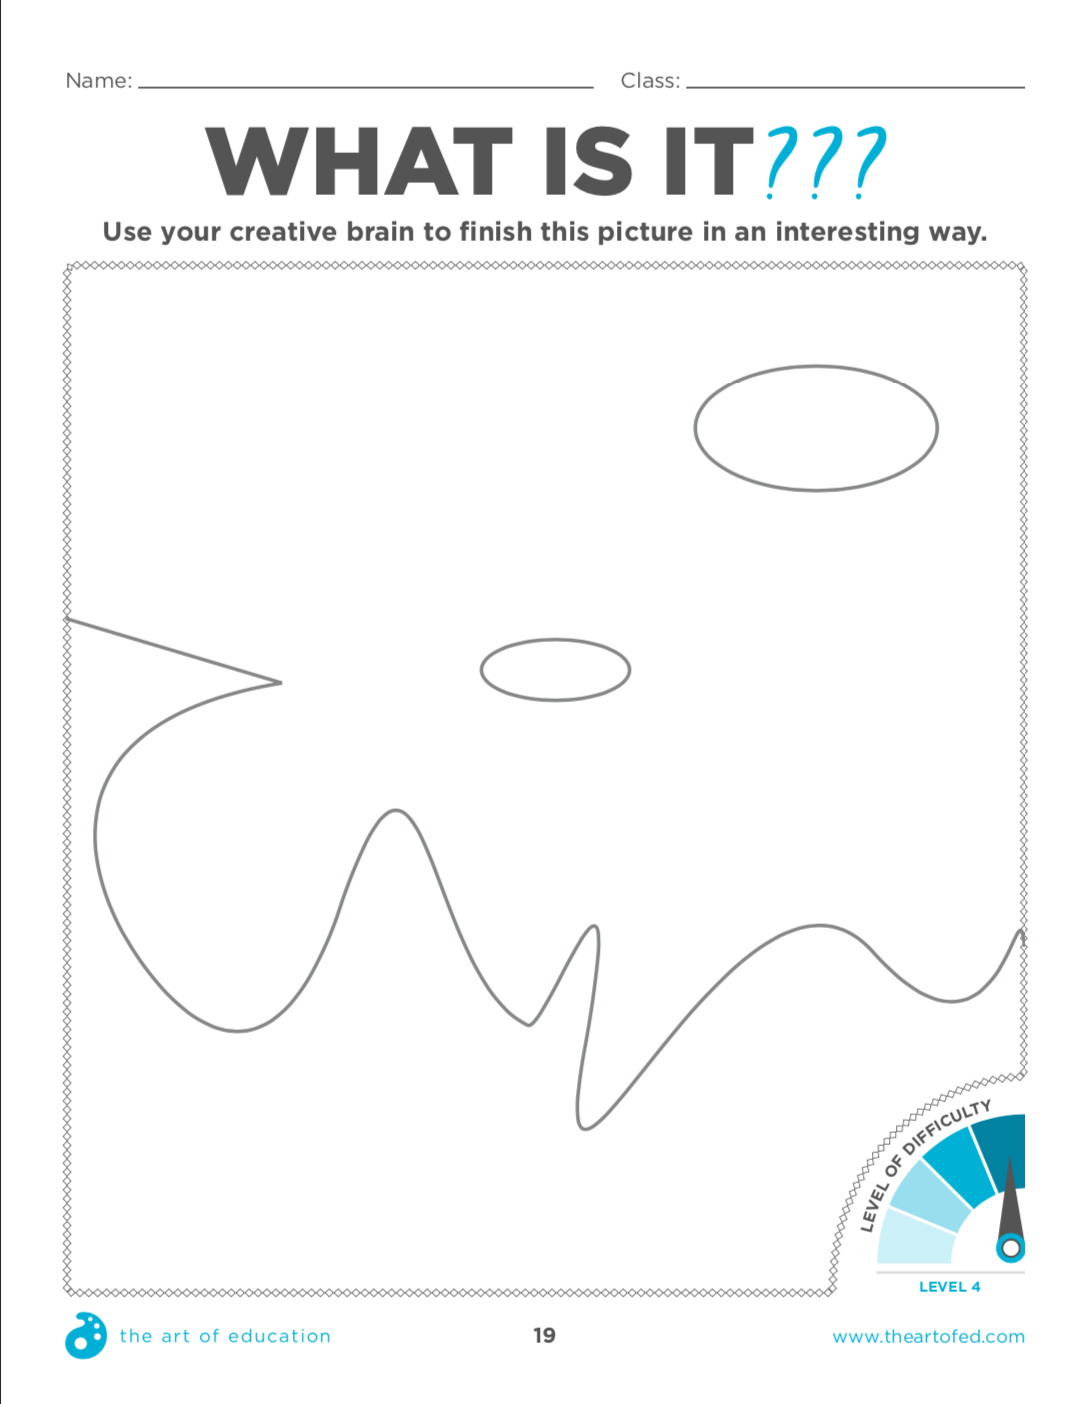
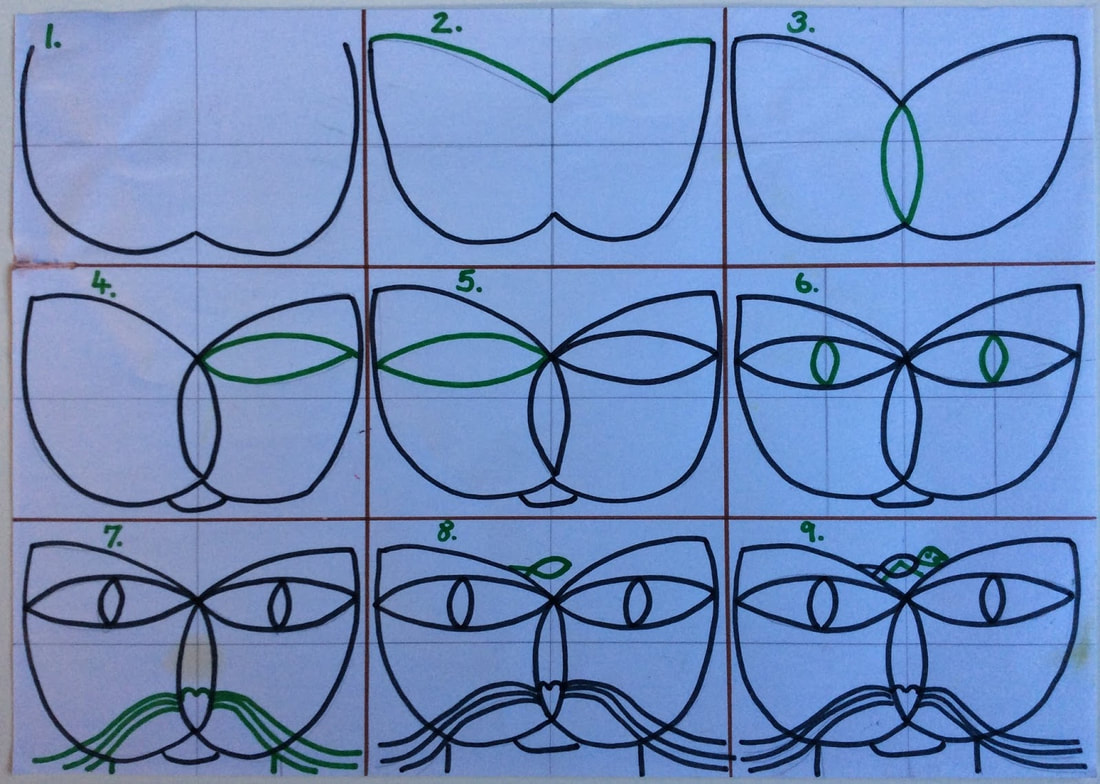
Want to use your imagination? Exercise your creative thinking? Challenge your ability to think outside the box? Most artists 'warm up' before they begin a major work of art. Think about sports, before you play you need to warm up and practice. Artists do the same thing usually in their sketchbook. For this project you are warming up your drawing ability. Here are some drawing prompts. All you need is a pencil. Click the image of the one you want to try. If you want you can print them out and draw on them. If you do not have a printer, turn the brightness up on your computer screen, hold paper up to it and trace the lines. If you cant do either of those, draw the line you see first then add to it using your imagination.
|
|
|
|
Week 2 of Digital Learning
Art-ing @ Home project #10
Let's do some at home printmaking! All you need for this project is a small piece of aluminum foil, markers, paper, and a sharpie or some sort of permanent marker. This project introduces you to something we call Monoprint. Mono means one and print...well I think you know what that means. So what exactly does Monoprint mean? Well it means that when you print it, it can only be printed one time. Usually with normal printmaking, you can print the image over and over and over, all you have to do is add more into to it. For this one, you add the ink (markers) and when you print it on your paper, you can only print it once. I hope you enjoy this one! The results are beautiful. Don't forget to take a picture of it and share it on Artsonia! Don't know what Artsonia is? Click HERE to read this blog post.
|
Click this link to watch the 'How to' video on this project!
https://www.artsonia.com/teachers/ideas/entry.asp?id=13 |
|
Art-ing @ Home project #11
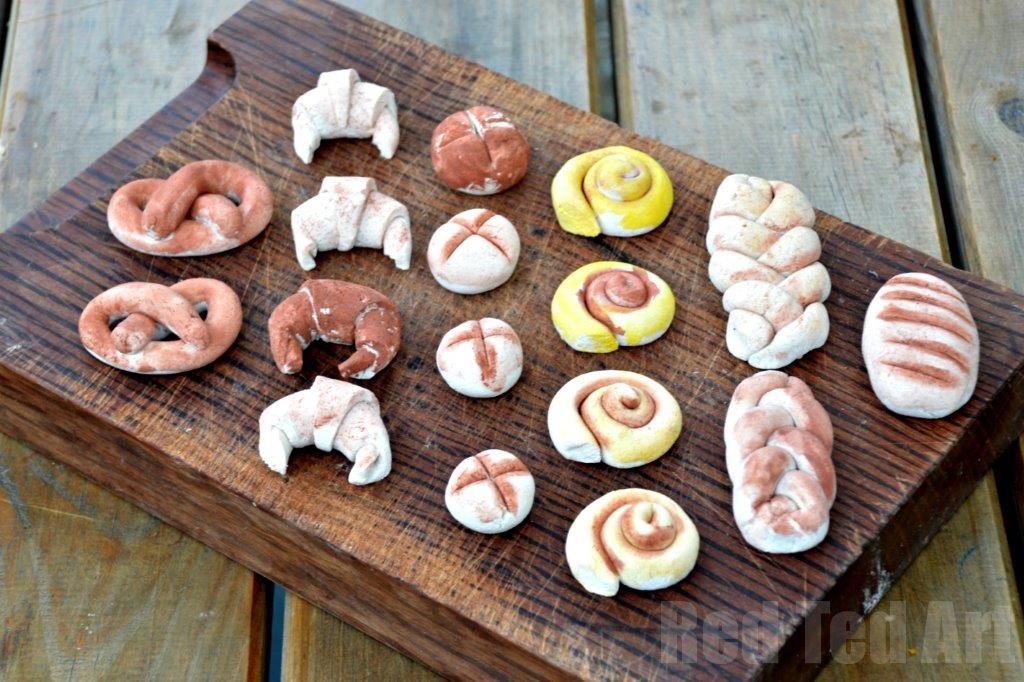
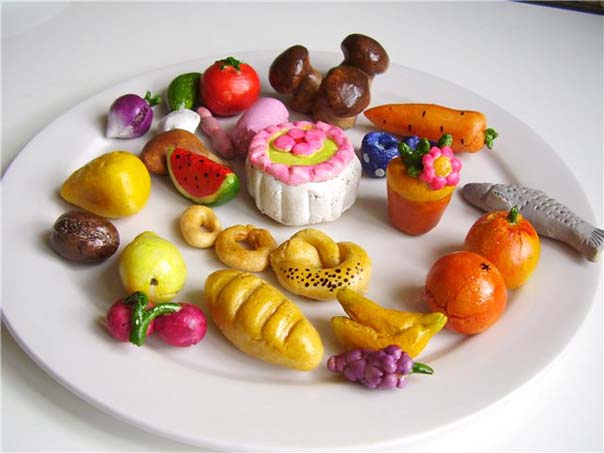
Wanna build a snowman? Ok so the weather is wrong for a snowman, also there is no snow. How about we make some air dry clay instead and create a sculpture of our favorite Frozen character! Don't like Frozen?....um.......well......TO BAD! THEY ARE THE MOST AMAZING MOVIES EVER! Just kidding, make a sculpture of your favorite FOOD, om num num. See below for the steps to make the air dry clay. Just a heads up though, this air dry clay can be TOXIC TO DOGS, you know, because of all the salt. Take a picture of your sculpture and upload it to Artsonia! Don't know what Artsonia is? Click HERE for more information!
|
Lots of dough
2 cups flour 1 cup salt 1 cup water |
Little bit of dough
1/2 cup flour 1/4 cup salt 1/4 cup water |
Mix the flour and salt in a bowl. Gradually mix in the water until you get a PlayDo like consistency.
|
This dough/clay will air dry in 2-3 days OR you can bake it (WITH PARENTAL GUIDANCE)
Preheat oven to 250 and bake for 2 hours OR till hard. |
Do not let animals eat the dough.....also you....you don't eat the dough either.
|
|
Art-ing @ Home project #12
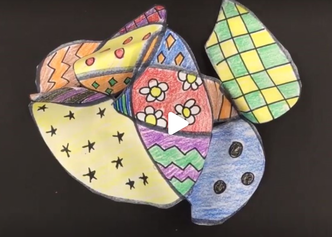
How about we alter a drawing and go from 2D art to 3D art? Remember something that is 2D is flat and can only be viewed from one side. Something that is 3D has form and can be viewed from multiples sides. For this project all you need is paper, pencil, crayons/markers/colored pencils, scissors and glue (stick works best). On your paper, draw varying sizes of circles. Inside the circles add patterns and color. Now cut them all out and using a glue stick, arrange them to create a 3D sculpture. See how tall you can make it. Hope you enjoy, take a picture and upload it to Artsonia! Don't know what that is, click HERE for the blog post that explains it. Happy Art-ing!
|
Click the picture for the link to the video in case you are not quite sure how to go about this project.
<-------- |
Art-ing @ Home project #13
Here is something fun to do. These are Bingo Boards I created with Mrs. Hill, Mrs. Brown, and Mrs. Cobelli. If you have a printer at home, print one off and complete it through out the upcoming weeks. Take your time! Have fun! If you do not have a printer, click on the one that says 'NO PRINTER BINGO BOARD'. This will open up in word and you can check the boxes when you complete the activities. Remember to save it as you go, don't loose what you have done! Hope you have fun! When you hit BINGO (getting 5 in a row) then snap a picture or screen shot and upload it to ARTSONIA! Hope you have fun doing some PE, Music, STEM and Art at home!
Art-ing @ Home project #14
Let's read a book! Ok, well, I'm sure you don't have this book so let's go to YouTube (Have your parent's permission!) and let someone else read the book for us. Below you will see the link to the reading of The Cat and the Bird. This book was inspired by the artist Paul Klee. During the reading, I want you to pay close attention to Color and Shape. Look at how the artist drew and colored the city and buildings. When you finish reading the book, I want you to learn a little bit about the artist.
|
|
Here is a short biography of Paul Klee.
After you read it I want you to think about these questions: 1. What relationship do you think his music had with his art? 2. Why do you think he struggled with color? 3. Do you think working with other artists help guide his choices he made with his art? Is yes, how? If no, why do you feel that way? 4. How do you think playing music helped him become a better artist? 5. Do you struggle with certain elements of art (line, shape, color, texture, space, value) when you are creating? |
|
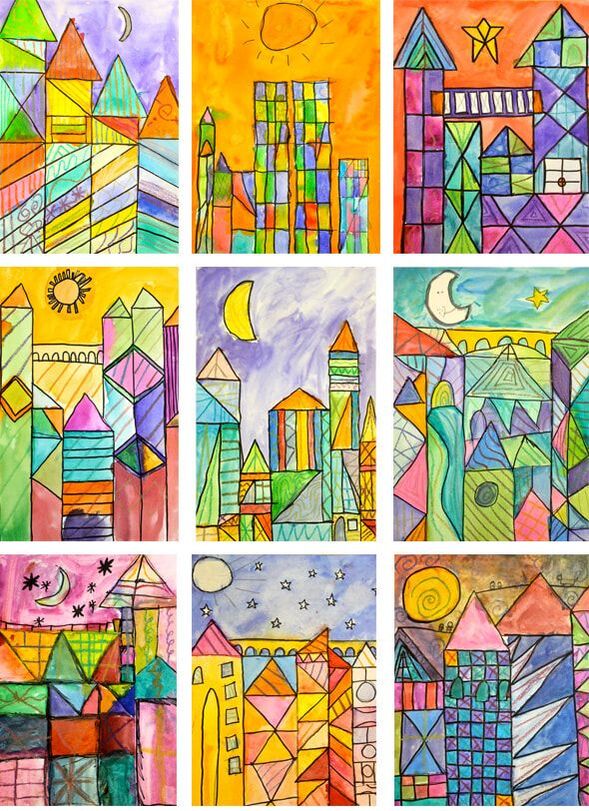
Now let's make some art! Paying close attention to how the illustrator of the book used color and shape, I want you to create your own Cityscape (What's a Cityscape? Well, a Landscape is art that shows areas of Land, a Seascape is art that shows areas of the sea, so a Cityscape is art that shows areas of the city!) so create a Cityscape in the style of Paul Klee. Use any medium you would like. The more creative the better! If you only have a pencil, how can you create different values to represent different 'colors'? When you have your Cityscape created, include the Cat and/or the Bird in your work.
|
This is Castle and Sun by Paul Klee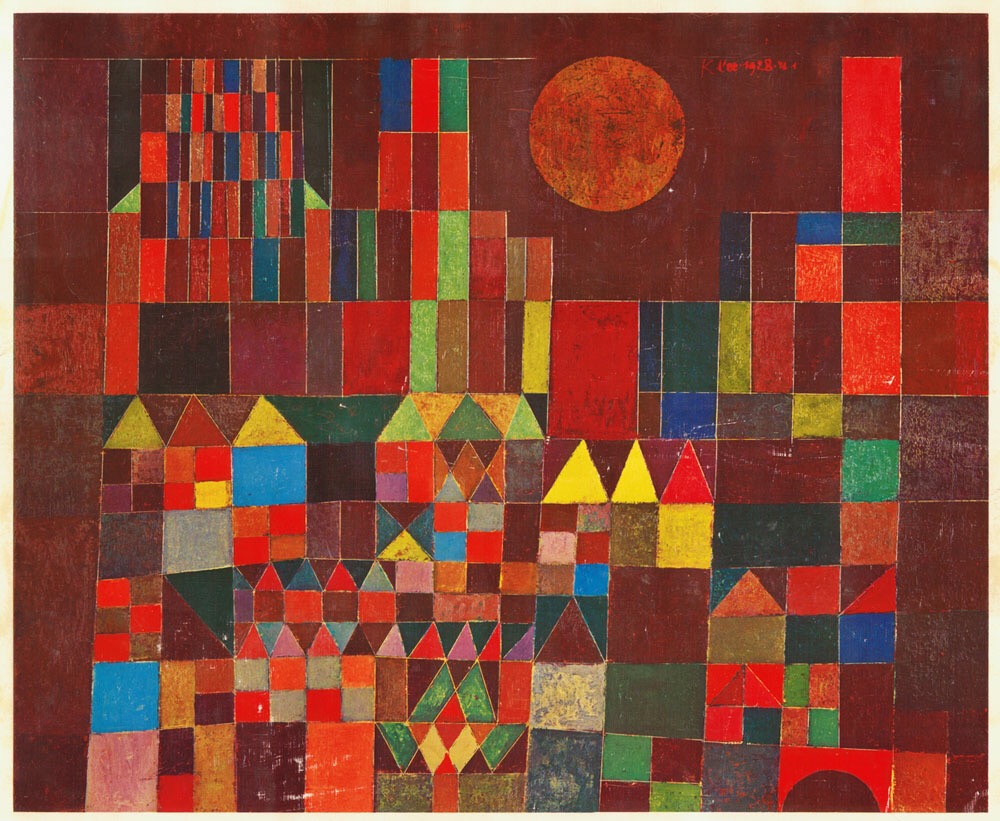
Don't forget to take a picture and post your work on Artsonia!
|
Art-ing @ Home project #15
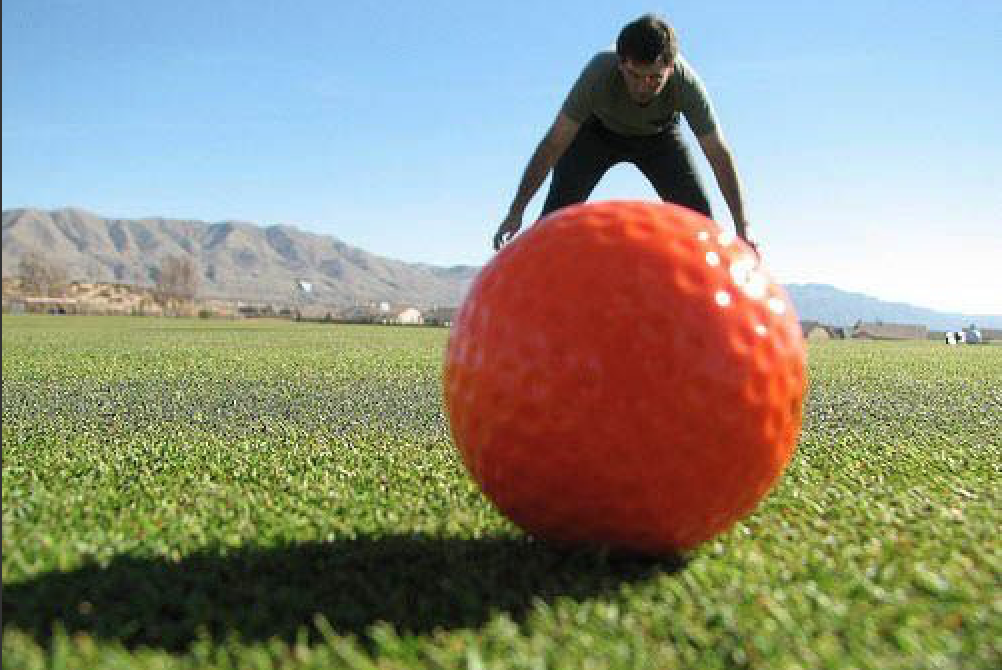
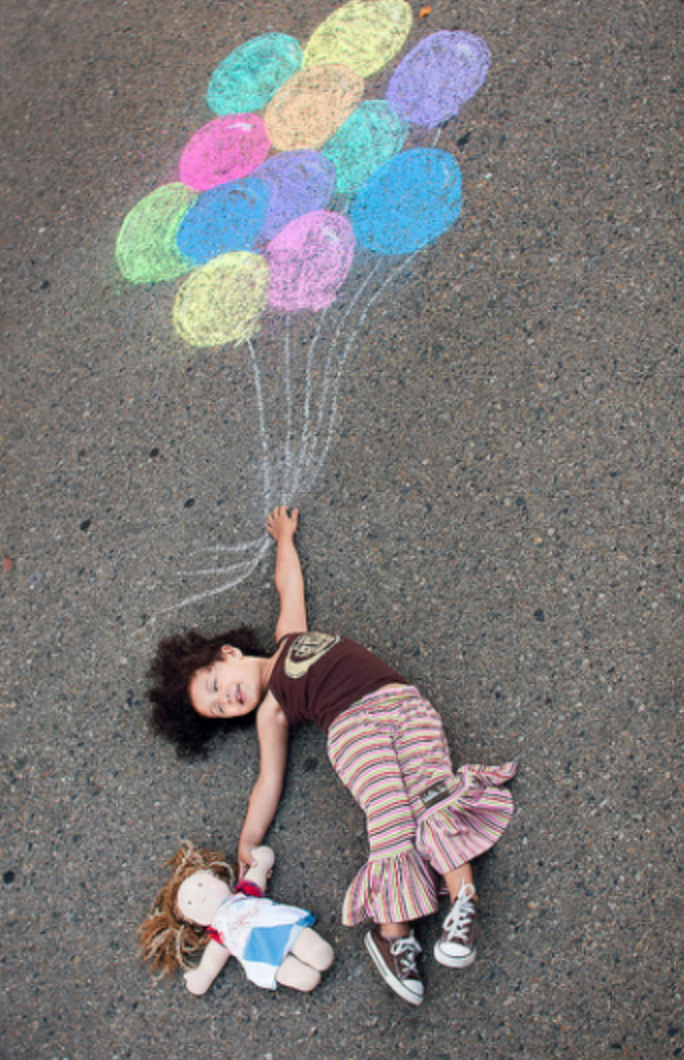
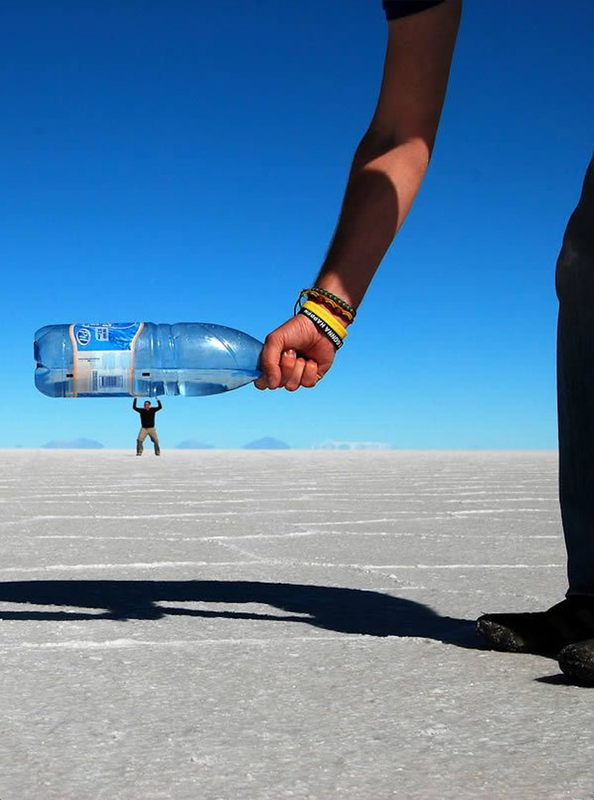
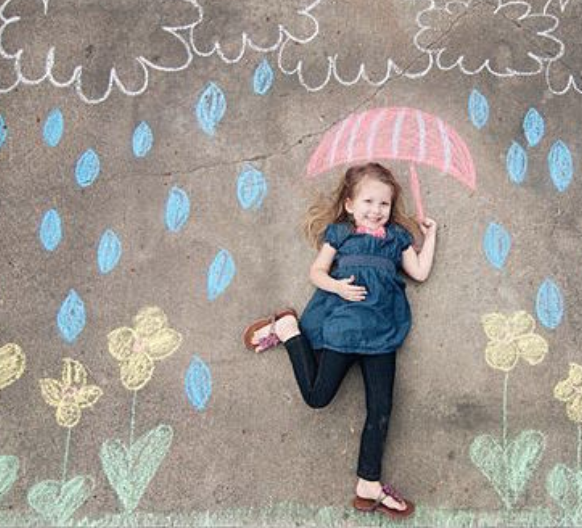
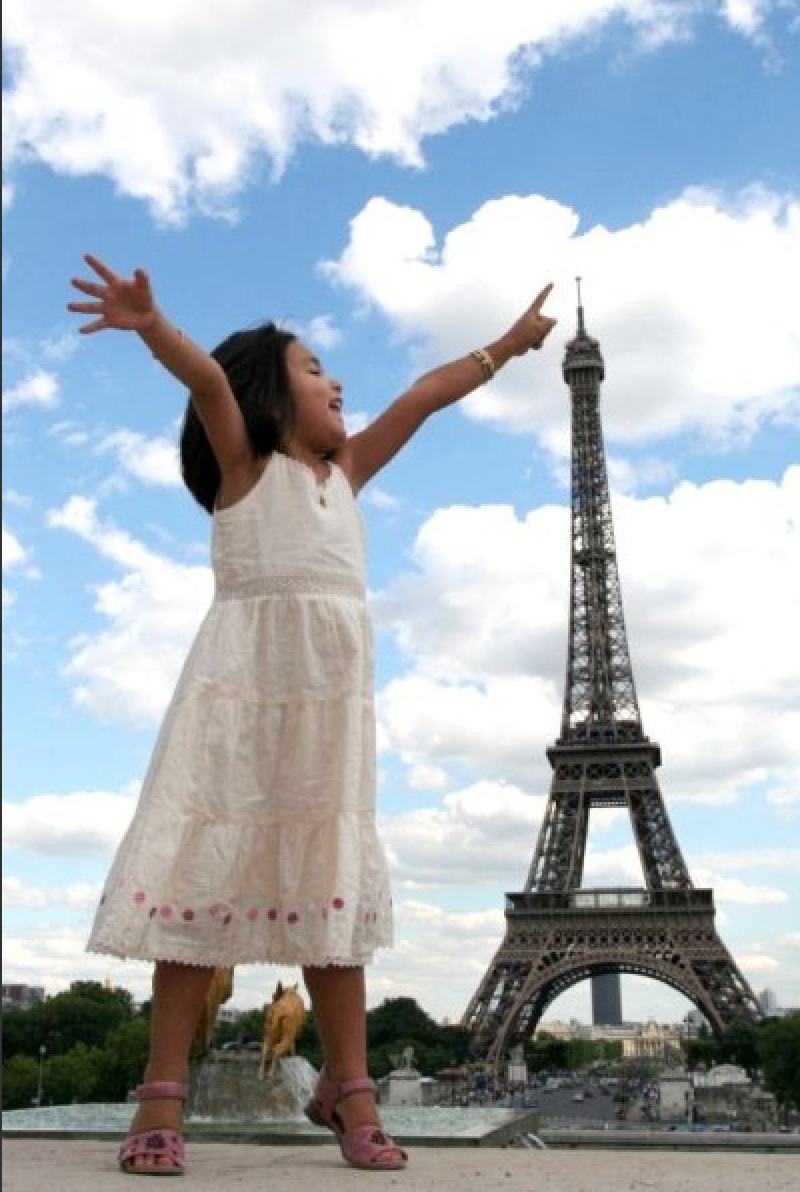
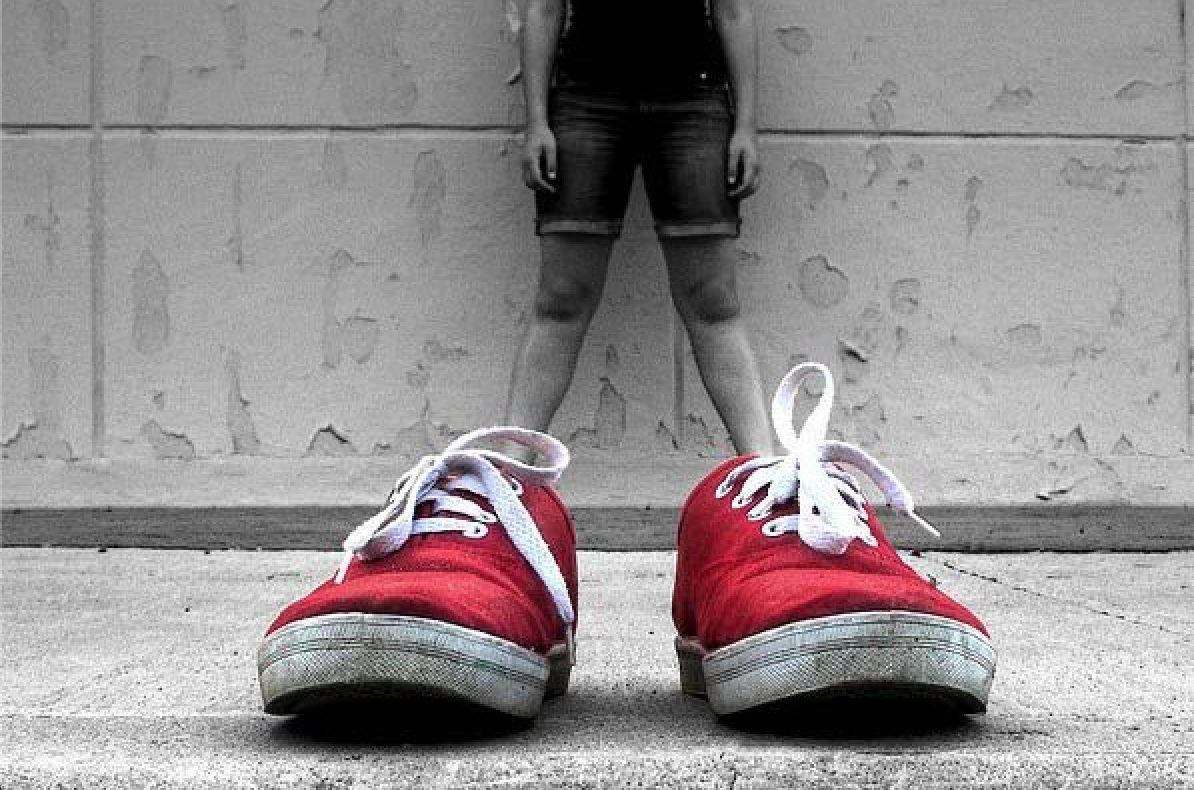
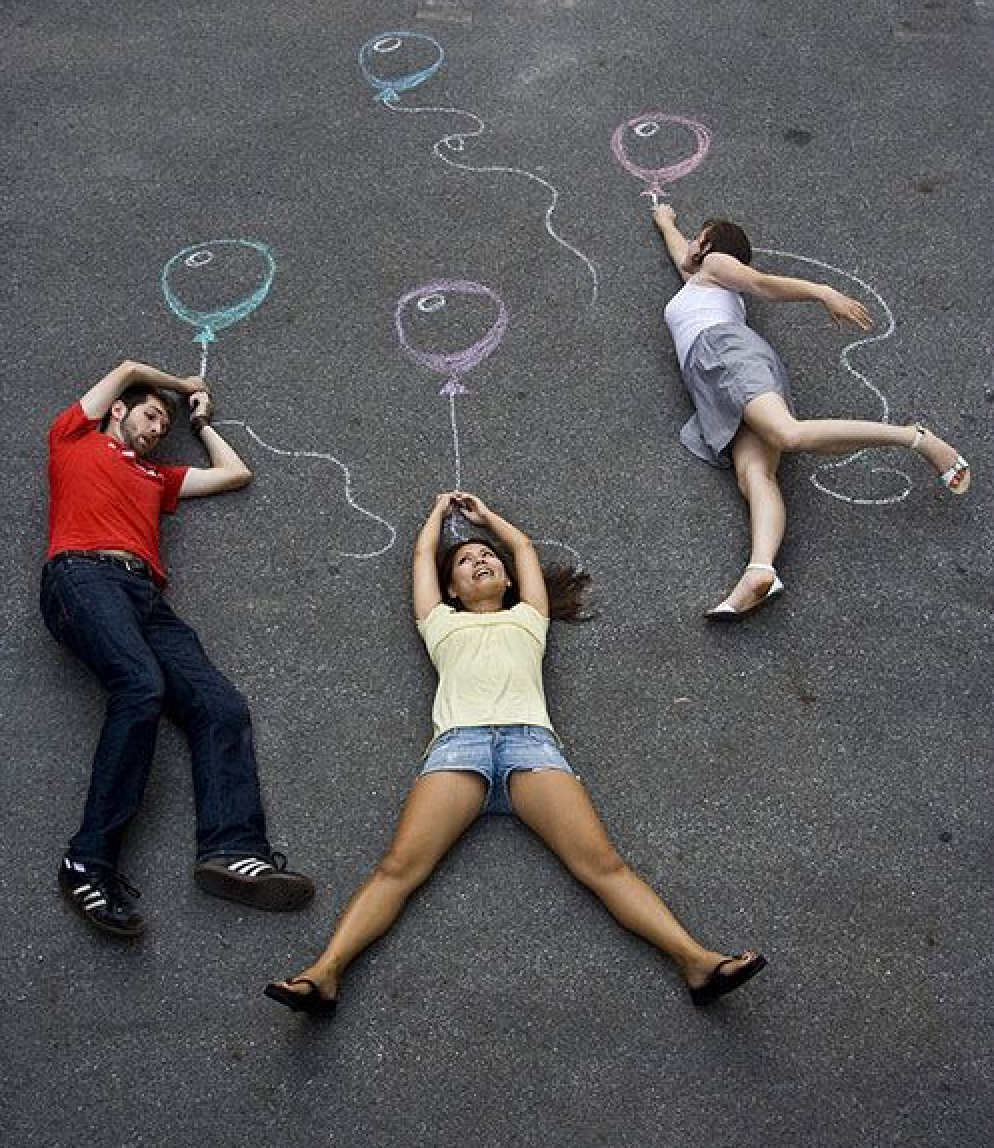
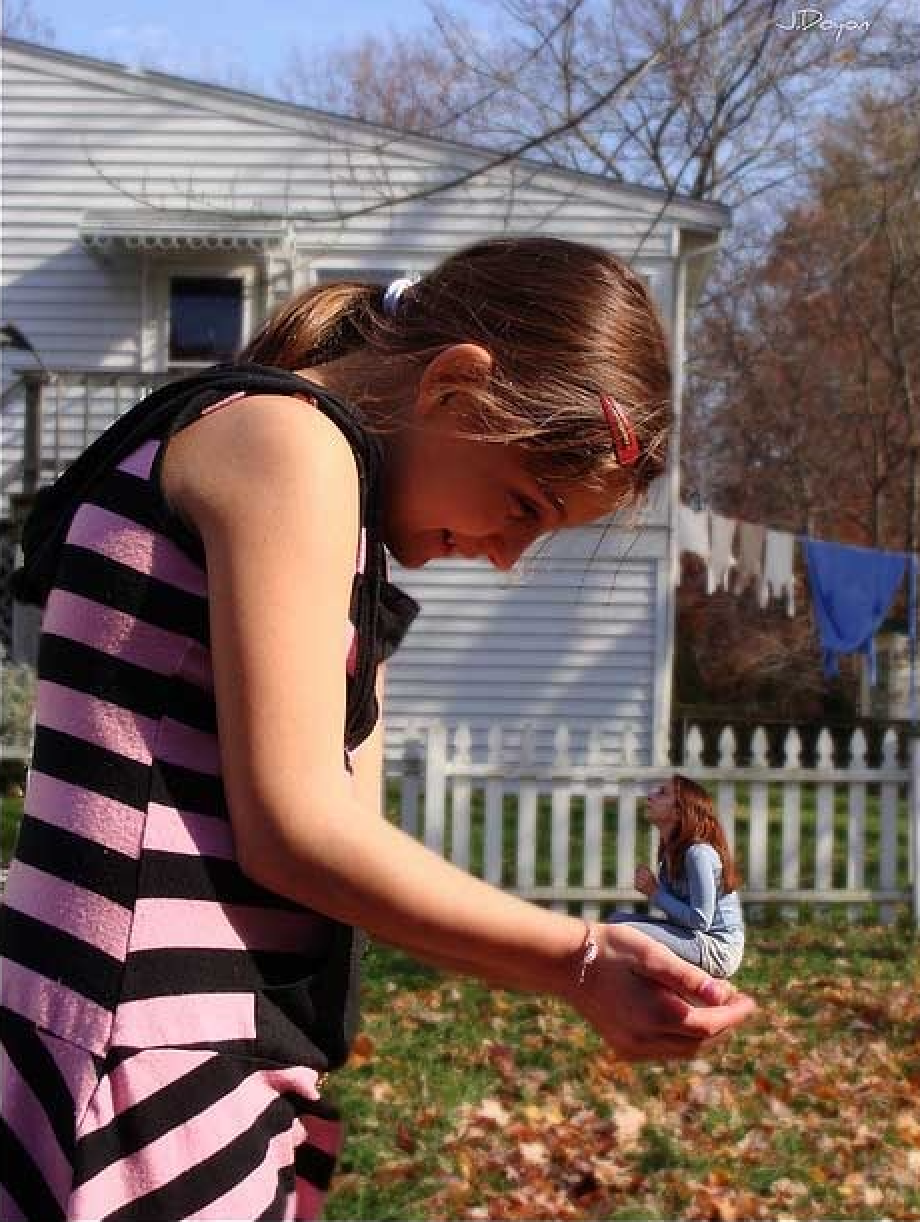
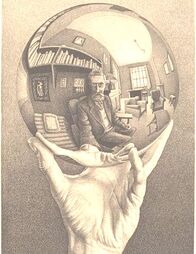
Let's do something fun! This project is a Forced Perspective project. Forced perspective is a technique which employs optical illusion to make an object appear farther away, closer, larger or smaller than it actually is. It manipulates human visual perception through the use of scaled objects and the correlation between them and the vantage point of the spectator or camera. I know what you are thinking......'Mrs. Thompson..........what in the world did you just say'. It's ok! Let me clarify.
Forced Perspective is all about creating an image and manipulating it so it looks larger or smaller than it actually is. You are forcing the viewer to see something the way you want them to see it. Here are some examples. Notice how in some, the Forced Perspective is accomplished by having one object LARGER and the other one SMALLER. Then look at the ones in chalk, they achieved Forced Perspective by interacting with their drawings.
What I want you to do is to create your own Forced Perspective work of art. Make sure you take a picture (because this is mostly a digital media project) and upload it to ARTSONIA so I can see it!
What I want you to do is to create your own Forced Perspective work of art. Make sure you take a picture (because this is mostly a digital media project) and upload it to ARTSONIA so I can see it!
|
|
|
|
Art-ing @ Home project #16
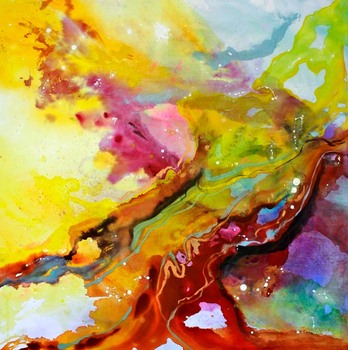
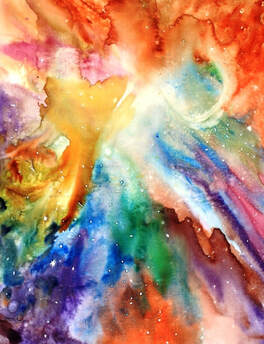
Non-objective art is not based on things you see in the real world. That means it's NOT artwork that shows homes, people, animals, landscapes etc. Non-objective art is work that is more focused on the interaction of color, shapes, and/or lines. Check out this artist, Patricia Cherry.
|
Look at her use of Color. Don't you just feel drawn into her paintings? There doesn't seem to be a start or end point to her work. Though our eyes are drawn to certain places on the work. This is called Focal Point. When you eyes are drawn somewhere because of how the artist arranged the Elements of Art.
Do you also notice the Movement? How her use of lines also draw you eyes around the work. You can almost feel the paint running.
|
|
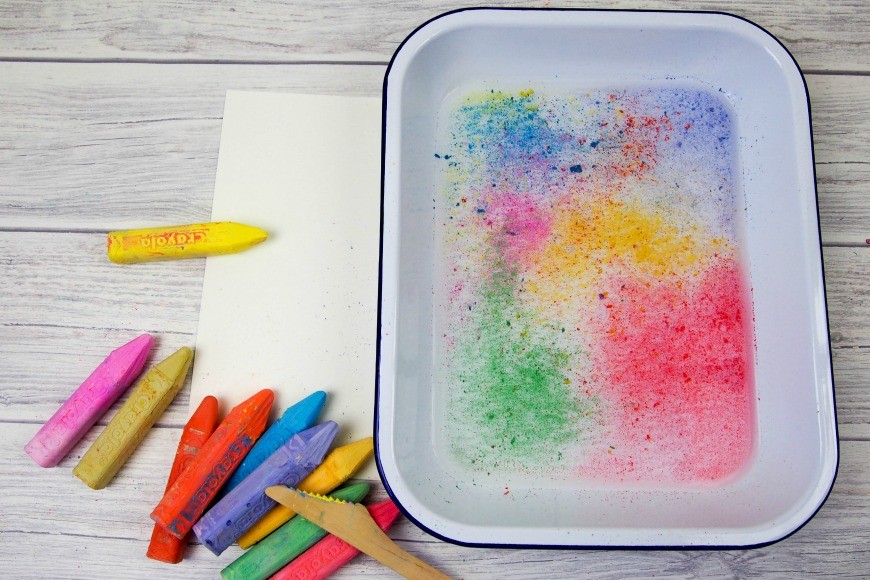
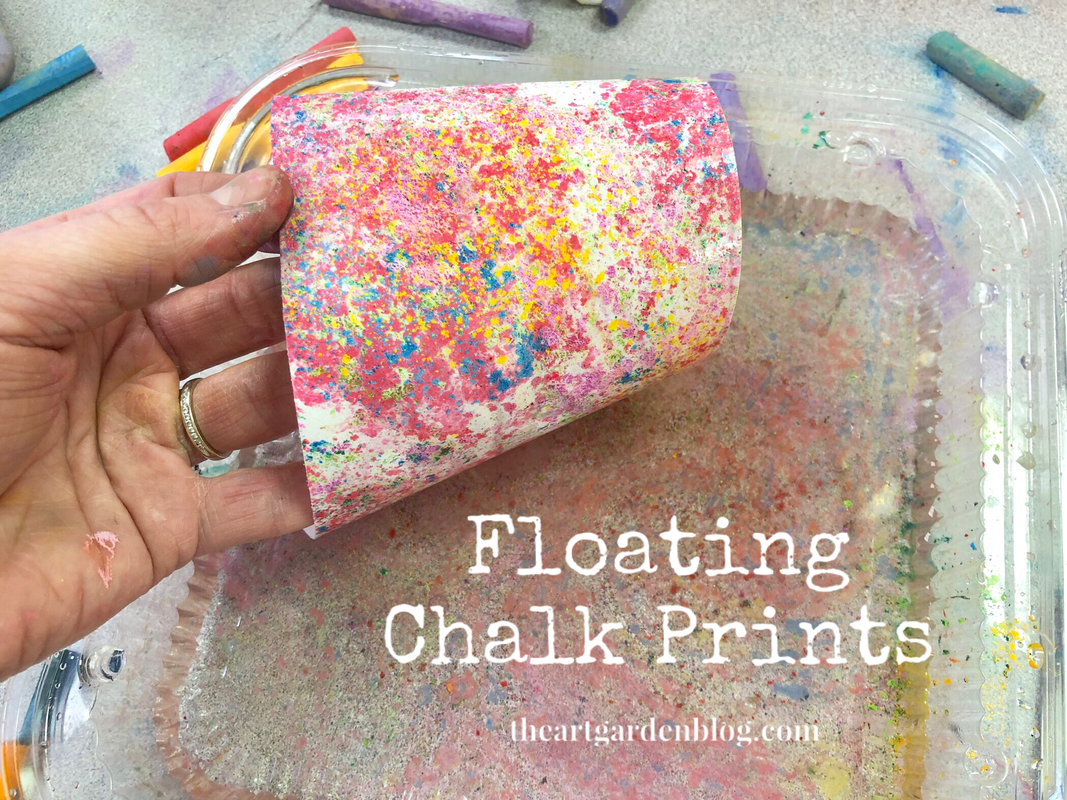
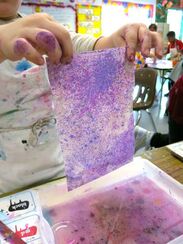
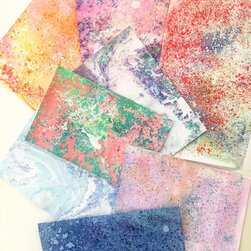
For this project you will need a flat container of water, paper, sidewalk chalk, a toothpick or skinny branch, and either a dull knife (with permission), or a spoon. That's all! What I want you to do is create a Floating Chalk Print. It's easier said than done. Especially since I want you to scrape and arrange the chalk in a way that creates both movement and focal point. Here is the process: hold the chalk over the container of water and start scraping it with your spoon or knife. Remember to always scrape it AWAY from you and towards the water (are you wondering why the chalk is floating? It's called Surface Tension which is a fancy way of saying the water molecules on the surface are attracted to each other (cohesion) and create a stronger surface. that's why some bugs can land and walk on the water). Change up your colors as you would like. When you are happy with your colors and their arrangement, consider gently placing your toothpick/stick in the water and carefully swirling or moving the chalk around a bit to create movement. When you are happy with how it looks, carefully lay your paper on top of the water then pull it off. Voila! You now have a Floating Chalk Print. Try this over and over again. You don't really need to dump out the water. Just stir it up and the chalk will sink to the bottom. Have fun! Below are some pictures of examples. Don't forget to snap a picture of your work and place it on Artsonia! Don't know what that is? Click HERE to read my blog post that explains it.
|
|
|
|
Art-ing @ Home project #17
|
For this project I want you to browse this Art History website. Select an artist or time period and learn about it. Then think about how that artist or art from that time period is different than how you create art. Now I want you to draw something you are familiar with drawing but somehow incorporate the style or technique you learned about from the artist or time period you researched. Your drawing can be simple but I want you to think about how learning different styles can help you become a better artist. Having a variety of styles and techniques is what makes artists UNIQUE. Have fun and happy Art-ing! Don't forget to take a picture and post it to Artsonia! Don't know what Artsonia is? Click HERE to see my blog post that explains it.
|
|
Week 3 of Digital Learning
Art-ing @ Home project #18
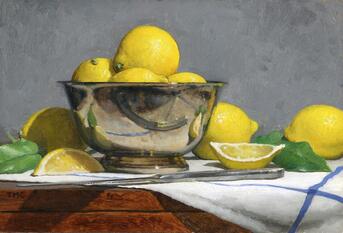
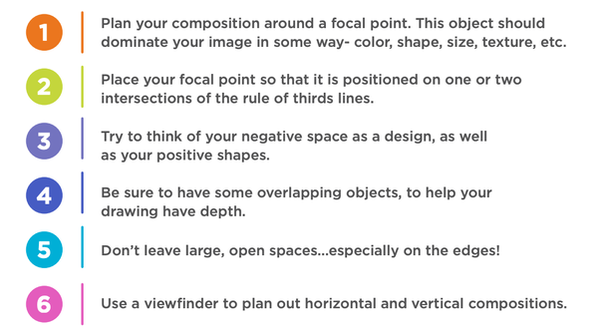
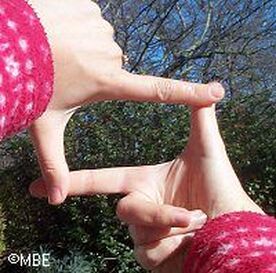
Today's project is a simple Still Life. A Still Life is a drawing of an arrangement of objects. These objects can be anything, plants, stuffed animals, vases, shoes etc. Check out the image below that gives you some tips on arranging your still life. Don't forget about Focal Point (the main idea of your artwork, what you want people to focus on) Once you have it set up, draw it! Use whatever material you would like. Now, I know what you are thinking, 'Jeez, Mrs. Thompson, that's a lot of stuff to draw!". But don't worry. You don't have to draw all of it. Maybe some areas are more interesting than others to you to draw. In this instance, artists use something called a Viewfinder. A viewfinder is a small square, usually made of paper or plastic, they look through and find the 'view' they wish to draw. You can also use your hands to make one. See the picture below. Hope you have fun and don't forget to take a picture and upload it to Artsonia so I can see!
|
|
Art-ing @ Home project #19
|
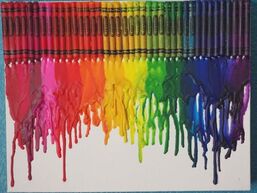
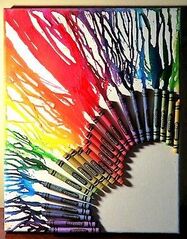
Ok, now this project you definitely want to make sure you have your parent's permission, it's REALLY fun, but JUST IN CASE GET THEIR PERMISSION. What you will need is crayons, glue, cardboard, and a hair dryer. An optional material is masking/painters tape. This project is crayon melting art. What you are going to want to do is glue (hot glue works best) the crayons down to the cardboard or canvas if you have one. See below for examples on how/where to glue them. Next, if you choose to, you can make a picture using the masking/painters tape. See the picture below for an example. When you are finished setting up, turn the hair dryer on and start heating up the crayons. You are going to want to hold the hair dryer closer to the ends that are around the edges and not the ends facing the cardboard. Look at the pictures if that's not too clear. Hope you have fun! If you used the tape, melt the crayons and when you finish, peel off the tape! Don't forget to take a picture and upload it to Artsonia to show me!
|
Glue at top, point down towards board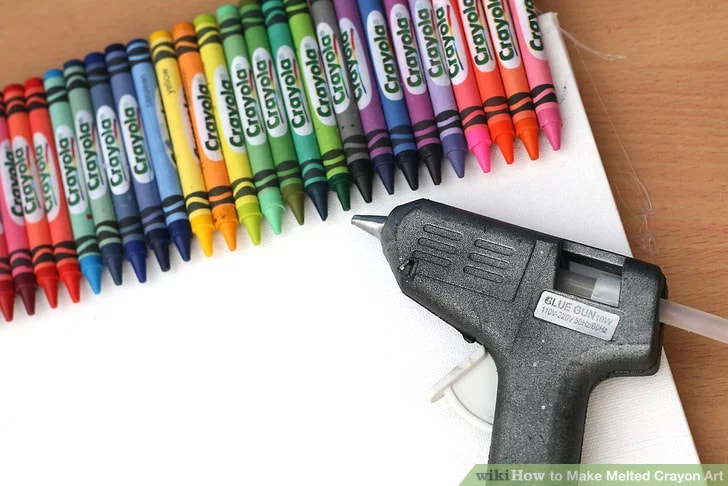
|
Warm them up, be careful, when they start dripping, don't point dryer at them, it could blow all around.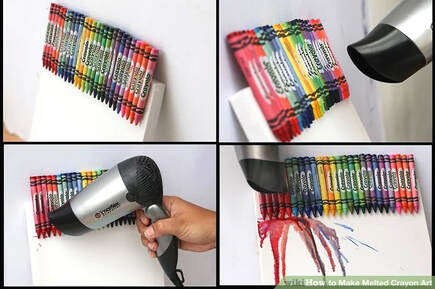
|
Use tape to create something interesting: words, pictures, etc.
|
Start melting the crayons over the taped off areas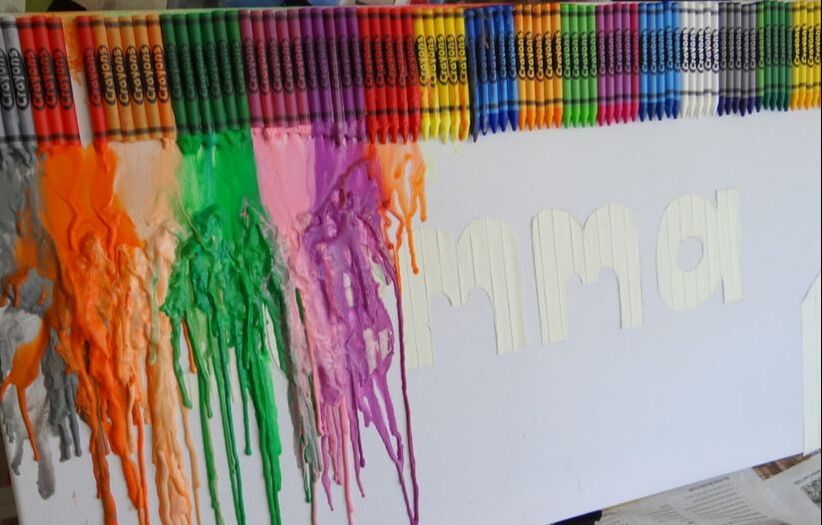
|
Peel up tape when crayon dries. If you have difficulty, have your PARENT us a knife to get the tape started.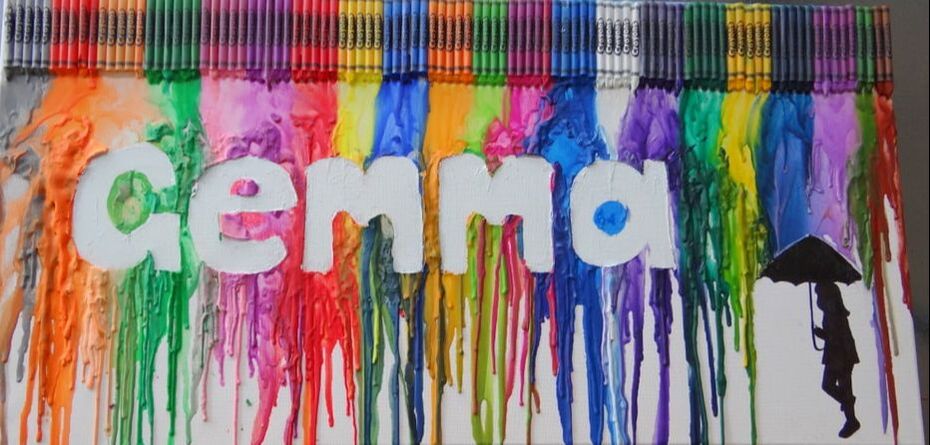
|
Art-ing @ Home project #20
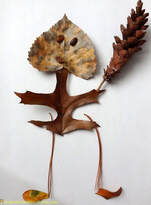
This project idea is courtesy of Ms. Jessica Espinoza, who is in charge of Professional Development for Fine Arts in Cobb. For this project let's do a little reading first then create art! If you have the book Leaf Man by Lois Ehlert, AWESOME! Read it! If you don't here is the read-aloud version on YouTube (make sure you have your parent's permission first). After you have read the book, go on a Nature walk with your family and collect natural materials such as pine cones, acorns, sticks etc. Bring it all home and assemble your materials on a piece of plain white paper and create your own Leaf Man! Can you and your family create a whole Leaf Family?! Think about Size and Space for this one. How will you arrange the Leaf man to fill the space and if you do the family, how will you arrange them by size to show age? When you are finished, I want you to write about your Leaf Man. Describe your characteristics and what nature items you used. Then use Chatterpix app to bring your Leaf Man to life! This app is free to download on your phone or iPad. Make sure you have your parent's permission! Take a picture and upload to ARSTONIA, if you do Chatterpix, try uploading it also to ARTSONIA (I am not sure if you can) if you can't, email it to me! Here is my email address.
Here is the link to Chatterpix for more information.
|
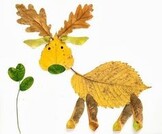
Leaf Man read-aloud |
Art-ing @ Home project #21
This project is a HUGE deal. I hope everyone can do this one. Kennestone Hospital has reached out to Dr. Luscre and asked if our students can create hand drawn 'Get well soon' pictures or anything uplifting. COVID-19 patients at the hospital are in isolation and cannot have visitors and need something to make them smile. Please draw anything cheerful, uplifting, or well-wishing. Draw, color, paint etc. If you want to create something from nature and send me a picture I can put a caption around it. When you make it, take a picture and upload it to Artsonia. I will forward it to Dr. Luscre who will get it to Kennestone hospital. If you don't have Artsonia, then just email me a picture of it! My email address is [email protected]
Thank you for your kindness and I can't wait to see what your kind and sweet hearts can create for people in need!
Thank you for your kindness and I can't wait to see what your kind and sweet hearts can create for people in need!
Art-ing @ Home project #22
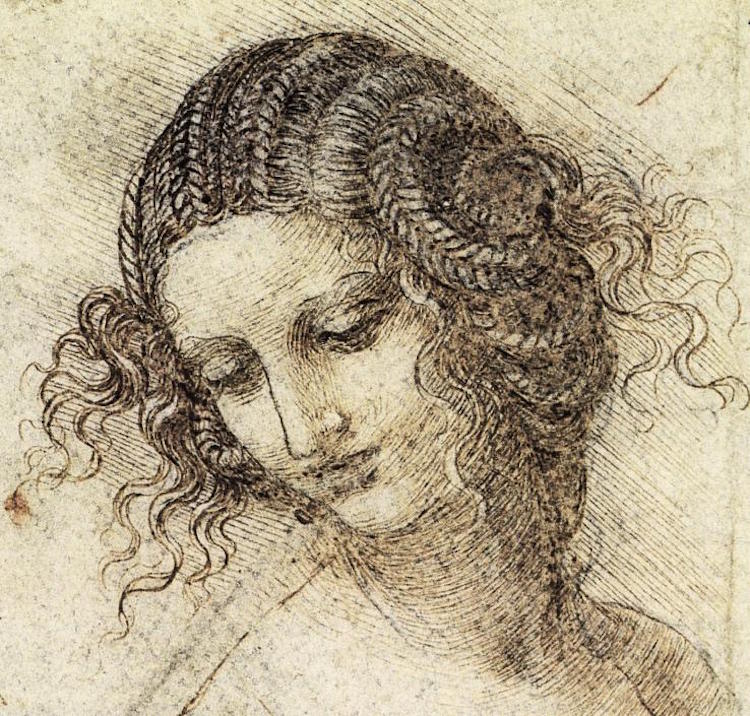
Ok, this one is a doozy! Just kidding, but it is challenging. For this project I want you to read my page about lines. CLICK HERE. When you are finished reading it I want you to use what you have learned. Your challenge is to create two works of art. One work should demonstrate your understanding of ACTUAL line. Your second should demonstrate your understanding of IMPLIED lines. If you are having trouble with direction, take a look below at the images under each category for inspiration. Don't copy them! But channel them! Good luck and don't forget to show me what you created either through ARTSONIA or EMAIL me!
|
Actual line examples
|
Implied line examples
|
Art-ing @ Home project #23
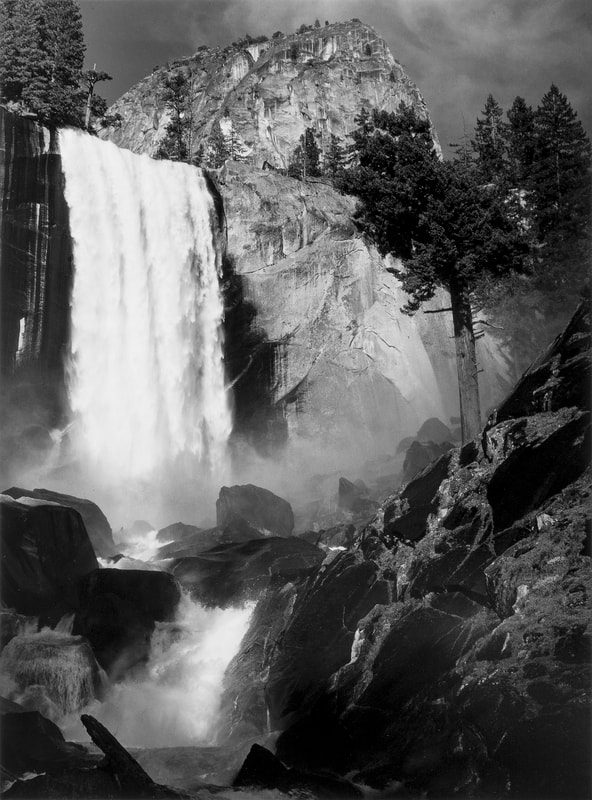
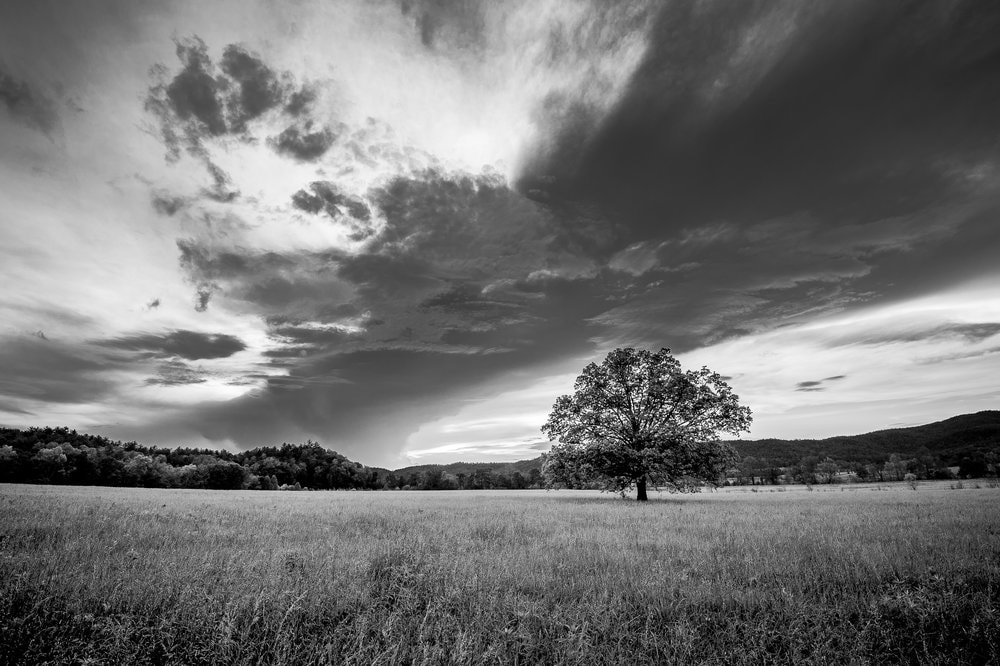
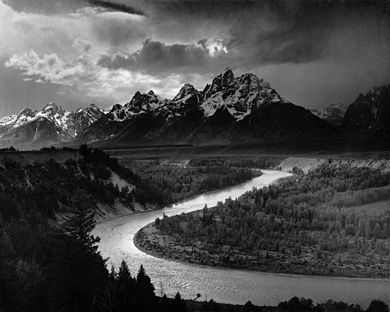
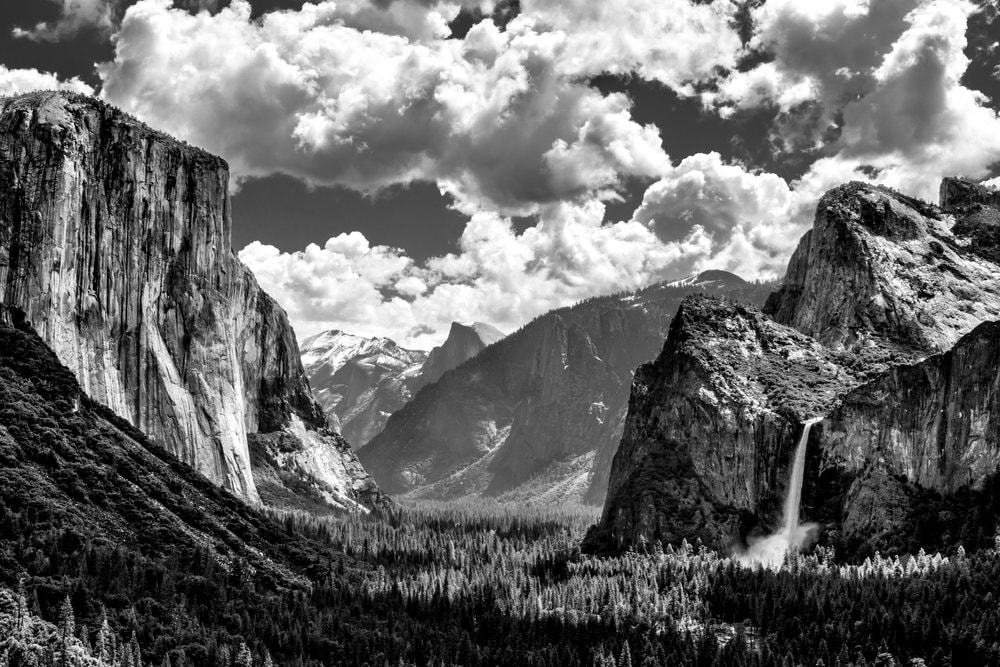
Let's switch gears a bit. I think photography is very important for us to talk about. Especially since we live in a digital age and you are hard pressed to find someone who does not have a phone or tablet available to them. So let's take a look at one of America's MOST FAMOUS landscape photographers; Ansel Adams.

|
Ansel Easton Adams (February 20, 1902 – April 22, 1984) was a landscape photographer and environmentalist known for his black-and-white images of the American West. ... Adams was a life-long advocate for environmental conservation, and his photographic practice was deeply entwined with this advocacy.
For this project, I want you to go outside and take a photograph of a landscape.
But hang on! There are a few more things. 1. Make sure there are NO MAN MADE items/objects/things in the photograph. Also, you need to show distance like he did. If you notice in his pictures, there is a foreground, middle ground, and background. If you recall, objects closest to us are in the foreground, little further away is the middle ground and furthest away is the background. 2. Either set your camera to black and white before you take the picture OR edit your picture to be black and white. 3. Now edit your picture in a way that shows HIGH CONTRAST. Notice Ansel Adam's photographs. There are areas of deep darkness and areas of vivid whiteness. You will want to play with the highlight, shadow, and contrast controls. Turn your highlights way up and your shadows way down. Try turning your contrast up. Move around the brightness last till you get a picture you like. As always, either email me your work or upload it to Artsonia! Happy Art-ing and have FUN with this one! |
Art-ing @ Home project #24
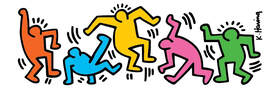
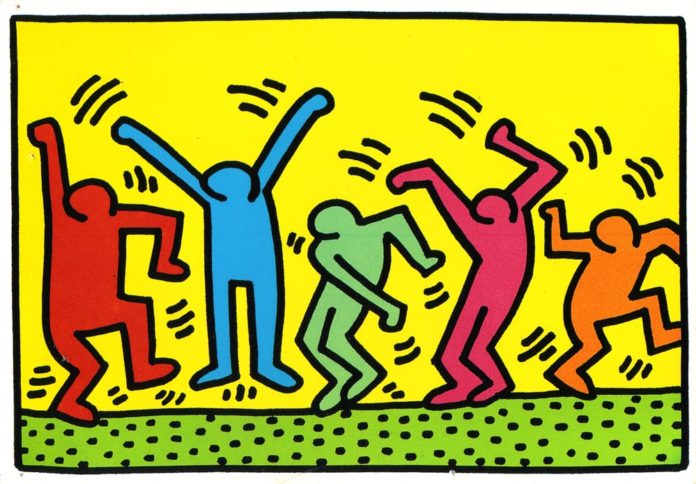
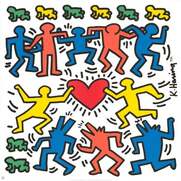
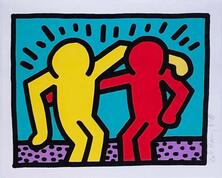
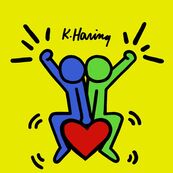
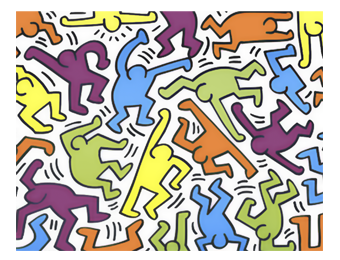
Let's have some fun! The artist, Keith Haring, was born on May 4, 1958, in Reading, Pennsylvania. He moved to New York City in 1978 and began using the city as his canvas, making chalk drawings in subway stations. His art was eventually seen everywhere from public murals to galleries and museums around the world. His bold lines, vivid colors, and active figures carry strong messages of life and unity. He had courage and demonstrated his excitement for life through his artwork. Take a look at some of his art below. Then check out this short animate clip that features his artwork CLICK HERE. You can also visit THIS WEBSITE to learn more about Keith Haring on your own! There are lots of activities and games on it.
|
|
|
|
Keith Haring's artwork was found everywhere and exemplified his love of life. He started small but never stopped creating. For this project I want you to get out your sidewalk chalk. Go outside and on your driveway create your own Keith Haring inspired artwork. Have fun! Use color! Use movement lines! Don't have sidewalk chalk? Then get a piece of paper and pencil/crayon/marker/whatever and create a drawing! Don't have those, grab a phone and snap a selfie in the style of Keith Haring and EDIT your image using color and lines. Take a picture of your work and share it with me either on Artsonia or Email!
Art-ing @ Home project #25
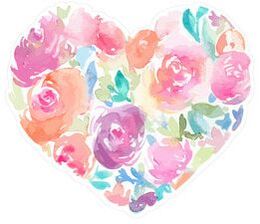
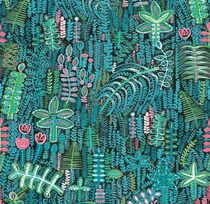
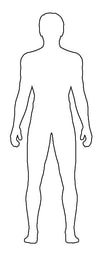
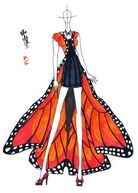
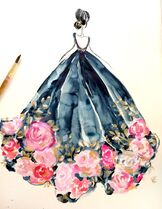
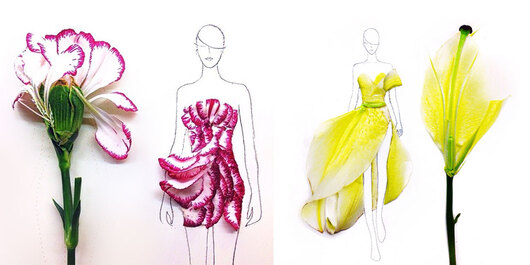
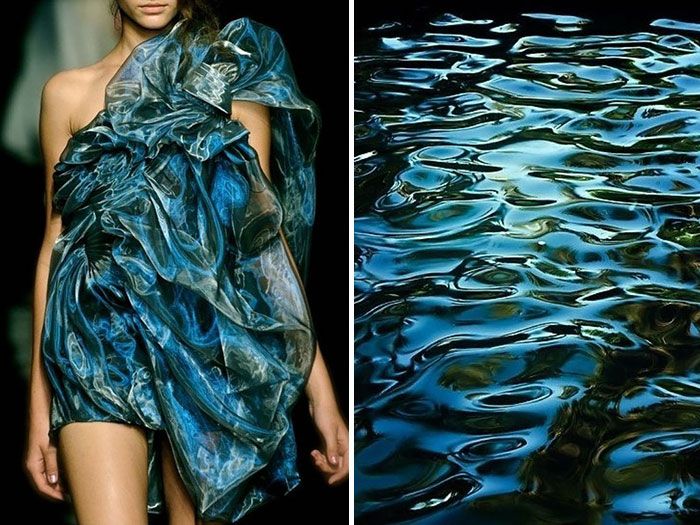
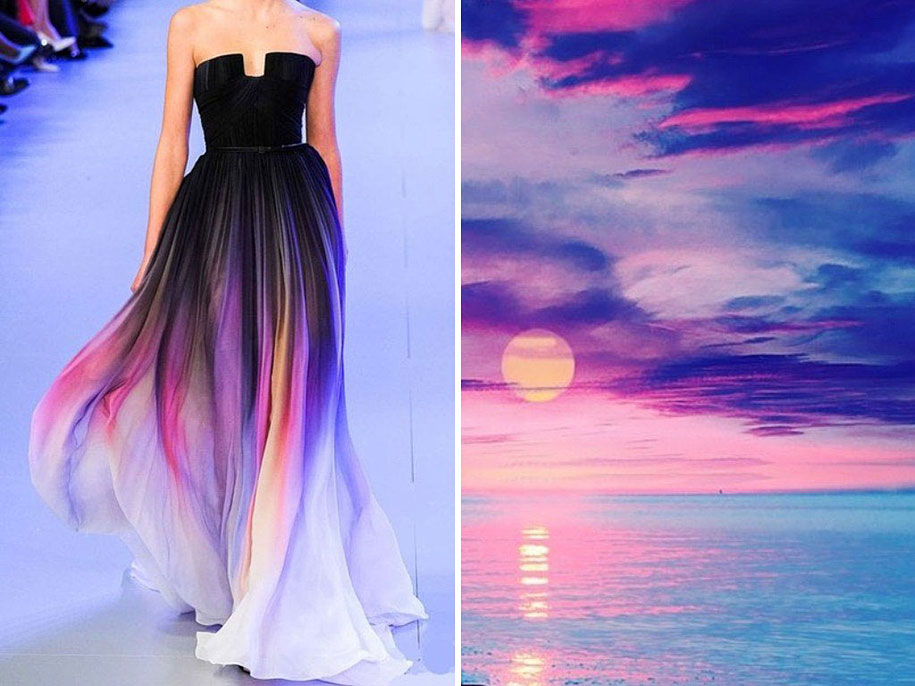
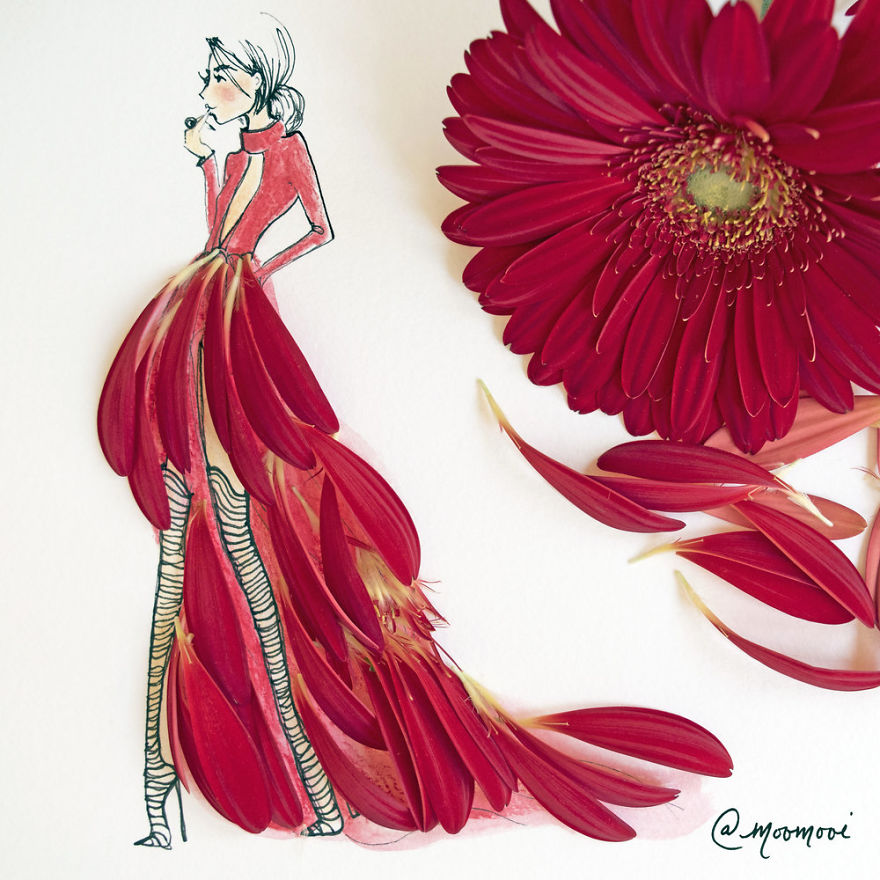
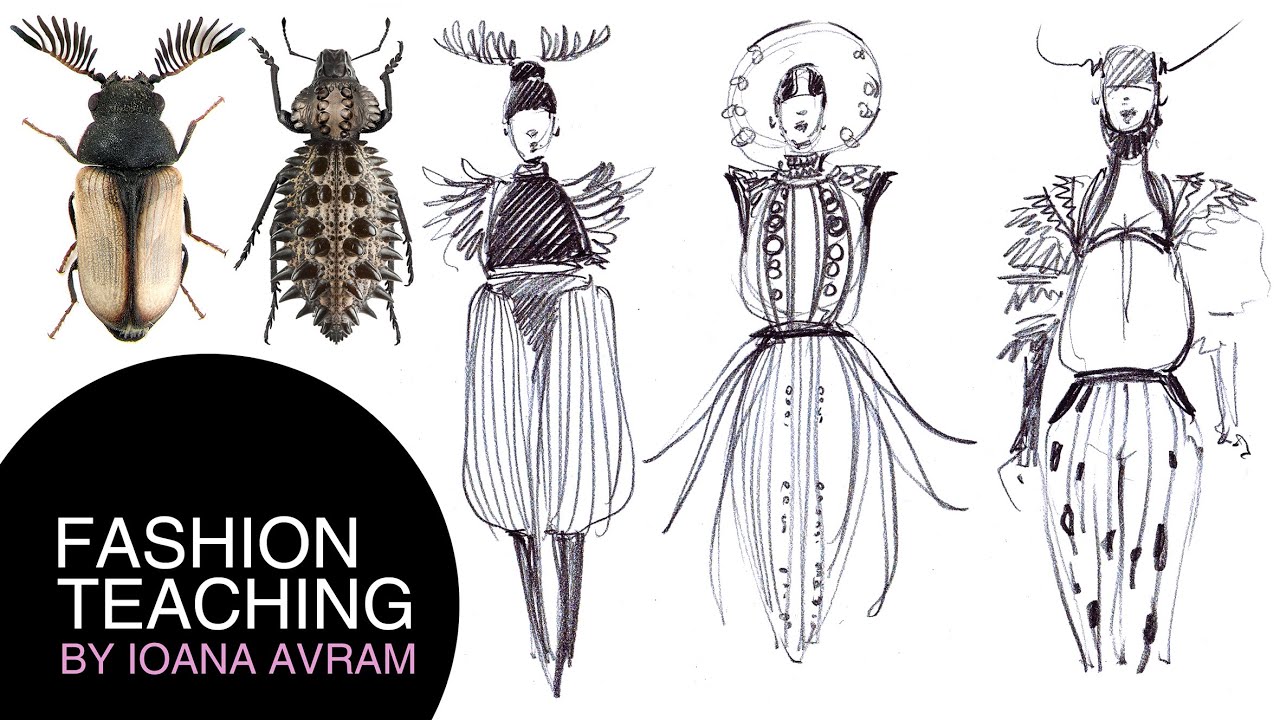
Let's get creative! Did you know that Fashion Design is a possible career in the arts? I mean look at project runway or any of those other fashion design shows. The designers FIRST have to draw their idea, then they have to recreate it in the 3D on a mannequin. They have to keep in mind colors, lines (the way the fabric lays), texture and many other elements of art. Fashion designers pull their inspiration from many places. One place they pull their inspiration from is nature. Think of all the animal prints or floral patterns on clothing you have seen before. For this project, you are a new and upcoming fashion designer. Go on a nature walk, look around, think of what you see, animals, plants, rocks, insects, etc. When you get home, pull out a piece of paper and draw the figure of a person. If you can, either print off the template of a person below or look at it and draw the figure on your paper. Now using what you saw in nature, create new clothing that features some elements of what you saw. Here are a few examples to get you going!
|
|
|
|
|
|
|
|
|
Week 4 of Digital Learning
Art-ing @ Home project #26
Let's make a sculpture from found objects around your house! What some people call junk, us artists like to call recycled material. For this project you will need stiff paper or cardboard, a hole puncher, scraps of aluminum foil, markers or watercolor paint, and scissors! We are going to be inspired by the artist Soo Sunny Park. She is a Korean American artist and grew up right here in Marietta, Georgia. She currently lives in New Hampshire and teaches at Dartmouth College. You can read about her work and see many pictures of it HERE. She does very interesting things with sculptures and light.
|
For this project watch the YouTube video below. The YouTube video includes information and a full walkthrough of the project. Have fun and don't forget to post your project to Artsonia or email it to me!
|
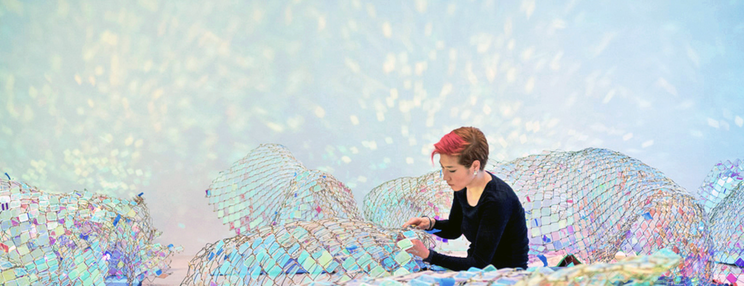
Soo Sunny Park working on one of her instillations |
Art-ing @ Home project #27
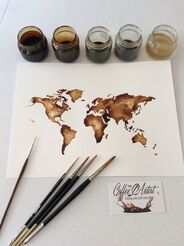
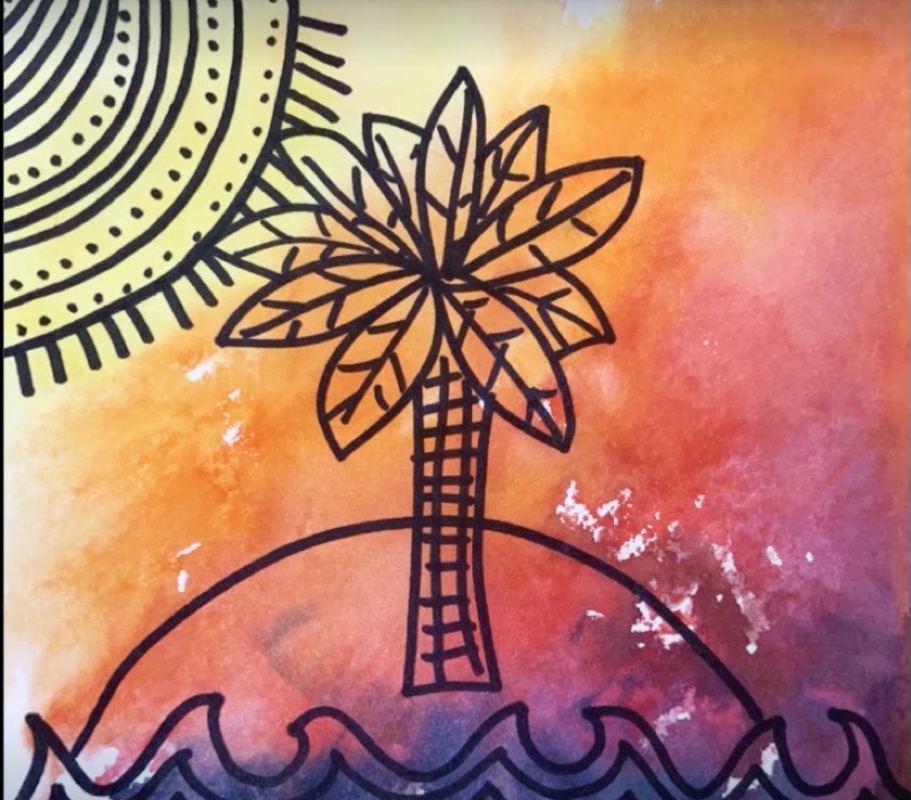
Ok for this project, I think everyone has these material somewhere in their home. I am challenging you to paint with either coffee or tea. What you will need to do is brew the coffee/tea very strong (ask your parents for help). Once it's brewed grab a few small containers. Pour small amounts of the coffee/tea in each container and add different amounts of water to all but one of them. This will give you, hopefully, a dark value, medium values, and lighter values. Now find a piece of paper (if you don't have paper ask your parents for the discarded envelope of some mail). On the paper sketch something very lightly that you like to draw. You can always keep it simple and draw some shapes. Now paint it with your coffee/tea mixes. Voila! Have fun and show me what you made on Artsonia! To the right you will find a short 8 minute YouTube video of how another artist painted with coffee.
|
|
Art-ing @ Home project #28
For this project, we are going to work on our ability to talk about art. Grab a sheet of paper or whatever you have on hand to write on. Tri-fold a piece of paper and label each of the three parts with: 1) SEE, 2) THINK, 3) WONDER. Visit the website link that has many examples of art from all over the world. Pick 1 piece of art in the “Animals” collection. www.rawpixel.com/category/53/public-domain?sort=trending&filter=animals&page=1
NOW with the 1 artwork you picked:
1- Look closely. What do you see? What elements of art and principles of design do you see in the picture?
2- What do you think? What do you think is going on? Do you like the piece? Why or why not. How does it make you feel?
3-What do you wonder? What does this make you wonder? What questions do you have?
Take notes on your tri-fold paper documenting what you SEE/ THINK/ WONDER about with the piece of art. Share your notes with a family member. Create your own work of art in the style of the artwork you analyzed. When you are finished go to Artsonia and share your See, Think, Wonder sheet.
|
Use this video to learn how to See, Think & Wonder about art
Being able to analyze artwork will help you in your daily life did you know that? When you are able to critically think and analyze artwork it will make you more perceptive. You will start to see things with a more critical eye and be able to make more inferences. |
|
Art-ing @ Home project #29
Today is simple. I want you to get a piece of paper or cardboard or discarded mail envelope and draw! I want you to draw whatever makes you happy! But I want you to draw it multiple times. Each time you draw it, I want you make some small adjustment or improvement to it. Have fun, be creative, and improve your drawing skills! As always, upload it to Artsonia so I can see it!
Art-ing @ Home project #30
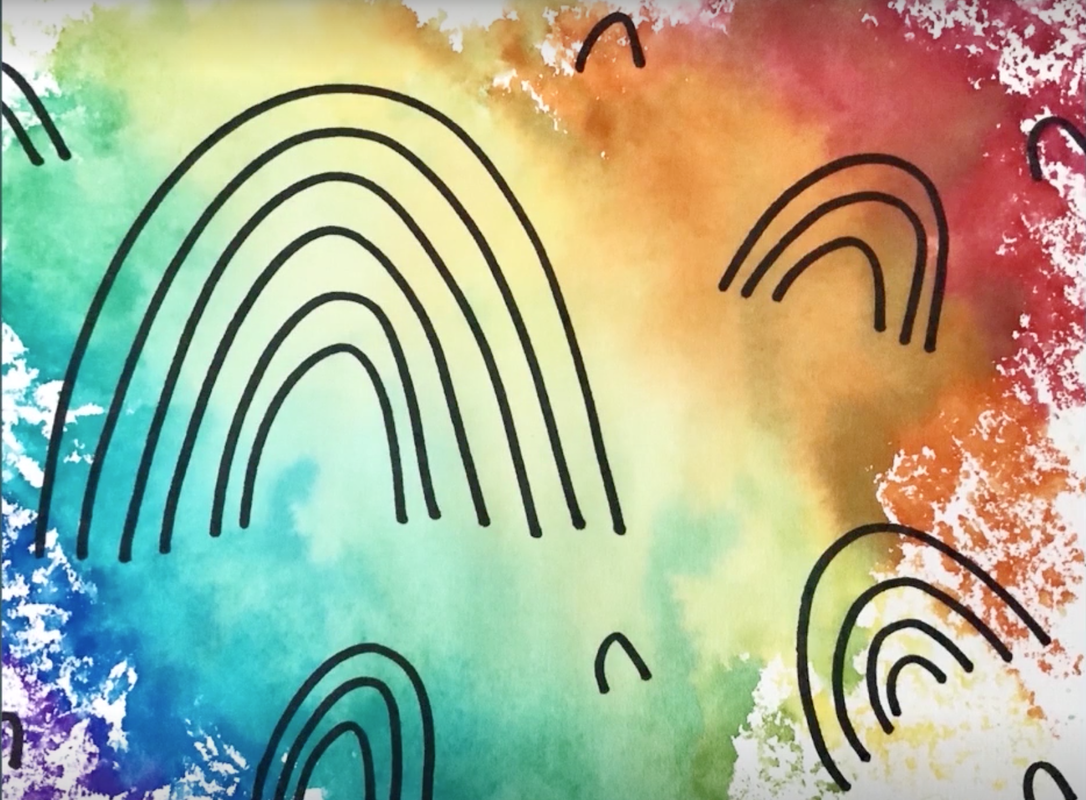
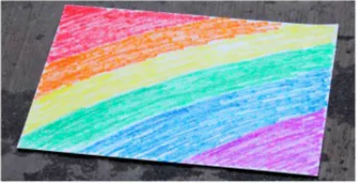
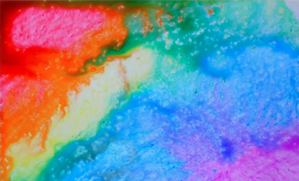
If you are reading this today, Thursday, it is raining right now. Bummer! So here is a rainy day art project idea. Using markers, color huge blocks of color on your paper. Like a rainbow the covers the whole paper. Make sure to leave no white showing! Now put your paper outside in the rain. When the rain stops, let your paper dry and voila! See what cool design you have after the rain! See the pictures below! As always, let me see what you have when your are finished. Either email me or upload it to Artsonia!
|
|
Art-ing @ Home project #31

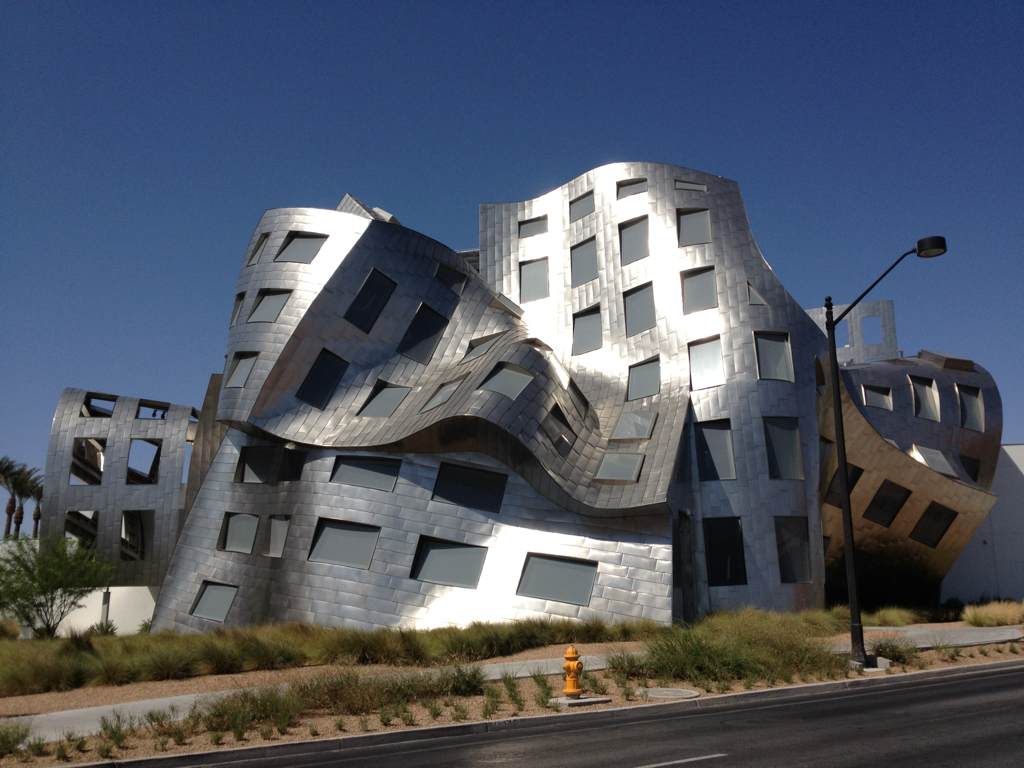
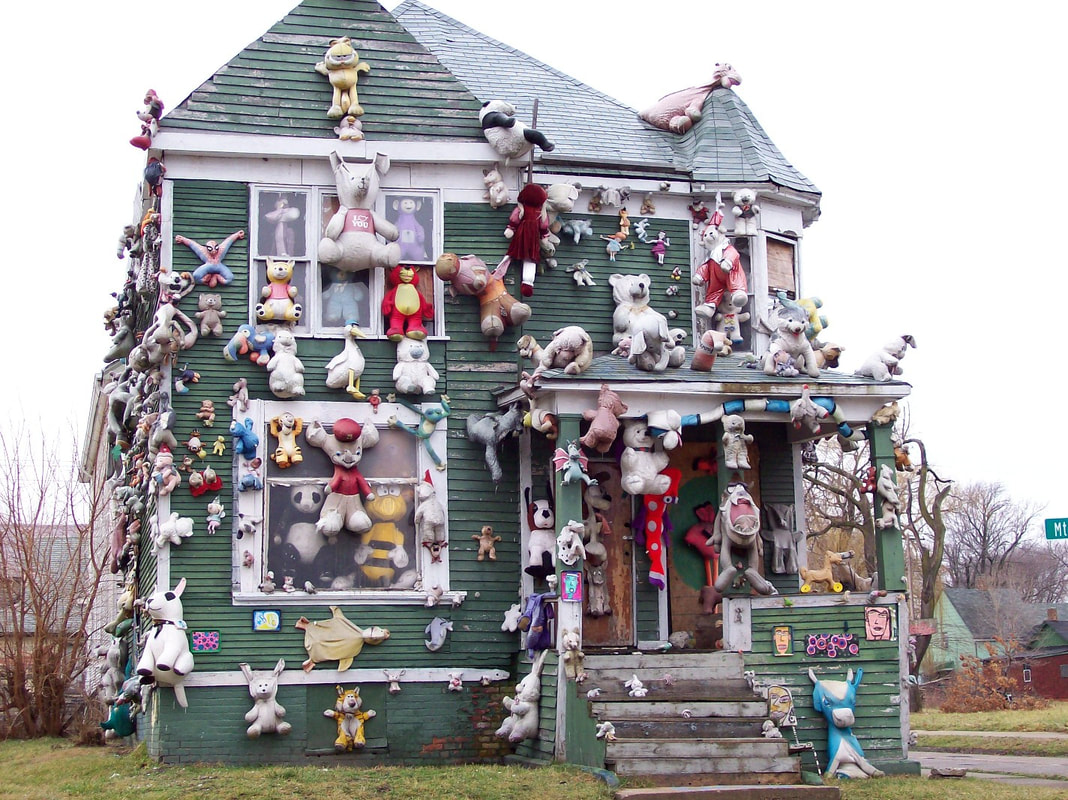
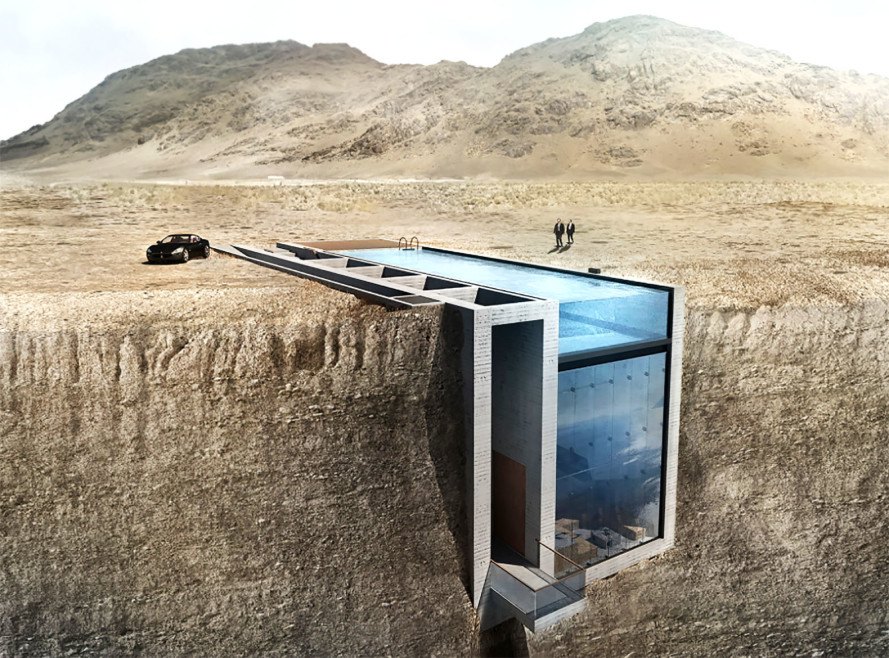
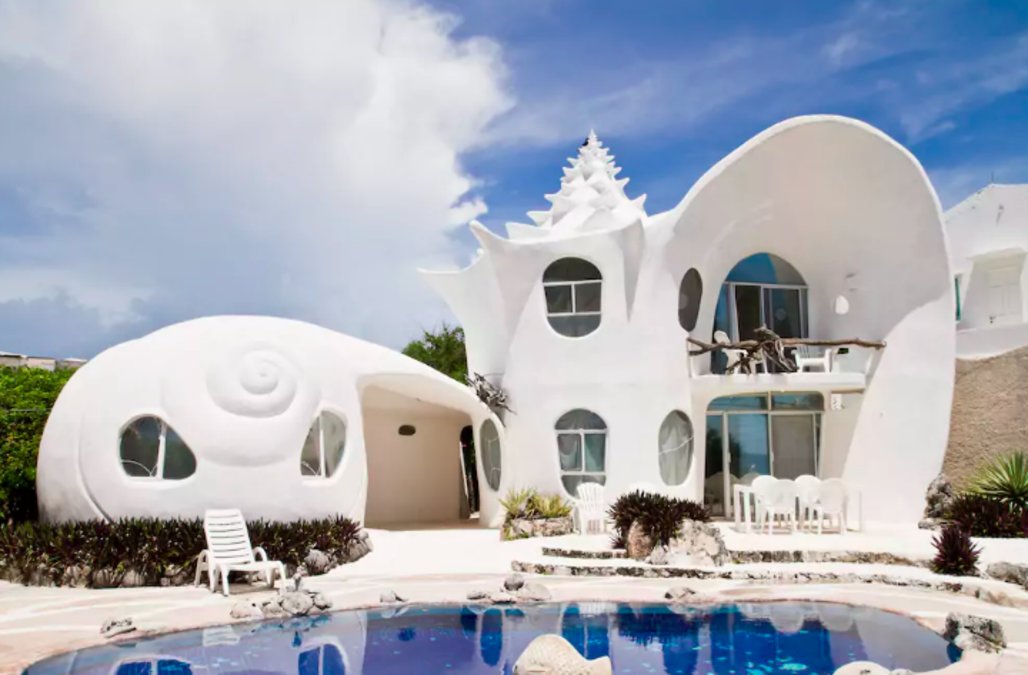
I am moving this week into a brand new home! Yay! We have been building it for 7 months now and the date has finally arrived. In light of this, for this project I want you to draw your dream home. The main features the house must include are door, windows, roof, and walls. Other than that, you have the artistic license to go crazy! Will it be a castle or tree house or house build entirely out of ice? Look at the images below of some really cool homes I have found. Don't forget to add color! This project I really want to see what you have created. If you can't upload it to Artsonia then just email it to me: [email protected]
Click on each picture to get a more detailed look at the house
|
|
|

|
|
