|
here is some art I just made for a friends birthday. I made it by drawing the image first then cutting it very delicately using an exacting blade. Then I created the watercolor background and carefully glued the cut image onto the background. I found the glueing step troublesome and challenging. I need to think of a better system for this step. 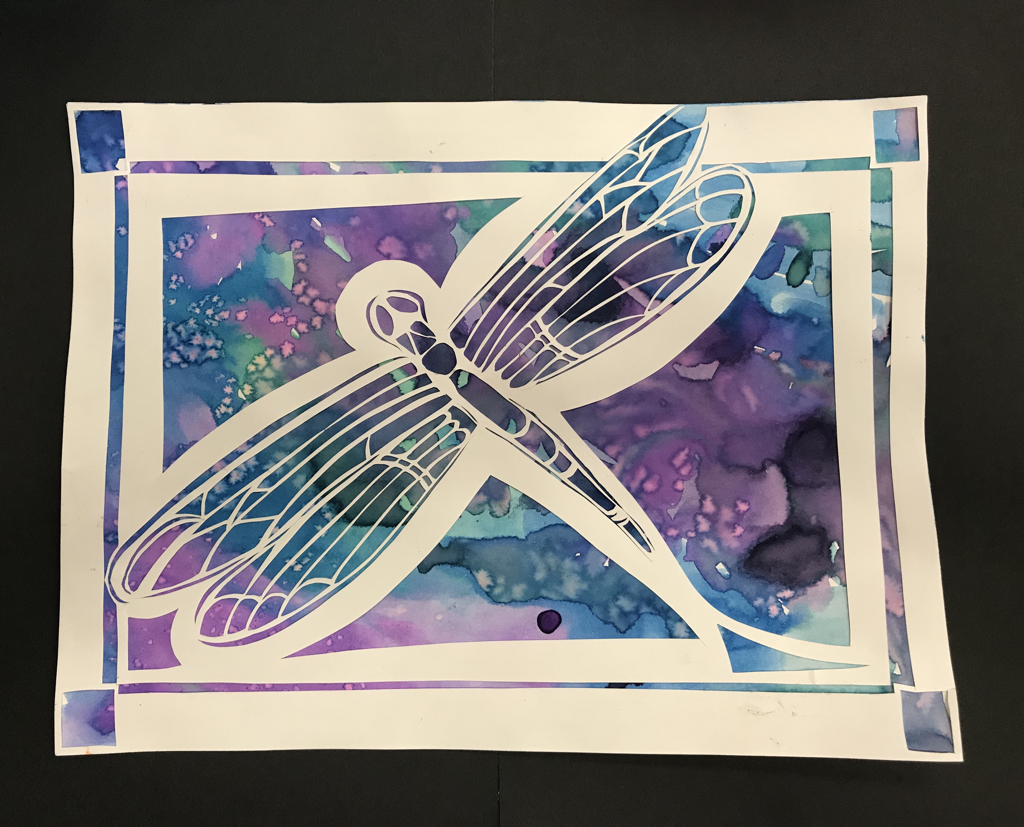
0 Comments
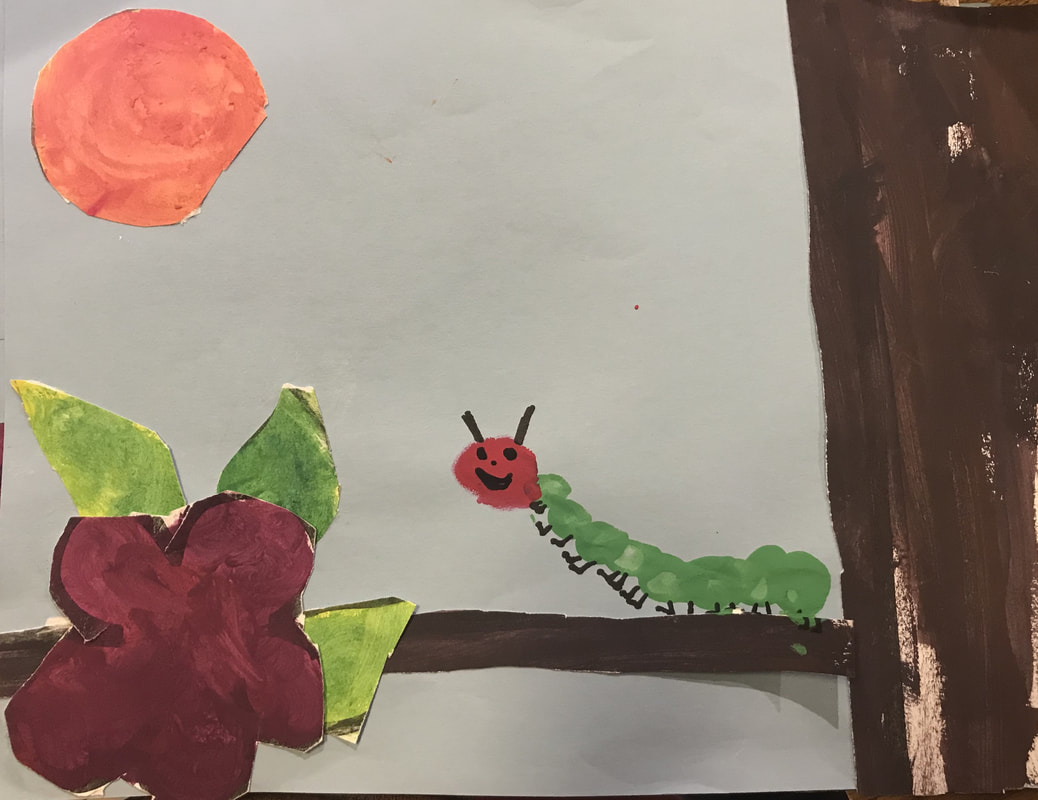
Did you know that the Egyptians believed in something called a Ka and the afterlife? That's right! Egyptians believed that when a person died, their Ka (or what we call a soul) lived on in the afterlife. They believed that the Ka would behave just as it did when the person was alive. The Ka would wake up and leave the body every morning, eat, play, then go back to sleep at night. The Egyptians believed that the Ka would need a way to know which body was its own and that was the purpose of the Death Mask. The Egyptians would mummify the bodies, then wrap them in linen, then over the head a Death Mask would be placed. The mask would resemble the person who had passed. The Kings and Queen's masks would be made out of precious materials and gemstones and the people who did not have as much money, the masks would be either painted wood or the face would be painted directly on the linen. This mask would help the Ka find its body. We also talked about some of Egyptian history. Egypt was divided into upper and lower Egypt. Upper Egypt was protected by the Vulture goddess Nekhbet and Lower Egypt was protected by the Cobra goddess Wadjet. We learned that the crowns would show either of these gods and based on the one we saw we would know which land the Pharaoh ruled over. We also talked about the False beard. We learned that only Pharaohs wore a false beard and if we looked at art and saw an Egyptian with a false beard they would always be the Pharaoh. WOW, BTW kids LOVED learning all this. EVERY class was hooked and I challenged them all to go to the library and read more books on the Egyptians. After we discussed this, we then learned how to draw a Death Mask. Then we talked about pattern and symmetry. We used pattern to draw the horizontal lines on the mask and made sure that our work was as symmetrical as possible. We used oil pastels to color with and finally gold paint. The last step is not depicted but we will cut these out and mount onto black paper and used glue and glitter to draw hieroglyphs of our initials. WHEH! This is a new project for me and was inspired by a fellow art teacher whom I love dearly, Maureen Armstrong at Mountain View Elementary school. What we did was look at different cultures and discuss the origins of language and communication. We talked about how symbols only hold meaning when placed in context of the culture they belong to. Then we viewed a few examples and talked about them. Then students went back to their tables and read through several different cultures that I was able to find symbols of and selected two cultures and symbols that spoke to them. Students drew these symbols on a small square then learned how to use tracing paper to make a transfer to a much larger square so that the resulting image is symmetrical. Then I taped the traced drawing to copper, students chose either the copper or the silver side, and students used wooden and plastic dowels to create the impression on the copper. This process of creating a raised relief on metal is called Repousse. The final step is to paint india ink over the entire surface then we polish it off so it only falls in the lines, this is called a Patina (brownish sheen polished on metal). The final step is for students to write their artist statement. I loved this project! It was fun for the kids to read about different cultures and I haven't had a single student feel lost or as though they cannot do this. Every student so far has loved their end result and it has created lots of smiles! 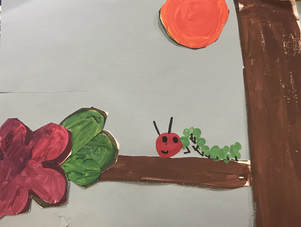 I do this project every year with Kindergarten, it is one of my favorites! It covers so much! First we read the book "The very hungry caterpillar" by Eric Carle. We talk about the elements of the story and identify characters and setting. Then we discuss colors and the primary colors. Students learn that the primary colors make all other colors of the rainbow. Students get the primary colors and a sheet with a sun, leaves, flower, tree branch, and tree trunk on it. Students learn to mix their primary colors to paint the sun orange, leaves green, and flower purple. Then we talk about how the tree trunk and branch need to be brown. But WAIT! We don't have brown! We mix all the primary colors up to create brown. The kids LOVE LOVE LOVE this part. There are many ooooos and awwwwws. After we paint, we cut everything out and glue it down to blue paper. Then we talk about printmaking and use our fingers and green and red to create our caterpillar. The final step of this project is to give our caterpillar legs and a face. The kids all really love this project and I really look forward to it each year. Fourth grade is working on figure drawing. Wow figure drawing! We looked at the human body and how to break it down into a series of shapes in proportion. I held a series of three different poses for the students to draw me using these basic shapes to give them a better idea of figure drawing. Then students took what they learned and went back to their tables. Their task was to create a self portrait of themselves as a super hero. I told them to team up and pose their partner in the hero pose they liked so they could draw the figure more accurately. Afterwards they will 'build' the costume/disguise on top of the figure. This was quite a challenge but students really seemed to enjoy themselves!
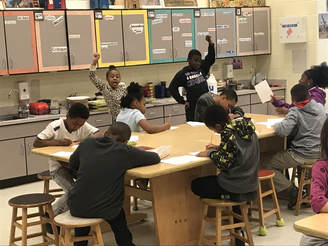
This lesson I do every year to celebrate black history month and it makes a fantastic arts integration project. We discuss the art of Faith Ringgold then create our very own story quilts. We learn how to make a pattern around our border then discuss the qualities of a good story. We talk about how great stories have lots and lots of details and supporting information. We discuss how artists don't write down their details, instead, we draw our details. Using lots of details in your drawings not only makes them more interesting but also helps the viewer understand your art and what it means. Check out the work of these amazing artists! You can find the lesson here! |
Mrs. ThompsonWelcome to the Big Shanty Intermediate art room! I hope you enjoy seeing what we are doing! Archives
May 2020
Categories
All
|


 RSS Feed
